
To make scented soy candles at home, start by melting high-quality soy wax slowly, keeping an eye on the temperature. Secure your wicks in clean jars and pour the wax when it cools slightly, adding fragrance oils at the right temperature for ideal scent. Allow your candles to cool, trim the wicks, and cure for a couple of weeks for the best throw. Keep exploring for tips on perfecting your candle craft and achieving professional results.
Key Takeaways
- Use high-quality soy wax, preheat jars, and securely center wicks with glue or stickers for a professional finish.
- Melt wax slowly to 180-185°F, then cool to 140-145°F before adding fragrance oils for optimal scent dispersion.
- Pour wax into containers at 130-155°F, leaving space for second pours, and smooth the surface with a heat gun if needed.
- Add approximately 1.5 oz of fragrance oil per 2 cups of wax, mixing thoroughly, and cure candles for at least two weeks for best scent throw.
- Re-melt leftover wax for re-pouring, reheat carefully, and ensure proper cooling and curing to enhance scent longevity and candle quality.

iGarden Robotic Pool Cleaner K Series, Cordless Pool Vacuum Robot for Inground & Above Ground Pools, Smart Navigation, Touchscreen, Self-Parking, Cleans Floor, Wall & Waterline, 150 Min
Robust Cleaning Capability: Engineered with a turbine-grade impeller, an optimized flow system, and 3 brushless motors, the cordless...
As an affiliate, we earn on qualifying purchases.
Gathering Your Materials and Tools

To make scented soy candles at home, start by gathering all the necessary materials and tools. First, get high-quality soy wax flakes like soy wax 464, which melts evenly and burns cleanly. Choose the right candle jars, such as 8-ounce glass containers, and clean or preheat them to ensure good adhesion.
You’ll also need natural or fragrance-infused soy wax melts—about 9 cups for six candles—so you have enough for your project. Don’t forget essential oils or candle-specific fragrance oils; around 50 drops per candle will give a pleasant scent.
To complete your setup, gather tools like a double boiler or microwave-safe measuring cup, cotton wicks, strong glue, and wick-centering devices. Having everything ready will make the process smooth and enjoyable.

(2026 Upgrade) WYBOT C1 Cordless Robotic Pool Vacuum for Inground Pools, Above Ground Pool Cleaner 4-in-1 Wall & Waterline Cleaning Up to 1,614sq.ft, 150mins Smart Navigation, App Support
Powerful Suction with Dual Brushes: Built with an upgraded independent water pump motor delivering up to 3,038 GPH...
As an affiliate, we earn on qualifying purchases.
Melting Soy Wax Safely and Effectively
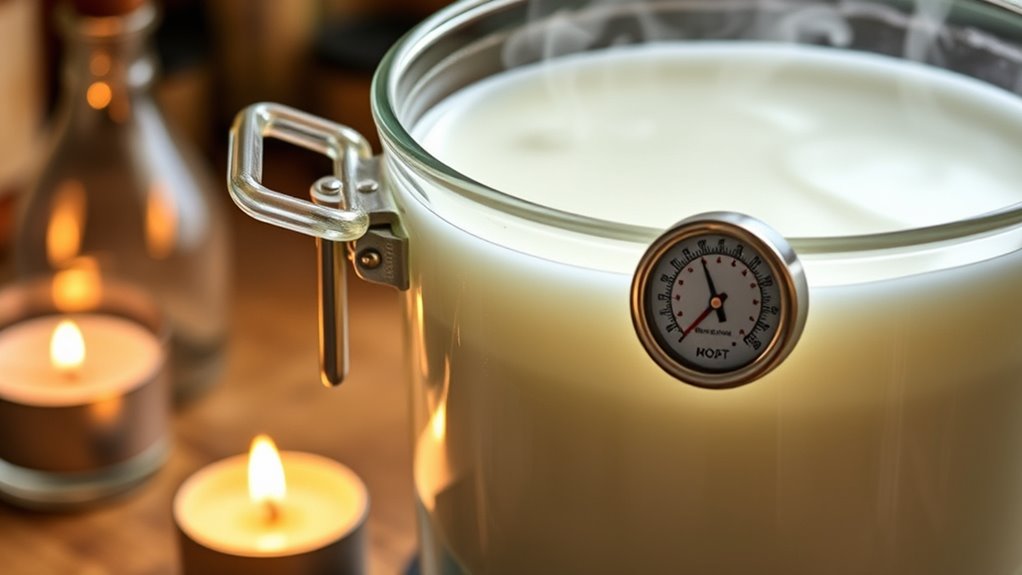
When melting soy wax, it’s vital to do so safely and effectively to guarantee a smooth candle-making process. Use a double boiler or microwave-safe container to melt the wax slowly, preventing overheating or burns. Keep a digital thermometer handy to monitor the temperature, aiming for 180-185°F for ideal melting and scent incorporation. Stir the soy wax frequently during melting to promote even heat distribution and avoid clumps. Never melt soy wax directly over an open flame; always use a water bath or microwave to reduce fire hazards. Once melted, let the wax cool to around 140-145°F before adding fragrance oils or pouring into containers. Proper temperature control guarantees your candles will have a perfect finish and pleasant scent throw. Additionally, staying aware of AI vulnerabilities in safety measures can help you incorporate smarter practices in your candle-making process. Understanding soy wax properties can further enhance your candle quality and safety. Being familiar with melting techniques ensures consistent results and reduces waste during the process. Using a quality thermometer can improve your control over the melting process and achieve better results. Incorporating knowledge of candle safety precautions can help prevent accidents and ensure a safe crafting environment.

WYBOT C1 Cordless Robotic Pool Vacuum for Inground Pools, Above Ground Pool Cleaner 4-in-1 Wall & Waterline Cleaning Up to 1,614sq.ft, 150mins Smart Navigation, App Support
Powerful Suction with Dual Brushes: Built with an upgraded independent water pump motor delivering up to 3,038 GPH...
As an affiliate, we earn on qualifying purchases.
Preparing and Securing Your Candle Containers
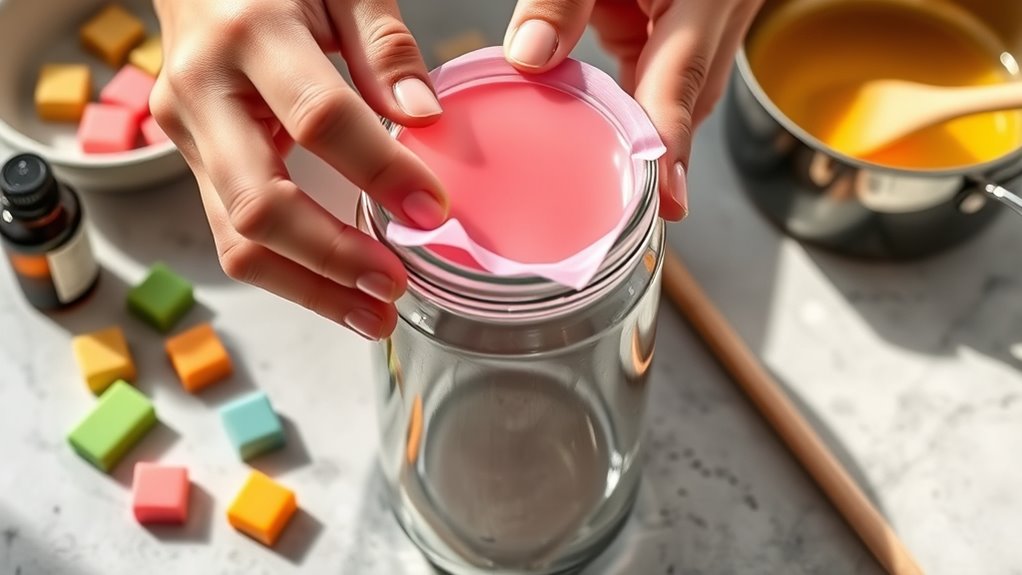
Preheating your candle containers in the oven at 170°F for about 10-15 minutes helps improve wax adhesion and reduces the risk of cracking. Before pouring, secure the wick by applying a small dab of hot glue to the metal base or using a wick sticker to keep it centered and upright. Attaching the wick beforehand ensures it stays in place during pouring and setting. Use a wick centering device or a wick sticker to maintain proper alignment, which is essential for an even burn.
| Securing Method | Benefits |
|---|---|
| Hot Glue | Strong hold, quick drying |
| Wick Sticker | Easy to reposition, clean application |
| Metal Base Adhesive | Secure, durable connection |
| Centering Device | Precise wick positioning during pouring |

iGarden Robotic Pool Cleaner K Series, Cordless Pool Vacuum Robot for Inground & Above Ground Pools, Smart Navigation, Touchscreen, Self-Parking, Cleans Floor, Wall & Waterline, 220 Min
Robust Cleaning Capability: Engineered with a turbine-grade impeller, an optimized flow system, and 3 brushless motors, the cordless...
As an affiliate, we earn on qualifying purchases.
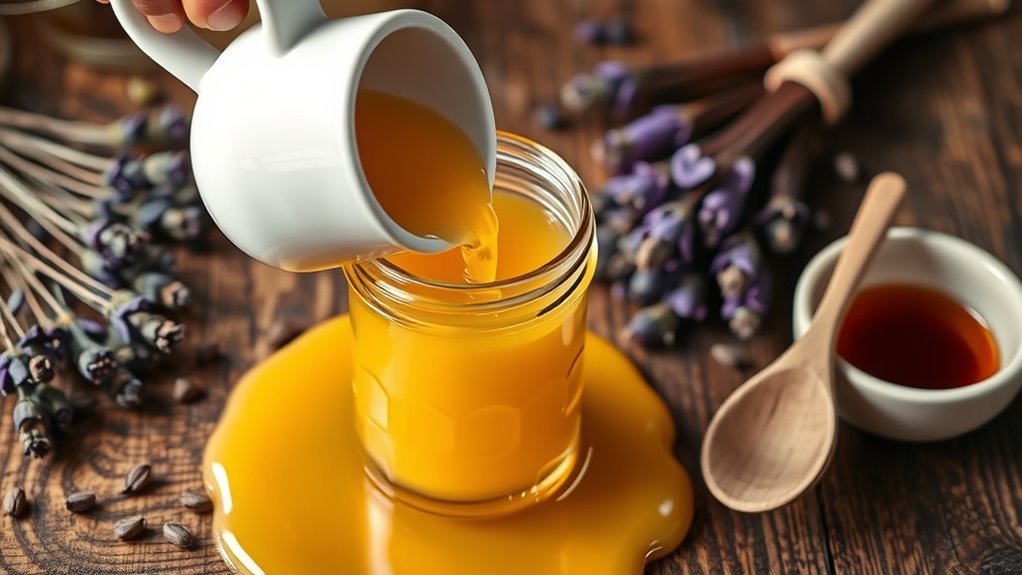
Adding Fragrance Oils and Achieving the Perfect Blend

Adding fragrance oils at the right temperature is essential for maximizing scent throw and preventing evaporation. Heat your melted soy wax to between 175°F and 185°F before adding the fragrance oil. This temperature range helps guarantee the oil disperses evenly and maintains its potency.
Use about 1.5 oz of fragrance oil per 2 cups of wax for a strong, balanced scent. Mix the fragrance oil thoroughly into the wax for at least 1.5 to 2 minutes to create a uniform blend.
Experiment with blending different fragrance oils to develop unique scent profiles, such as orange with peppercorn or rosemary with sage. Testing various scent load levels and ratios allows you to find the perfect balance that delivers a desirable scent throw and aromatic experience.
Pouring the Wax and Managing Surface Imperfections

Pour the melted soy wax into your candle jar when it’s between 130°F and 155°F to help prevent surface imperfections and guarantee a smooth finish. This temperature range allows the wax to settle evenly and reduces the chance of sinkholes or uneven surfaces. Leave about ¼-inch space at the top of the jar to accommodate a second pour if needed. If surface imperfections like sinkholes appear after cooling, reheat leftover wax and pour a second layer to fill and smooth these areas. You can also use a heat gun carefully to melt and level the top surface for a flawless look. Managing surface imperfections with these techniques ensures your candle has a professional, polished appearance. Using the right wax temperature and proper techniques can significantly improve your candle’s final finish. Additionally, paying attention to cooling and curing times can help achieve a more uniform surface. Proper temperature control during pouring is essential for a high-quality finish, especially considering how wax types can influence the final appearance of your candles.
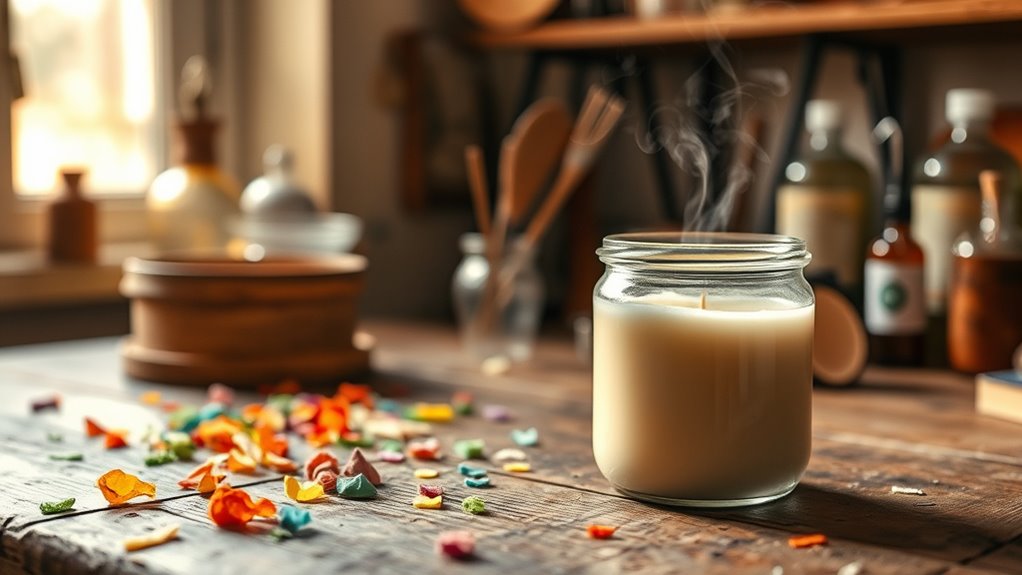
Cooling, Trimming, and Curing Your Candles

Once your candle has cooled completely, usually after 1-2 hours, it’s time to trim the wick to about 1/2 inch for a cleaner burn. Proper curing for at least two weeks enhances the scent throw and overall performance. Storing your candles in a cool, dark place during curing helps develop their fragrance and prolongs their life. Incorporating vertical storage solutions into your candle storage can help keep your workspace organized and prevent clutter. For a truly authentic farmhouse feel, consider incorporating natural materials into your candle packaging or labels to complement your homemade scents. Additionally, understanding best modern toilet options can inspire innovative techniques and unique packaging ideas by exploring diverse cultural aesthetics.
Proper Cooling Techniques
After your candles have cooled at room temperature for 1-2 hours, it’s important to handle them carefully to prevent surface imperfections and cracking. During the cooling process, avoid moving or disturbing the candles, as uneven cooling can lead to cracks or surface flaws. If you notice any sinkholes or uneven surfaces, perform a second pour of melted wax once the initial layer has hardened. This helps create a smooth, even surface and reduces imperfections. Keep the candles in a stable environment, free from drafts or temperature fluctuations, to promote proper cooling. Additionally, understanding data privacy challenges such as algorithmic complexity and regulatory issues can help you better control the quality of your candles and ensure consistent results. Once fully cooled, trim the wick to 1/4 inch before use. Proper cooling techniques, including cooling, trimming, and curing, ensure your candles remain flawless and ready for curing and enjoyment. Incorporating remote hackathons or virtual events can inspire innovative candle designs or packaging ideas by connecting with creative communities worldwide. Additionally, understanding candle quality factors, including wax type and pouring temperature, can further enhance your candle-making process.
Optimal Curing Duration
Allow your candles to cool and harden completely for at least 1-2 hours before handling or trimming the wick. Once cooled, trim the wick to about 1/4 inch to promote a clean burn and reduce soot. For ideal scent throw and performance, it’s essential to let your candles cure undisturbed for at least two weeks. During this curing time, the fragrance oils fully bond with the soy wax, resulting in a stronger, more consistent smell when burned. Proper curing enhances the candle’s aroma and ensures the fragrance is evenly distributed. Additionally, data analysis by AI can help identify the optimal curing duration based on specific wax and fragrance combinations. This step is crucial because indoor air quality can impact the longevity and effectiveness of the fragrance. Keep in mind that patience pays off—rushing this step can weaken the candle’s scent throw and overall quality. Allowing sufficient curing time guarantees a more satisfying and long-lasting scented candle experience. Curing process is crucial for maximizing fragrance performance and ensuring your candles burn safely and beautifully, especially when using aroma oils to enhance the scent.
Recycling Leftover Wax and Maintaining Candle Quality
You can easily reuse leftover soy wax by melting it down and pouring it into new molds, which helps cut waste and extend your supplies. Performing a second pour after the candle cools creates a smooth, professional-looking finish. Remember to let your candles cure for at least two weeks to boost scent throw and overall quality. Ensure proper storage conditions to maintain candle quality and prevent wax degradation over time.
Reusing Wax Remnants Efficiently
Reusing leftover soy wax is an effective way to maximize your resources and minimize waste. Store cooled wax remnants in a sealed container to keep them fresh and prevent contamination. When you’re ready to re-melt, heat the wax at 180-190°F, making sure to control the temperature for a smooth finish. Re-melting allows you to create new candles or wax melts, saving money and materials. Keep in mind that proper storage and handling maintain wax quality over time.
Here’s a quick guide:
| Step | Tip | Purpose |
|---|---|---|
| Store wax | Use airtight containers | Prevent contamination |
| Re-melt wax | Heat carefully to 180-190°F | Achieve smooth finish |
| Reuse remnants | Pour into new molds or jars | Maximize resources |
Second Pour for Smooth Finish
Performing a second pour with leftover wax is an effective way to achieve a sleek, professional-looking candle. After the first layer cools for 1-2 hours, reheating soy wax melts to about 130-140°F ensures ideal flow for the second pour.
This step helps fill sinkholes and smooth surface imperfections for a polished finish. To enhance the surface further, use a heat gun or hairdryer to carefully eliminate bubbles and uneven spots.
- Reheat leftover soy wax melts just enough for pouring
- Pour slowly to prevent air pockets
- Allow each layer to set before the next pour
- Use a heat gun to smooth the surface after pouring
- Cure the candle for at least 2 weeks for ideal scent throw
Curing Enhances Scent Throw
Allowing your soy candles to cure for at least two weeks considerably boosts their scent throw by giving fragrance oils time to fully meld with the wax. Proper curing enhances the overall fragrance strength and guarantees a more consistent scent experience.
During this period, store your candles in a cool, dark place to prevent scent loss and improve performance over time.
Recycling leftover wax into new candles or melts is an excellent way to maintain scent quality and utilize residual fragrance. Reheating and reusing wax helps preserve fragrance integrity, resulting in stronger, longer-lasting scents.
Consistent curing combined with careful recycling of wax ensures your soy candles deliver ideal scent throw and high-quality performance every time you light them.
Frequently Asked Questions
How Do You Add Scent to Soy Wax Candles?
When adding scent to soy wax candles, you should wait until the wax cools to about 175-185°F.
Then, pour in approximately 50 drops of fragrance oil or 6-10% of the wax weight.
Stir thoroughly for 1-2 minutes to guarantee even distribution.
Avoid adding fragrance at too high temperatures, as it can cause evaporation and weaken the scent.
Always perform a test burn to get your desired scent strength.
How to Get a Strong Scent Throw in Soy Candles?
To get a strong scent throw in soy candles, you should use high-quality fragrance oils specifically made for candles.
Add the scent at the right temperature, around 175-185°F, and keep the fragrance load between 6-10% of the wax weight.
Make sure to pour at the ideal melting temperature, then let your candles cure for at least two weeks.
Proper temperature control and curing really boost the fragrance’s strength and performance.
What Are 3-4 Mistakes to Watch for When Making Soy Candles?
When making soy candles, a few common pitfalls can trip you up. First, overloading fragrance oil can cause the wax to seize and burn unevenly.
Second, pouring at the wrong temperature might lead to surface imperfections or sinkholes.
Third, not securing the wick properly or placing it off-center results in tunneling.
Finally, skipping the curing time lessens the scent throw and affects the candle’s overall burn quality.
What Are the Negatives for Using Soy Wax to Make Candles?
Using soy wax for candles has some downsides. You might notice uneven burning or sinkholes if you don’t pour it at the right temperature.
It can emit soot and allergens if fragrance oils aren’t used carefully.
Some soy waxes contain genetically modified soybeans, which concerns certain consumers.
Additionally, improperly cured candles can develop frosting or surface bloom, affecting their look and quality.
Be aware of these issues to guarantee a better candle-making experience.
Conclusion
Now that you know how to craft scented soy candles at home, you’re like a wizard lighting up your space with warm, inviting aromas. With patience and practice, each candle becomes a little masterpiece, filling your home with cozy magic. So, roll up your sleeves, enjoy the creative process, and let your candles shine as bright as your imagination. After all, a well-made candle is like a hug in a jar—warm, comforting, and uniquely yours.