
To create aged terracotta pots, start by selecting plain, unglazed pots for the best weathered look. Apply a lime wash or thick coats of paint to build texture, then gently sand to reveal patches of terracotta. You can add natural effects like moss or algae using yogurt and water, and highlight edges with dry brushing. Sealing your work will help maintain the rustic charm. With these techniques, you’ll discover how to transform simple pots into vintage masterpieces.
Key Takeaways
- Use unglazed, porous terra cotta pots and prepare a clean workspace to ensure proper adhesion and safety.
- Apply layered techniques like lime wash, yogurt aging, and dry brushing to create natural weathered textures.
- Soak new pots in water, then coat with yogurt and keep in a moist environment for about a month to develop a greenish patina.
- Incorporate subtle greens, browns, and blacks with paint or sponges to mimic moss, algae, and organic aging effects.
- Seal the finished pot with outdoor-grade sealers and reapply annually to preserve the aged appearance.

PolarcoForgeco Self Watering Tall Black Planters Outdoor Set of 2, 24” Flower Pots Planters for Outdoor Plants, Modern Plastic Tall Planter for Front Porch, with Drainage Hole (Ribbed)
SELF WATERING SYSTEM: Our tall planter's innovative self-watering design uses a cotton rope to draw water directly from...
As an affiliate, we earn on qualifying purchases.
Selecting the Right Pots and Materials
When selecting pots for aging projects, it’s best to choose plain, unglazed terra cotta with a porous surface, as this allows the treatments to absorb evenly. Unglazed terra cotta offers excellent porosity, making it ideal for applying aging treatments like paints, washes, or natural methods. Using a variety of investment assets can enhance your overall project results and durability. Avoid glazed or painted pots because their smooth, sealed surface can hinder adhesion and prevent authentic aging effects. Standard 6-inch or larger pots are perfect for textured finishes and multiple techniques. You don’t need to spend a lot—pots from stores like the 99¢ Store or Home Depot work well for experimentation. If you plan to use natural aging methods, opt for new, clean pots to ensure consistent results. Proper financial management ensures you can sustainably invest in quality materials for your project. Additionally, selecting pots with a consistent and porous surface supports more predictable and even aging outcomes, aligning with best practices in AI in Education that emphasize precision and adaptability. Choosing the right materials sets a solid foundation for your project’s success.

YNNICO 12 inch Large Self Watering Plant Pots, Flower Pots Planters with Multi Mesh Drainage Holes for Indoor Outdoor Garden Plants and Flowers
[EXCELLENT DRAINAGE HOLES] -Mesh drainage holes and deep planting space promotes root growth to keep plants healthy. It...
As an affiliate, we earn on qualifying purchases.
Preparing Your Workspace for Aging Projects
To achieve the best results in your aging projects, start by setting up a clean, well-ventilated workspace, ideally outdoors. A good workspace allows you to work efficiently and safely, especially when applying sealers or paints. Incorporating sound vibrations into your project process can also promote relaxation and focus during your creative work. Protect surfaces by laying down newspapers, plastic sheeting, or drop cloths to prevent spills and splatters from damaging furniture or flooring. Gather all your tools and supplies—brushes, paints, sealers, and water—before you begin to keep your workflow smooth. Wear gloves and a mask if you’re working with spray paints or sealers to shield yourself from fumes and skin contact. Clear the area of clutter, and ensure you have enough lighting to see details clearly. A well-prepared workspace sets the foundation for successful aging projects. Additionally, understanding the role of contrast ratio in projectors can help you create an ideal environment for viewing your finished pieces under optimal lighting conditions. Incorporating proper lighting techniques can further enhance visibility and detail during your work. Being aware of essential oils for respiratory health can also be beneficial if you’re working in a space that requires good air quality and ventilation.

GarveeLife 22.5 in Tall Planters Set of 2, Outdoor&Indoor Black Planter Pots, High Front Porch Planter Pots with Drainage Holes&Water Level Monitor&Inner Bucket, Automatic Watering, Black
Water Level Monitor: This set includes two 22.5 in elegant planters designed for outdoor plants with two water...
As an affiliate, we earn on qualifying purchases.
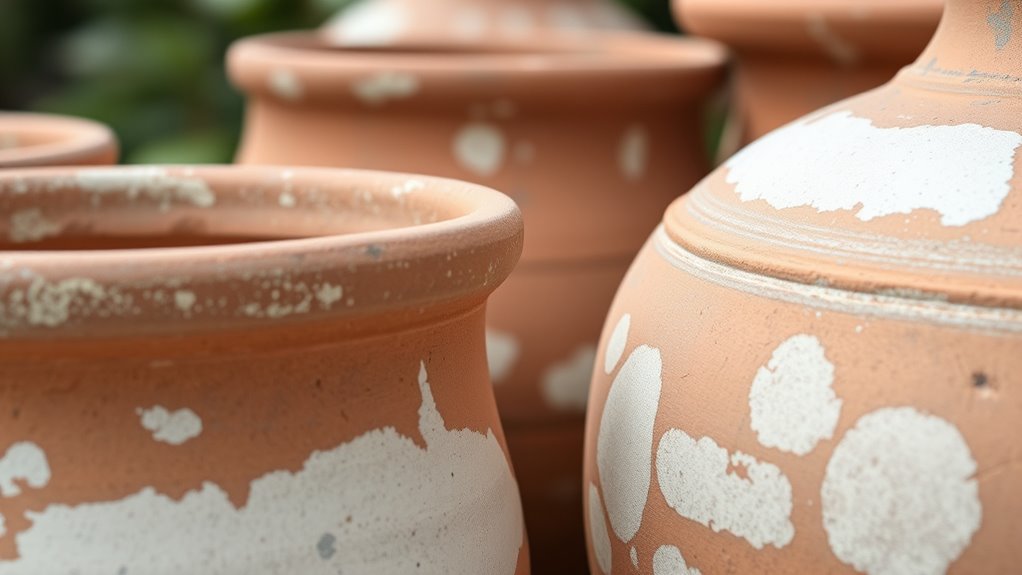
Applying a Lime Wash for Rustic Charm

Applying a lime wash to your terracotta pots instantly adds rustic charm and a weathered, vintage look. To achieve this, mix Espoma organic garden lime with water until you have a thick, brushable slurry. Using a sponge brush, apply multiple coats, building texture and enhancing the aged appearance. Allow each layer to dry quickly; thicker coats will take longer and deepen the weathered effect. Lightly sand the dried lime wash with 150 grit sandpaper to reveal patches of the original terra cotta, adding character and authenticity. Regularly inspecting your process ensures consistent results and mitigates potential security vulnerabilities in your project. Incorporating a weathered finish can further enhance the rustic appeal of your pots. You can also experiment with color variations to create a more authentic aged look. Exploring different application techniques can help you achieve a more natural and aged effect. Finish with a matte sealer spray to lock in the aged look and protect the surface. Visualize your pots with: – A textured, uneven surface – Subtle color variations – Patches of exposed terra cotta – A matte, weathered finish – Rustic charm that mimics years of outdoor exposure

YNNICO Indoor Self Watering Planters with Drainage Holes and Saucers, 8, 7, 6.5, 6, 5.5, 5 Inches, Black, 6 Pots
【Practical Size Combo】-These plastic planters indoor combines with 6 different sizes, 8 inch 7inch 6.5 inch 6 inch...
As an affiliate, we earn on qualifying purchases.
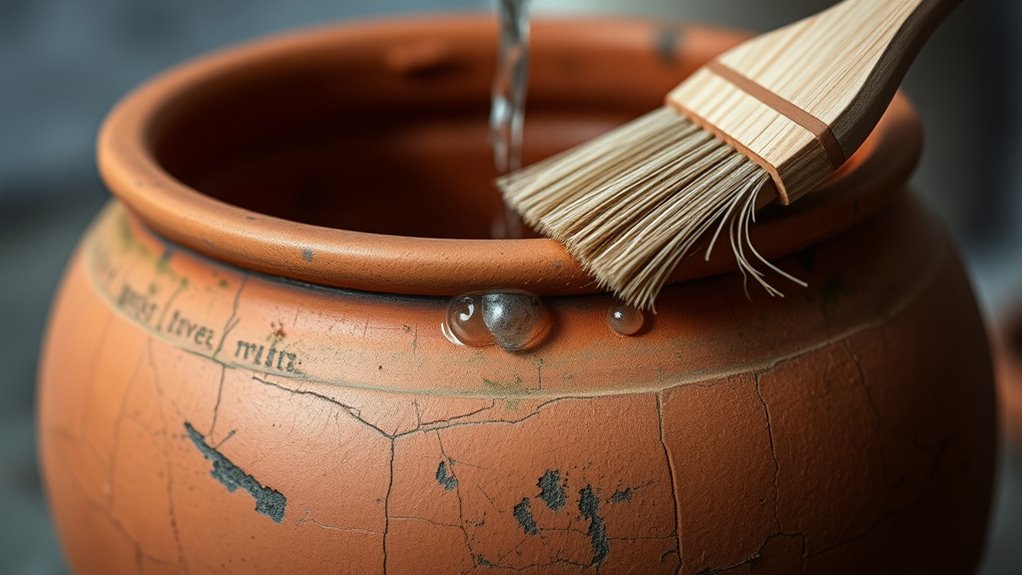
Using Yogurt to Create Natural Patinas
Ever wondered how to create a naturally aged look on your terracotta pots without harsh chemicals? You can achieve this by using yogurt to develop an authentic patina.
Start by soaking your dry, new terracotta pot in water for 15 minutes to open its pores. Then, spread about a cup of plain, unsweetened yogurt unevenly over the surface with a sponge brush. Proper surface preparation ensures better adhesion and more authentic aging effects. Using the right application technique can significantly influence the final appearance. Additionally, the growth of a greenish patina is encouraged by the yogurt, giving the pot a truly weathered look.
Keep the coated pot in a cool, moist environment for roughly a month, avoiding indoor storage to prevent odors. Over time, the yogurt encourages the growth of a greenish patina, enhancing the weathered, aged appearance of the terracotta.
After this period, your pot will have a long-lasting, natural aged patina that withstands outdoor conditions for years, giving your garden a charming, rustic touch.
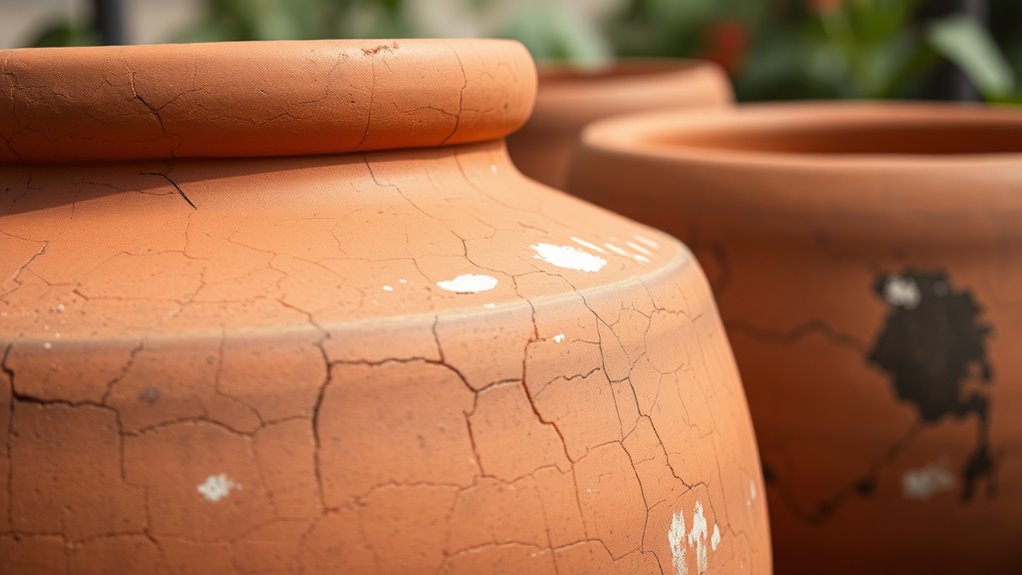
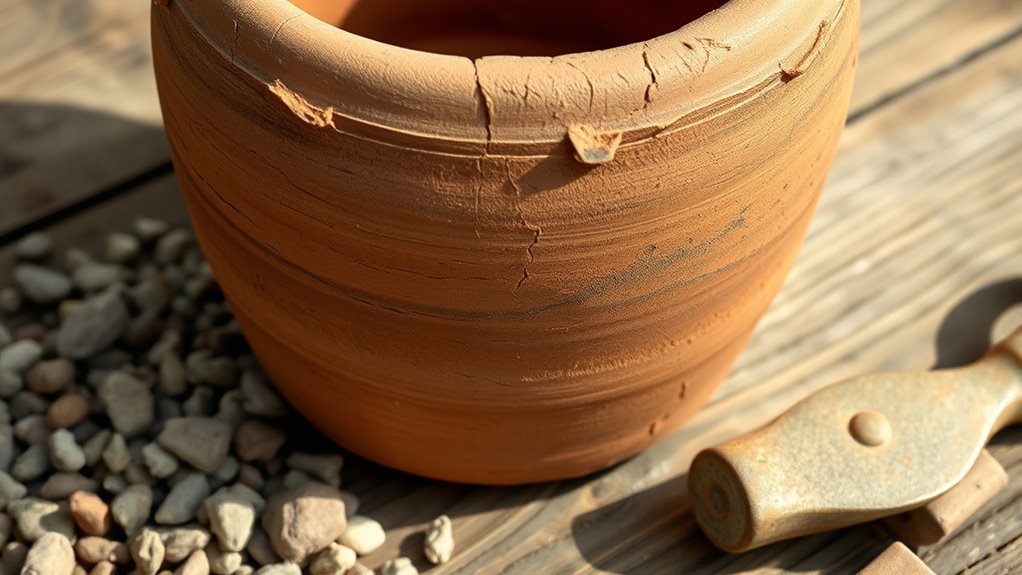
Enhancing Texture With Sanding and Sealing
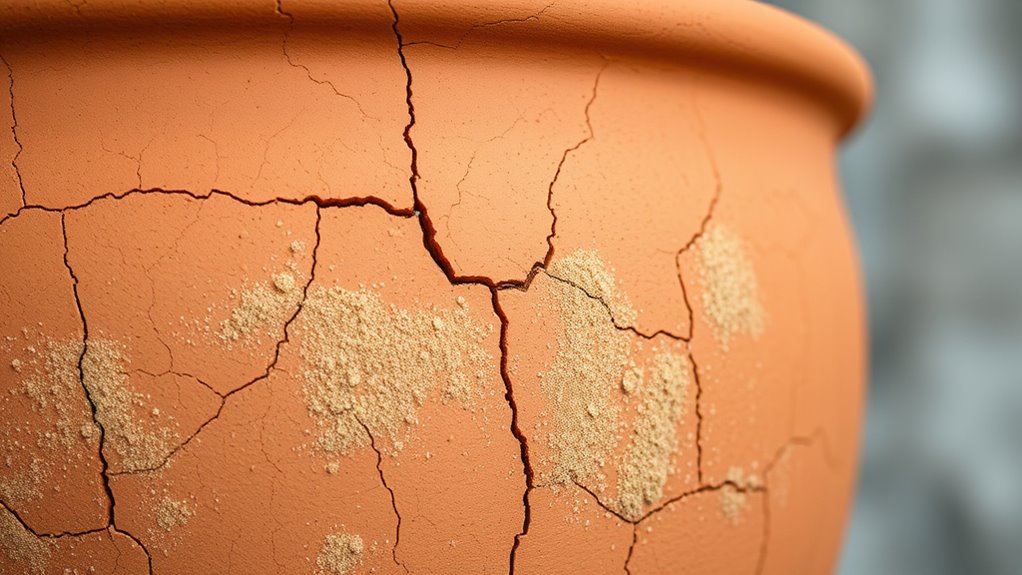
Enhancing the texture of your aged terracotta pots involves carefully sanding their surfaces to emphasize their weathered look. Use a 150 grit sanding block after applying lime or paint to create a distressed, aged texture by revealing patches of the terracotta beneath.
Focus light sanding on edges and ridges to mimic natural wear and deepen the rustic appeal. Once satisfied, apply a matte sealer over the surface to lock in the aged appearance and protect against further weathering.
For added depth, apply multiple coats of sealer, lightly sanding between each layer. Careful sanding after sealing can highlight areas where the original terracotta shows through, giving your pots an authentic, character-filled finish.
This process creates beautifully textured, authentic-looking aged pots.
Painting for Depth and Character

To add depth and character to your aged terracotta pots, start by applying multiple thin layers of paint with a sponge or dry brush, creating a weathered look. Use uneven, sporadic strokes and blend with a damp cloth to mimic natural aging and emphasize textured ridges. Darker shades in crevices and highlights with dry brush techniques will make details pop and give your pots a realistic, aged appearance. Incorporating techniques used in ethical hacking, such as layered and strategic application, can help achieve a more authentic and nuanced finish.
Layering Colors for Depth
Layering colors is essential for creating a realistic aged look on terracotta pots. You’ll start by applying the darkest shade, like dark gray, to establish depth.
Gradually add lighter hues such as medium gray and cream, blending the edges to mimic natural wear. Use a dry brush or sponge to lightly dab or sweep over the layers, allowing some colors to show through and build visual complexity.
Techniques like stippling and dry brushing add texture and uneven color distribution, enhancing the aged appearance. Finish by gently wiping or sanding specific areas to reveal underlying layers, emphasizing the layered depth.
This process creates a rich, authentic aged look by subtly blending and layering colors for a compelling, aged character. Additionally, understanding the aesthetic appeal of aged terracotta can help you achieve a more realistic and charming finish.
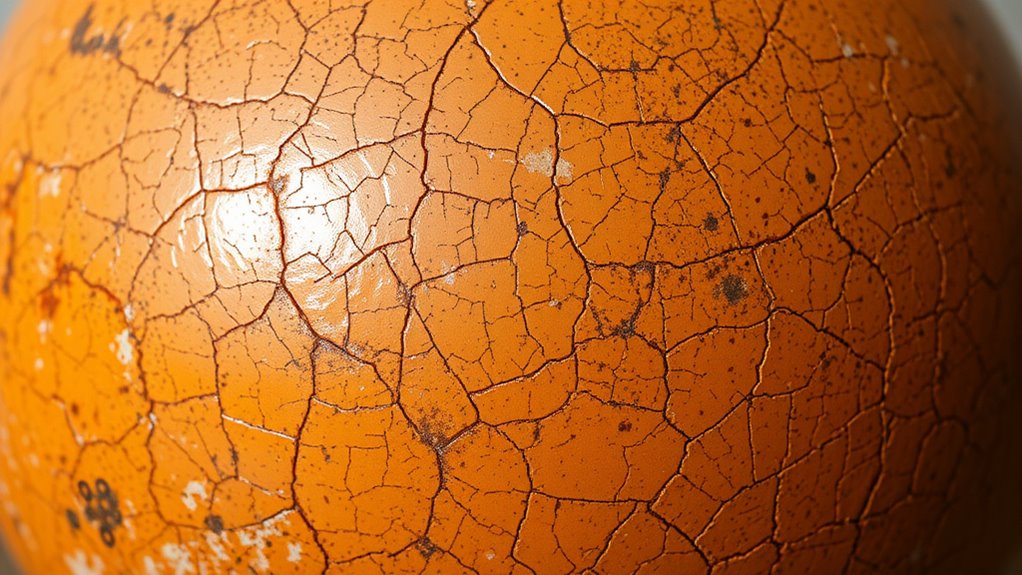
Blending for Texture
Blending for texture brings a realistic, weathered look to your terracotta pots by softening harsh lines and creating seamless shifts between colors. To achieve this, merge different shades of gray, black, and white to add depth and mimic natural aging. Using a dry brush technique to lightly feather paint edges enhances the textured, aged appearance by softening transitions. Applying paint in thin, uneven layers and then merging with a damp sponge or cloth helps replicate the irregular patina of aged terra cotta. Incorporate subtle color variations and blend them smoothly to prevent harsh lines, giving the surface a more authentic, multi-dimensional look. Lightly sanding or wiping after blending reveals underlying layers, adding further depth and character to your aged, textured pot. Additionally, understanding the importance of local resources and techniques can help you achieve a more professional finish. Incorporating biodiversity principles by selecting eco-friendly paints and materials can also contribute to environmentally conscious crafting. Employing proper surface preparation ensures better adhesion and longevity of your finish, resulting in a more durable and visually appealing aged effect. Furthermore, exploring local weather conditions can guide you in choosing appropriate sealing and finishing methods to enhance durability, while utilizing environmentally friendly paints can improve sustainability of your project.
Highlighting With Dry Brush
Highlighting with a dry brush adds subtle depth and character to your aged terracotta pots by emphasizing their textured details. Use a dry, stiff brush with a small amount of contrasting or metallic paint to lightly highlight raised edges and textured areas. Focus on applying the dry brush along ridges, crevices, and imperfections to enhance depth and mimic natural wear. Keep the brush nearly dry by removing excess paint on a paper towel before lightly brushing over the surface for subtle highlights. Vary the pressure and angle of your brush to produce uneven, organic highlights that resemble weathered patina. Incorporating layered finishes can further enhance the aged appearance and add visual interest. Be mindful of weathering techniques to achieve a more authentic look. Finish by gently dabbing or stippling with a clean, damp cloth to blend highlights, avoiding harsh lines and achieving an authentic, layered look.
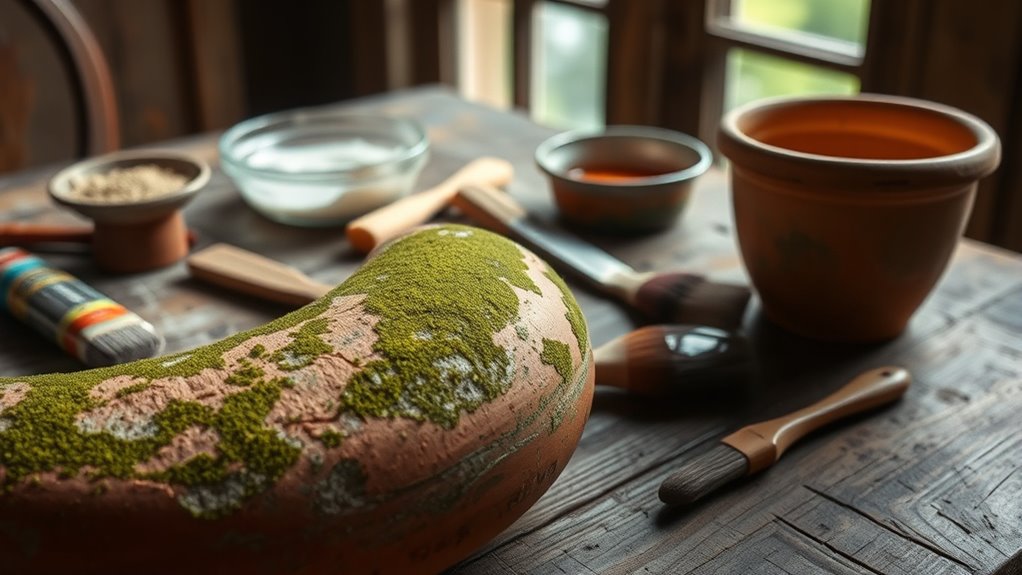
Adding Moss, Algae, or Other Natural Effects

To create a convincing aged look, start by applying green watercolor or acrylic paint—such as Winsor Green or Sap Green—to the crevices and inside rim of the pot using a damp sponge or brush. This mimics moss, algae, or other natural effects often seen on aged terracotta pots.
Lightly blot or dab the painted areas with a clean, damp sponge or cloth to create irregular patches that resemble organic growth. Focus on shaded spots, cracks, and the base, where moss and algae naturally accumulate.
Layer multiple green tones and add hints of brown or black to enhance realism, making the moss look dried or aged.
Once the paint dries, seal the surface with a clear matte spray to preserve the effect and prevent smudging or fading over time.
Combining Techniques for Unique Finishes
Combining different aging techniques allows you to create unique and authentically weathered finishes on terracotta pots. By layering methods like lime wash and yogurt aging, you achieve a layered finish that mimics natural wear. Adding details with black and white paint can enhance depth, giving your pot a vintage character.
Sanding after lime application reveals underlying textures, creating a rustic, weathered look. Applying sealers afterward not only protects your work but also lets you customize the color and texture further. You can even incorporate moss effects or subtle color variations to add realism.
This approach lets you craft one-of-a-kind aged pots that suit both outdoor gardens and interior decor.
- Lime wash creating a soft, matte surface
- Sanded areas revealing rough terracotta underneath
- Subtle moss or algae accents for added authenticity
- Layered paint details for depth and character
- Sealed finishes for durability and customization
Maintaining and Protecting Your Aged Pots
Once you’ve finished aging your terracotta pots with layered techniques, protecting and maintaining their appearance is key to guaranteeing they last. Applying a clear matte sealer helps preserve the finish and shields the surface from weathering caused by rain, sun, and temperature changes.
Reapplying the sealer annually or as needed keeps the aged look intact while preventing chipping or flaking. Use outdoor-grade sealers to ensure your pots withstand the elements without deterioration.
Reapply outdoor sealers yearly to maintain the aged appearance and protect against weather damage.
Avoid harsh scrubbing or abrasive cleaners, which can remove the textured layers and aged paint. During extreme weather, store the pots in sheltered areas to prolong their decorative lifespan.
Proper maintenance and protection will help your aged terracotta pots keep their charm for years to come.
Frequently Asked Questions
How to Make Terra Cotta Pots Look Aged?
You want to make your terra cotta pots look aged, so start by applying a thick layer of homemade lime wash or white paint unevenly on the surface.
Once it dries, lightly sand the area to reveal some of the original terra cotta, creating a weathered look.
Add texture with natural materials or craft paints, then seal with a matte spray to preserve the aged appearance and protect it outdoors.
How to Get Patina on Terracotta?
You want to get patina on terracotta, so start by applying a thin wash of white or gray paint, then lightly sand it for a natural look.
Add greenish hues with watercolor or acrylic paint, mimicking moss or algae.
For a more authentic aged effect, use the yogurt technique and incorporate natural elements like mud or soil.
Finish with a matte sealer to preserve the patina and protect it from weathering.
How to Age Terracotta Pots With Baking Soda?
Imagine your terracotta pot as a blank canvas waiting to tell its weathered story. You can age it with baking soda by mixing a paste or sprinkling it directly onto the surface.
Scrub gently to create streaks and spots, mimicking years of exposure. Rinse and dry to set the aged look, then seal for lasting rustic charm.
This simple process transforms your pot into a timeless, earthy masterpiece.
What Does Yogurt Do to Terracotta Pots?
Yogurt on terracotta pots encourages the growth of bacteria, mold, algae, moss, or lichens, creating a natural green patina. This biological process gives your pots a weathered, aged look over time.
You apply yogurt, and it acts as a natural aging agent, transforming the surface without chemicals. The microbial activity produces a durable finish that lasts outdoors for years, enhancing your pots’ rustic charm in an eco-friendly way.
Conclusion
So, after all that work, your aged terracotta pots will look perfectly weathered—except maybe they’ll stay pristine forever if you forget to seal or protect them. Irony strikes again! But don’t worry; a little upkeep keeps your creations charmingly imperfect. With patience (and perhaps a splash of luck), your pots will tell a story—whether it’s one of genuine age or just good fake aging. Happy gardening and crafting!