
To achieve a modern look with DIY concrete planters, start by selecting lightweight resin bases or repurposed household molds, sealing holes and applying release spray for easy demolding. Mix your concrete with proper water, pour into molds, and tap to release air bubbles. After curing, sand edges, add textures or paint, and finish with a sealant. If you keep exploring, you’ll discover detailed steps to craft sleek, stylish planters for your space.
Key Takeaways
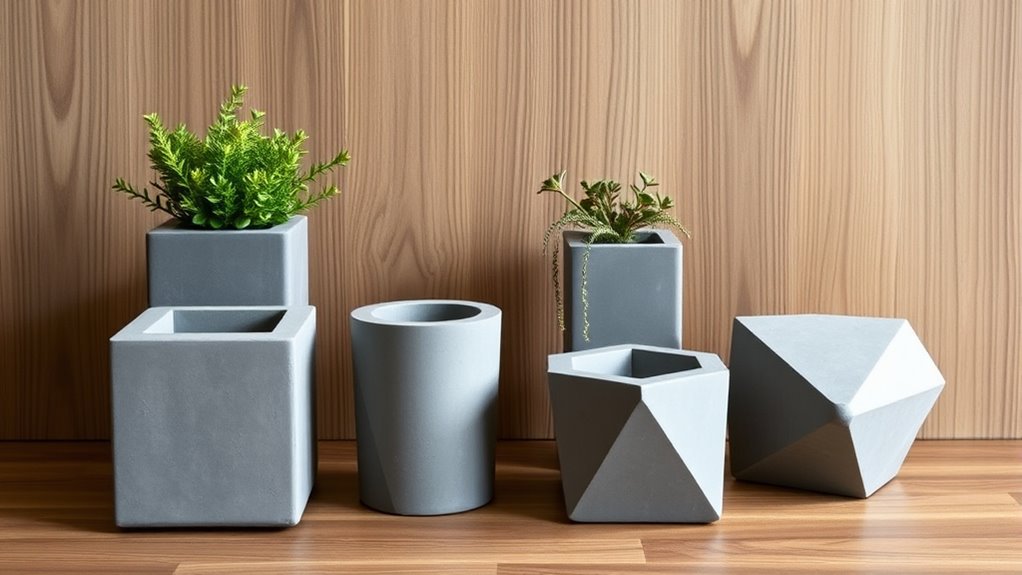
- Use lightweight, stylish molds like resin containers or repurposed household items for modern, sleek planter shapes.
- Apply smooth finishes by sanding and polishing, exposing decorative aggregate for a contemporary aesthetic.
- Incorporate textured techniques such as limewash or paint flicking to add depth and a trendy, aged look.
- Seal planters with matte, weather-resistant sealants to enhance durability and maintain a modern matte finish.
- Position planters on stable, clean surfaces, ensuring proper drainage and minimal maintenance for long-lasting modern appeal.

Midtown Umbrellas - 10-Year-No-Fade 9 Ft Patio Umbrella with Terylast Fabric, Auto-Tilt Aluminum Frame and 8 Reinforced Ribs for Deck, Pool, Garden & Beach - Ebony Black Canopy, Black Pole
10-YEAR-NO-FADE PATIO UMBRELLA – Built with solution-dyed Terylast fabric and a UV-resistant canopy, engineered to outperform standard polyester...
As an affiliate, we earn on qualifying purchases.
Selecting and Preparing Your Materials
To create durable and attractive DIY concrete planters, start by selecting lightweight resin or plastic containers in sizes like 12 or 16 inches in diameter, available in terracotta, white, or silver finishes. These containers serve as the perfect base for your concrete projects, providing easy removal once your planters are set. Utilizing user-friendly interfaces in your planning process can simplify tracking and managing your project steps. For the coating, use materials like microcement, which costs around $30 per 40-pound bag, and can be leftover from renovations. To make your planters look thicker and more substantial, wrap flexible self-adhesive PVC trim twice around the top edge for added dimension. Proper preparation guarantees a foundation for successful DIY concrete planters. Additionally, understanding contrast ratio and how it affects image quality can help in selecting the right projector if you decide to incorporate multimedia elements into your garden display. Incorporating well-being practices such as mindful planning can enhance your overall project experience. Applying techniques from Honda Tuning such as customizing details and finishing touches can give your planters a unique and polished appearance. Planning your project with personal finance management principles, like budgeting for materials and tools, can ensure you stay within your financial limits while creating a beautiful garden feature. Gather essential tools such as a corded drill with a mixing paddle, a masonry brush, and sealer to ensure a smooth application and a professional finish. Proper preparation guarantees a foundation for successful DIY concrete planters.

Midtown Umbrellas The Wooden 9 Feet Patio Umbrella With Sunbrella Antique Beige Acrylic Fabric - Aluminum Frame Market Umbrella For Backyard, Deck, Garden, Pool - Wooden Pole
[ Protection ]: 10 year Protection on the Midtown Umbrella frame along with 5 year Protection on the...
As an affiliate, we earn on qualifying purchases.
Crafting Custom Molds for Unique Shapes

Creating custom molds for unique concrete planters is a straightforward process that begins with repurposing household items like Tupperware, Pho containers, DVD spindles, Styrofoam cups, or LEGO bricks. These household objects serve as DIY molds, allowing you to craft shapes that suit your style. Incorporating recycled materials not only promotes sustainability but also adds a distinctive touch to your designs. To guarantee a smooth finish, seal the joints with silicone caulk, preventing leaks during pouring. When working with larger or intricate molds, support them with wood slats and corner braces to maintain stability. Pour the concrete mix carefully into your custom molds, and consider inverting or tilting the molds to achieve creative forms. Once cured, remove the molds by tearing or cutting away the container material, revealing textured or patterned surfaces that add character to your unique planters. Additionally, understanding market trends can help you design planters that appeal to current home decor styles, increasing their appeal and potential sales. Moreover, being aware of wood stove safety standards can inform how you create a safe and durable environment for your outdoor or indoor gardening spaces. Being aware of IRA investment strategies can also inform how you manage your finances to support your creative pursuits and business growth.

Blissun 9' Outdoor Patio Umbrella, Outdoor Table Umbrella, Yard Umbrella, Market Umbrella with 8 Sturdy Ribs, Push Button Tilt and Crank (Navy Blue)
100% POLYESTER FABRIC -- Blissun patio umbrella is made of 100% polyester, waterproof and UV resistant, long lasting,...
As an affiliate, we earn on qualifying purchases.
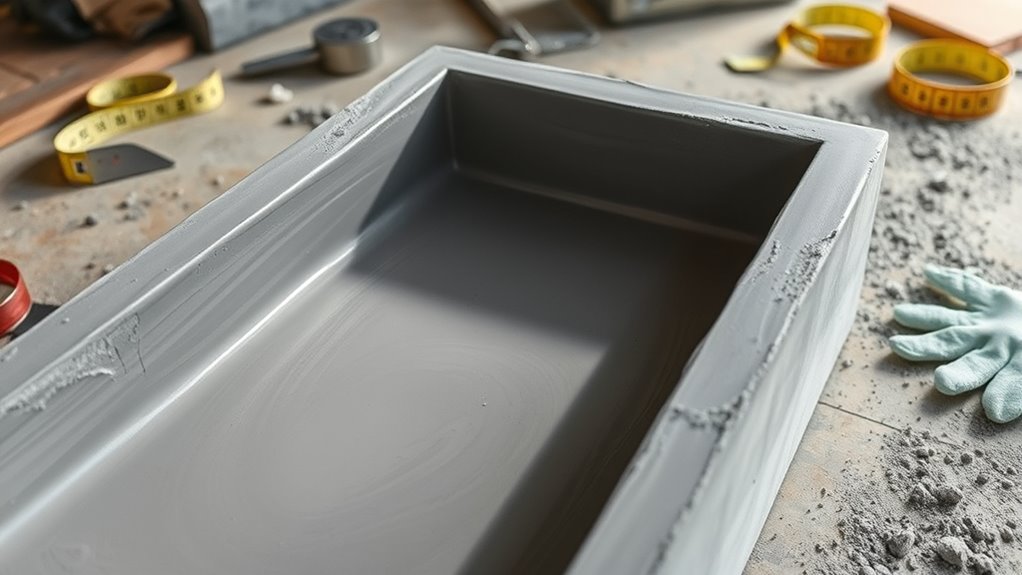
Applying Lubricants and Sealing Holes

Before pouring your concrete, apply a generous spray of canola oil or mold release to make demolding easier and prevent sticking. Be sure to seal all holes securely with painter’s tape to avoid leaks and imperfections during curing. Double-check the tape’s adhesion to confirm your planters come out smooth and clean. Additionally, verifying the best laundry detergents can help ensure your planters stay free of residue or stains during handling, especially if you plan to use them outdoors where UV protection may be necessary to prevent weathering. Incorporating proper cure time ensures your concrete sets correctly and maintains a professional appearance over time. Recognizing the importance of angel numbers in guiding your creative projects can also bring positive energy and inspiration during the process. Proper IRAs management can further enhance your retirement planning, ensuring your financial stability in the long term.
Effective Lubrication Techniques
Applying the right lubricants and sealing techniques is essential for a smooth demolding process and a clean finish. Use a generous coat of mold release or vegetable oil inside your mold to prevent sticking. This makes removing the planter easier and avoids damage. Before pouring concrete, seal any holes or openings with FrogTape® to prevent seepage and maintain shape during curing. For added durability, wrap the top edge with self-adhesive PVC trim, sealing it for a thicker, polished look. Proper lubrication minimizes mold damage and results in a smooth surface. Additionally, selecting the appropriate air purification methods can improve the environment where you craft your planters, especially if working in dusty or humid conditions. Incorporating vetted safety practices ensures a safer workspace and better-quality results.
Sealing Mold Openings
Sealing mold openings is a crucial step to guarantee your concrete planter turns out perfect. First, use painter’s tape to seal mold openings and prevent concrete from seeping through.
For larger holes, spray vegetable oil or mold release spray inside the mold, making demolding easier later. Before pouring, ensure your dry concrete mix is sifted to remove chunks, creating a smooth, fine powder that helps with sealing. Proper sealing and lubrication help maintain the mold’s shape, prevent leaks, and result in a clean, professional finish.
Additionally, understanding the importance of regular maintenance can extend the lifespan of your mold and improve the quality of your finished planters. This knowledge ensures you can troubleshoot issues like leaks or surface imperfections effectively.
Taking these steps ensures your DIY concrete planters look sleek and polished every time.

Blissun 9' Outdoor Patio Umbrella, Outdoor Table Umbrella, Yard Umbrella, Market Umbrella with 8 Sturdy Ribs, Push Button Tilt and Crank (Tan)
100% POLYESTER FABRIC -- Blissun patio umbrella is made of 100% polyester, waterproof and UV resistant, long lasting,...
As an affiliate, we earn on qualifying purchases.
Mixing and Pouring the Concrete
To start mixing the concrete, gradually add water to your dry Portland cement and sand mixture while stirring continuously. Use a drill with a mixing paddle or a sturdy plastic spoon to blend the ingredients thoroughly, ensuring a smooth, lump-free consistency. Adding appropriate water levels is crucial for achieving the right consistency and strength of the concrete. Mix until the concrete reaches a thick, pancake batter-like texture, adding water slowly to maintain control.
When pouring, fill your molds about one-third full, then insert and press smaller molds into the center for even distribution.
After pouring, gently tap or vibrate the molds to release trapped air bubbles, which helps create a smoother surface and improves the final appearance.
Proper mixing and pouring techniques are essential for achieving a durable, aesthetically pleasing concrete planter.
Ensuring Proper Curing and Demolding
Make sure you wait at least 18 hours before demolding your concrete planter to prevent damage. When removing the mold, do so gently by cutting or breaking supporting containers carefully, so you don’t crack the surface. After demolding, smooth the edges with sandpaper for a clean, professional finish. To ensure the best sound quality, consider using headphones with the appropriate jack type for your device. Using proper curing techniques can also help strengthen the concrete and improve its overall appearance. Additionally, regularly assessing your organization system in your workspace can help maintain the clarity and order needed for efficient DIY projects. Proper curing methods are essential for achieving a durable and aesthetically pleasing finish on your concrete planters. Incorporating emotional support strategies, such as taking breaks and practicing mindfulness during your projects, can also enhance your overall experience and reduce stress.
Proper Curing Time
Proper curing time is essential to guarantee your concrete planter gains maximum strength and durability. Allow at least 7 days for curing, with 14 to 28 days ideal for long-lasting results.
During this period, maintaining moisture retention is crucial—cover your planter with plastic or damp cloths to prevent rapid moisture loss, which can cause cracking. Proper curing and demolding are interconnected; a thorough curing process helps prevent surface damage and ensures structural integrity.
Demolding should generally happen after 18 to 24 hours, once the concrete has set but isn’t too brittle. Rushing this step risks surface damage or structural weaknesses.
Remember, curing duration can vary based on the concrete mix, ambient temperature, and thickness, so always follow manufacturer recommendations. Additionally, divorce statistics highlight the importance of careful planning and legal considerations if you’re dealing with complex situations related to property or family assets.
Patience during curing ensures your planter develops the strength needed for outdoor or indoor use, delivering a smooth, professional finish.
Gentle Demolding Techniques
Once your concrete has cured for at least 18 hours, it’s time to carefully remove the mold. During demolding, avoid forcing or pulling on the molds to prevent damaging your planter’s shape or surface. Gently loosen the molds and, if they stick, use tools like a utility knife or tap lightly with a rubber mallet.
If lubrication with oil was insufficient, take extra care when removing complex or multi-part molds like LEGO or styrofoam, disassembling slowly to preserve details. Remember, the concrete dries and gains strength during this process, so patience is key.
After demolding, wait an additional 24-48 hours for full curing before handling or planting. This gentle approach guarantees your modern concrete planters look professional and last longer.
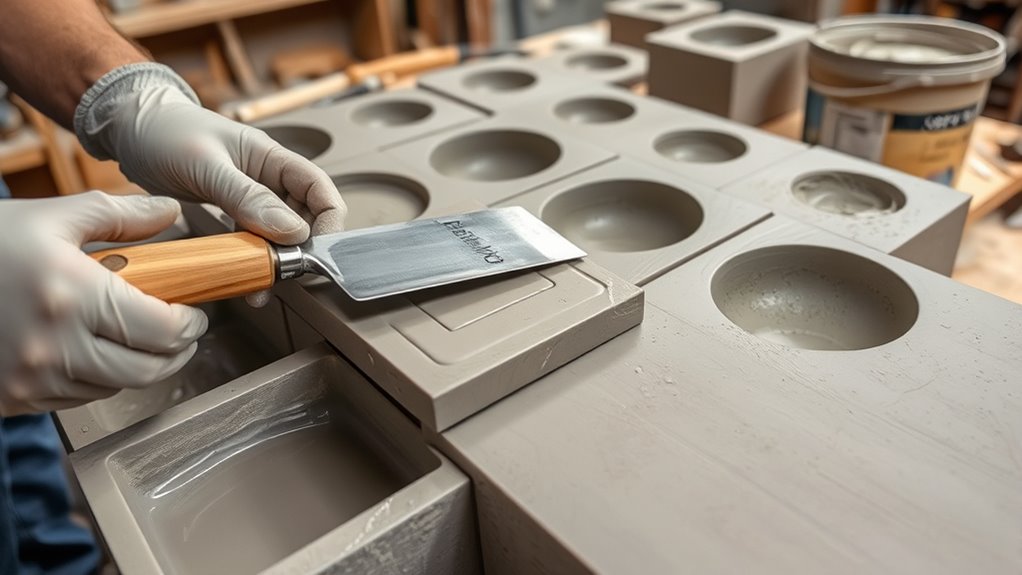
Finishing Touches: Sanding and Texturing

To achieve a polished and visually appealing finish on your concrete or microcement planters, sanding and texturing play essential roles. Sanding smooths out imperfections and refines the surface, especially when using fine grit (around 200 grit), giving your planter a sleek finish.
Light sanding with an abrasive pad or stone before full curing helps remove drips and uneven spots, ensuring a refined appearance.
Light sanding before curing smooths imperfections for a polished finish.
For added texture, a wet concrete polisher can expose decorative glass aggregate, creating visual interest.
To mimic natural wear or add depth, lightly sand edges and ridges for an aged look.
You can also introduce texture through techniques like flicking black and white paint or limewash, resulting in a porous, stone-like surface that enhances the tactile appeal of your finished planter.
Painting, Limewashing, and Aging Effects

Applying paint techniques like limewashing can instantly transform your concrete or microcement planters, giving them a charming, aged appearance. Limewashing involves diluting limewash paint, such as Soft Taupe, with water and brushing it onto the surface. Layering multiple coats enhances the depth and authenticity of the aging effects, with each layer slightly varying in tone for a natural look. Light sanding after limewashing reveals subtle color variations and creates a porous, stone-like texture. To protect your finish, apply a matte sealant that preserves the natural aesthetic while resisting weathering. For added character, selectively distress the surface with sanding or dry brushing, accentuating the patina and giving your planters a truly aged, timeless charm.
| Technique | Effect |
|---|---|
| Limewashing | Creates an earthy, aged appearance |
| Layering | Adds depth and natural variation |
| Sanding | Reveals color variations and texture |
| Distressing | Enhances aging effects and patina |
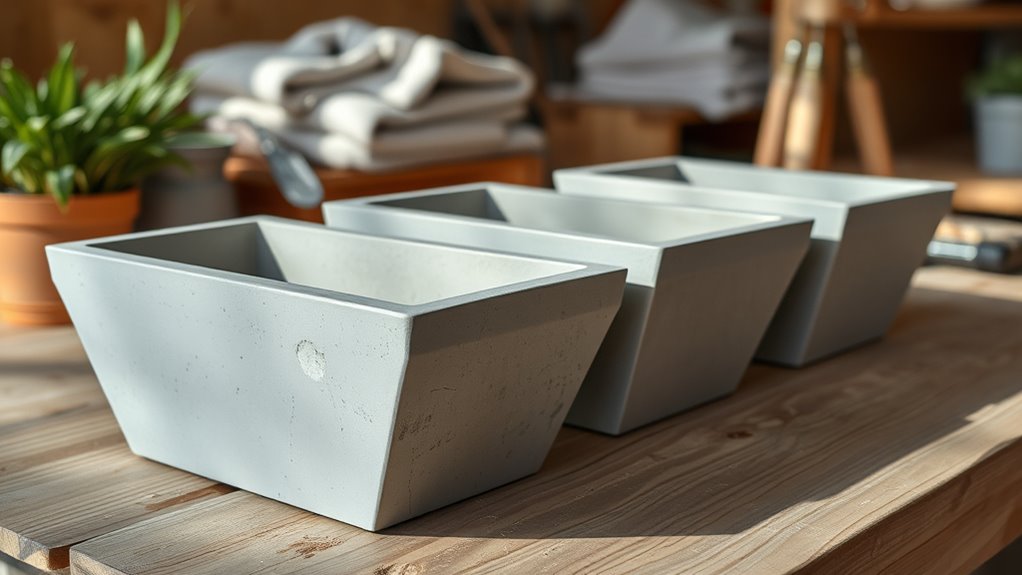
Sealing and Positioning Your Planters

After finishing the aging and decorative techniques on your concrete or microcement planters, sealing them properly guarantees they stay durable and attractive over time. Apply a matte sealant after the microcement has fully cured, usually 12-24 hours post-application, to enhance water resistance.
For outdoor planters, choose a sealant formulated for exterior surfaces to shield against moisture and UV damage. Reapply the sealant every 1-2 years to maintain their protection and appearance.
Proper positioning is equally important—place lightweight planters on stable surfaces and avoid direct contact with standing water, which can cause cracking.
Frequently Asked Questions
What Are the Disadvantages of Cement Pots?
You should know that cement pots are quite heavy, making them hard to move around easily.
They’re prone to cracking or chipping, especially in cold weather with freeze-thaw cycles.
Since cement is porous, moisture can get trapped, risking root rot.
Plus, their rough surface makes cleaning tough and can harbor pests or mold.
They also stain or discolor quickly, requiring regular sealing and maintenance to keep them looking good.
What Is the Best Concrete Mix for DIY Planters?
When choosing the best concrete mix for DIY planters, you want a balance of strength and workability. A mix with Portland cement, sand, and water in a 5:3 ratio offers durability.
For smoother finishes, opt for a thinner, pourable mortar-like mix, which flows easily into molds and reduces surface imperfections.
Adding color pigments or crushed glass can boost visual appeal, making your planters both sturdy and attractive.
Do I Need to Line a Concrete Planter?
You might wonder if you need to line your concrete planter. If you’re planting delicate or moisture-sensitive plants, lining is a good idea because it prevents soil and water from damaging the concrete.
A liner helps contain soil, makes cleanup easier, and protects against cracks caused by moisture seepage. If you skip lining, sealing the concrete with a waterproof sealant can also boost its durability and resistance to moisture.
How to DIY a Concrete Planter Box?
To DIY a concrete planter box, start by gathering mold materials like plastic containers, silicone caulk, and spray lubricant. Seal any holes with FrogTape® to prevent leaks.
Mix Portland cement and sand with water until it’s thick. Pour the mixture into your mold, add a drainage pipe, and vibrate to remove air bubbles.
Let it cure for at least 4 days, then remove the mold and smooth edges for a sleek finish.
Conclusion
By creating your own concrete planters, you add a personalized touch to your space while saving money. Did you know that DIY projects like this can reduce waste by up to 30% compared to buying ready-made? With patience and creativity, you’ll craft unique, stylish planters that truly reflect your style. Plus, you’ll enjoy the satisfaction of knowing you built them yourself—making your garden or home even more special.