
To create a realistic waterfall ambience, start by capturing the continuous rush of water with high-quality microphones and strategic positioning. Layer multiple recordings of water flows, splashes, and ambient sounds to add depth, adjusting volumes and spatial placement carefully. Apply reverb and EQ to enhance space and clarity, simulating outdoor environments. Small variations in timing and volume keep the scene lively. Explore these techniques further to craft a truly immersive water soundscape.
Key Takeaways
- Use high-quality omnidirectional or shotgun microphones with windscreens to capture the continuous, varying water sounds at optimal distances.
- Layer multiple recordings, including the main waterfall, distant flows, and ambient nature sounds, adjusting volumes and panning for depth.
- Apply reverb and EQ to simulate outdoor space, enhancing clarity and spatial realism while avoiding harsh or muddy frequencies.
- Incorporate environmental details like wind, rustling leaves, and regional sounds to create an authentic, immersive waterfall environment.
- Balance sound levels and effects carefully, using subtle automation and spatial placement to craft a natural, multi-dimensional ambience.
Understanding the Elements of Waterfall Sounds

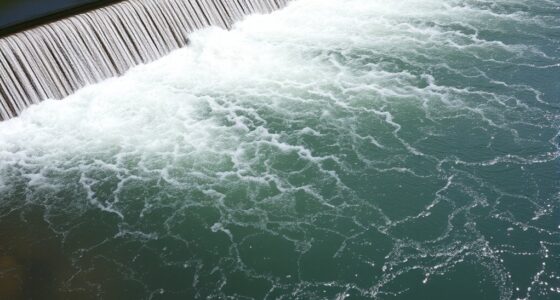
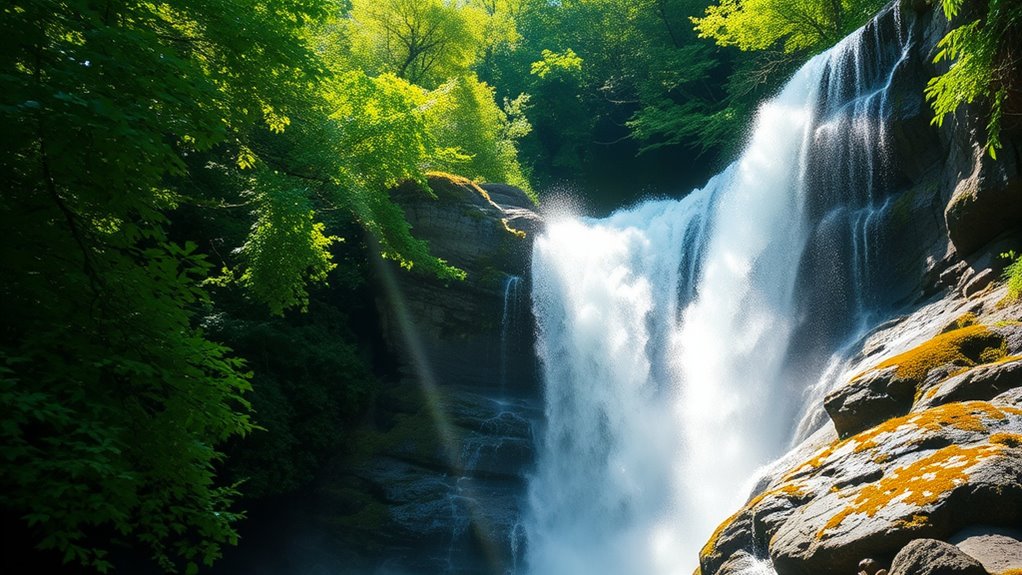
Waterfall sounds are rich and complex, composed of several key elements that shape their unique character. You’ll notice the steady rush of water as it tumbles down rocks, creating a continuous, soothing background noise. The pitch varies from low, rumbling tones to sharp, high-pitched splashes, giving the sound depth and texture. The velocity of the water influences the intensity, with faster flows producing more vigorous sounds and slower flows offering calmer tones. Echoes and reverberations also play a role, especially in natural surroundings with cliffs or dense foliage, adding layers of spaciousness. Finally, environmental factors like wind, humidity, and surrounding terrain subtly alter the sound’s quality, making each waterfall’s auditory signature distinct and engaging. The contrast ratio between different sound elements helps to create a balanced and immersive auditory experience.
Choosing the Right Recording Equipment and Settings

Selecting the right recording equipment and settings is vital to capturing the full richness of waterfall sounds. High-quality gear guarantees clarity, depth, and natural resonance. To get the best results, consider a pair of omnidirectional or shotgun microphones to pick up broad soundscapes without distortion. Use a portable recorder with a high sample rate (at least 48kHz) and bit depth (24-bit) for detailed audio. Adjust the gain carefully to avoid clipping from loud water splashes. Additionally, set your microphone’s low-cut filter to reduce wind noise and low-frequency rumble. Keep your equipment steady with a tripod or shock mount and use windshields to protect against environmental noise. Proper equipment choice and settings are key to creating immersive waterfall soundscapes. Regular use of appropriate recording techniques can significantly improve the quality of your recordings.
Capturing Authentic Waterfall Audio in the Field

To capture authentic waterfall sounds in the field, you need to be prepared and attentive to your environment. Arrive early, choose a quiet spot near the waterfall, and set up your equipment securely. Use a windscreen to prevent noise from wind interference. Pay attention to the water’s movement—adjust your distance to capture the desired intensity. Be patient and wait for natural variations in the water flow to record authentic sounds.
| Tip | Explanation |
|---|---|
| Use a windscreen | Reduces wind noise for clearer recordings |
| Record at different distances | Captures variations in water sound |
| Monitor audio levels | Prevents clipping or low-volume recordings |
| Check surroundings | Avoid unexpected noises like birds or machinery |
Using Layering Techniques to Build Depth

Layering different sounds is a powerful way to add depth and richness to your recordings. By combining multiple water sounds, you create a more immersive experience that feels alive and dynamic. Start with the main waterfall recording as your foundation. Then, add complementary layers like distant water flows, splashes, or subtle background textures. These layers fill in the gaps and make the soundscape feel full. To effectively build depth, consider these techniques:
Layer different water sounds to create a rich, immersive, and dynamic waterfall ambience.
- Mix sounds at different volumes to create a sense of distance
- Use panning to place layers across the stereo field
- Incorporate variations in timing and intensity
- Blend natural ambient noises for authenticity
- Experiment with sound layering to achieve a more realistic and engaging waterfall ambience.
Applying Effects and Processing for Realism

Reverb helps create a sense of space and depth, making your sounds feel more natural. EQ allows you to sharpen clarity and remove unwanted frequencies, enhancing realism. By carefully applying these effects, you can make your sound design more convincing and immersive. Additionally, understanding how tuning modifications—such as engine upgrades—affect vehicle acoustics can provide inspiration for creating authentic waterfall sounds that respond dynamically to different environments.
Reverb for Depth
Reverb is a powerful tool for creating a sense of depth and space in your sound design, making your audio feel more realistic and immersive. When applied effectively, reverb can simulate the natural reflections of a waterfall, adding layers that draw the listener into the scene. To enhance the feeling of distance and realism, adjust parameters like decay time, pre-delay, and diffusion. Use longer decay times to suggest vastness, while shorter times can create intimacy. Experiment with different room sizes to match the environment you envision. Adding subtle reverb to certain elements can also help them sit better in the mix, creating a cohesive waterfall soundscape. Incorporating acoustic effects similar to those found in natural outdoor environments can further enhance authenticity.
EQ for Clarity
To achieve a realistic and clear sound, applying EQ effectively is essential. Start by identifying the muddy frequencies, usually between 200-500 Hz, and cut them slightly to reduce muddiness. Boost high frequencies around 5-10 kHz to enhance the water’s sparkle and crispness. Focus on removing any harsh or resonant peaks that can distract from the natural sound. Use a narrow Q setting to target problematic frequencies precisely, avoiding over-processing. Trust your ears—if a certain frequency makes the waterfall sound dull or overly harsh, adjust accordingly. Remember, subtle EQ tweaks can notably improve clarity without sacrificing naturalness. The goal is to make each element of the waterfall sound crisp, transparent, and immersive. Incorporating sound processing techniques can further refine the ambiance and enhance the overall realism.
Creating Dynamic Variations for a Lifelike Feel

Creating dynamic variations is essential for achieving a lifelike sound design because it mimics the natural fluctuations found in real-world sounds. To make your waterfall ambience feel authentic, introduce subtle changes in volume, pitch, and rhythm. This prevents the sound from feeling static or robotic. You can achieve this by modulating the water flow, adjusting the intensity of different sound layers, or using automation to vary the dynamics over time. Adding these variations captures the unpredictable nature of real water.
- Varying the intensity of water splashes
- Modulating the speed of flowing water
- Incorporating occasional pauses or quieter moments
- Using automation to shift sound levels organically
Integrating Background and Ambient Sounds

When integrating background and ambient sounds, you should layer diverse elements to build a rich environment. Make sure to balance sound levels so no single element overpowers the others. By creating spatial depth, you can make your soundscape feel more immersive and realistic.
Layering Diverse Elements
Integrating background and ambient sounds effectively requires carefully layering diverse elements to enhance the overall atmosphere of your sound design. You want each sound to complement the others, creating a rich, immersive environment. Start by selecting sounds that fit the mood and setting of your waterfall scene. Mix natural sounds like dripping water, distant birds, or rustling leaves with the core waterfall noise. Pay attention to how these elements interact, ensuring they blend smoothly without overpowering each other. Use subtle variations in volume and timing to add realism. Consider spatial placement to give depth and perspective. By thoughtfully combining these diverse sounds, you create a lively, believable water landscape that transports your audience right into the scene. Incorporating regional knowledge can also help tailor the soundscape to specific environments, enhancing authenticity.
Balancing Sound Levels
Have you ever wondered how to make background and ambient sounds sit perfectly within your mix? The key is balancing their sound levels so they complement each other without overpowering the main elements. Start by setting your primary sound, like the waterfall, to a comfortable level. Then, gradually bring in the ambient sounds, adjusting their volume so they add depth without distracting. Use your ears to judge whether the background feels natural and cohesive. Avoid making any sound so loud that it draws unnecessary attention or so quiet it becomes indistinguishable. Regularly toggle between louder and softer settings to find the sweet spot. Remember, subtlety is essential—your goal is to create a seamless, immersive experience. For optimal results, consider the sound environment as a whole to ensure all elements work harmoniously.
Creating Spatial Depth
Balancing sound levels sets the foundation for a convincing and immersive mix, but creating a sense of spatial depth takes it a step further by placing sounds within a three-dimensional environment. To achieve this, you need to carefully integrate background and ambient sounds so they complement the main elements without overpowering them. Use subtle volume adjustments to position sounds in space, creating a layered and realistic scene. Panning can help simulate directionality, making the environment feel more natural. Adding reverb and delay effects can also enhance the sense of distance and space. Remember, subtlety is key—small changes can markedly deepen the listener’s sense of immersion. Incorporating hackathons as a metaphor can inspire innovative approaches to sound design challenges, encouraging creative problem-solving.
Finalizing and Using Your Waterfall Ambience in Projects

Once you’ve selected the perfect waterfall ambience, the next step is to refine it to seamlessly fit your project. Start by adjusting the volume and EQ to match the scene’s mood and environment. If your project is calm and serene, lower the high frequencies and keep the sound soft. For more energetic scenes, boost the highs and increase the volume slightly. Use crossfades or automation to blend the waterfall sound naturally with other audio elements, avoiding abrupt passages. Consider adding subtle reverb or spatial effects to place the waterfall within your scene’s space. Once satisfied, export your audio in a compatible format. Incorporate it into your project, ensuring it complements visuals or other sounds, enhancing immersion without overpowering the overall mix. To ensure the audio aligns well with your project’s overall tone, consider referencing sound design principles, which can guide you in creating a balanced and immersive soundscape.
Frequently Asked Questions
How Can I Reduce Background Noise in Waterfall Recordings?
To reduce background noise in waterfall recordings, you should start with a good directional microphone to focus on the water sound and minimize unwanted noise. Use a windscreen or foam cover to block wind noise. Record in a quiet environment and choose a time when background sounds are minimal. After recording, apply noise reduction plugins or filters in your editing software, and carefully adjust settings to preserve the natural ambiance.
What Are the Best Times of Day to Record Waterfalls?
If you want the clearest waterfall recordings, early mornings or late afternoons are your best bets. During these times, the environment is calmer, and wind is usually minimal, reducing unwanted noise. Plus, you’ll catch the waterfall at its most majestic, with softer ambient sounds blending seamlessly. Be prepared to act quickly—these peaceful moments are fleeting, and the perfect shot might disappear as the day warms up and crowds arrive.
How Do I Prevent Equipment Damage in Wet Environments?
To prevent equipment damage in wet environments, you should always use waterproof gear or protective covers. Keep your equipment in sealed, water-resistant cases and avoid direct contact with water. Use silica gel packs to absorb moisture and operate in sheltered spots when possible. Regularly check and maintain your gear, and consider using desiccants to keep internal components dry. Taking these precautions guarantees your equipment stays safe and functional.
Can I Create a Waterfall Ambience Without Field Recordings?
You can absolutely create a waterfall ambience without field recordings. Think outside the box and use synthesized sounds or layered samples from sound libraries. By combining different textures and applying effects like reverb and pitch shifts, you can craft a convincing waterfall soundscape. It’s not just about copying nature, but about capturing its spirit — sometimes, the best ideas come from thinking on your feet.
What Software Tools Are Recommended for Editing Waterfall Sounds?
You should try software like Audacity, Adobe Audition, or Logic Pro X for editing waterfall sounds. These tools offer powerful features like noise reduction, equalization, and effects to enhance your recordings. With their intuitive interfaces, you can easily trim, layer, and refine sounds to create a realistic waterfall ambience. Experiment with plugins and filters within these programs to achieve the desired natural or stylized water sound.
Conclusion
Creating a waterfall ambience is like capturing a fleeting moment of nature’s heartbeat. When you blend authentic recordings with layered effects, you craft an immersive experience that transports listeners. I once recorded a waterfall at dawn, and hearing my edited track felt like standing right there, feeling the mist and hearing the rush. With patience and creativity, your sound design can evoke that same awe, turning natural beauty into an unforgettable sonic journey.