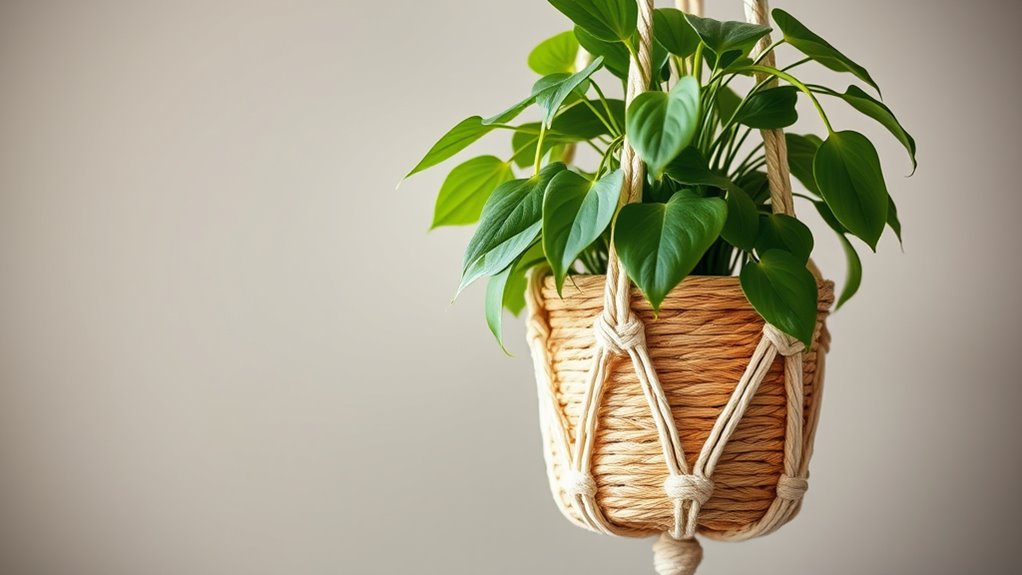

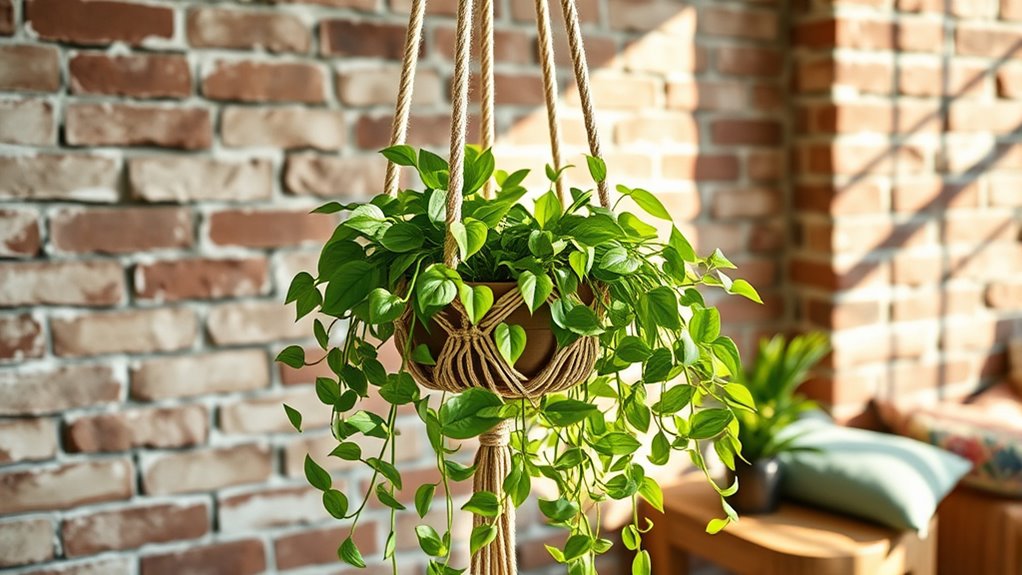
To create your own macrame plant hanger, start by gathering supplies like cotton cords, a support ring, and scissors. Cut your cords to the desired lengths and attach them securely with lark’s head knots. Use simple knots such as square or spiral knots to form decorative patterns and evenly space your cords around the ring. Finish with a secure knot, trim excess, and hang your creation. Keep exploring the steps to craft a beautiful, personalized plant hanger.
Key Takeaways
- Gather all necessary supplies, including support ring, macrame cords, scissors, and optional beads, then measure and cut cords to desired lengths.
- Attach cords to the support ring using lark’s head knots, ensuring even spacing and secure attachment.
- Create decorative knots like square or spiral knots to form the plant holder’s pattern, maintaining consistent spacing.
- Gather and secure the cords at the bottom with a knot, then trim excess to desired length for a clean finish.
- Hang your DIY macrame plant hanger on a sturdy hook and adjust as needed for balance and aesthetic appeal.
Top picks for "create macrame plant"
Open Amazon search results for this keyword.
As an affiliate, we earn on qualifying purchases.
Gathering Essential Supplies for Your Macrame Project
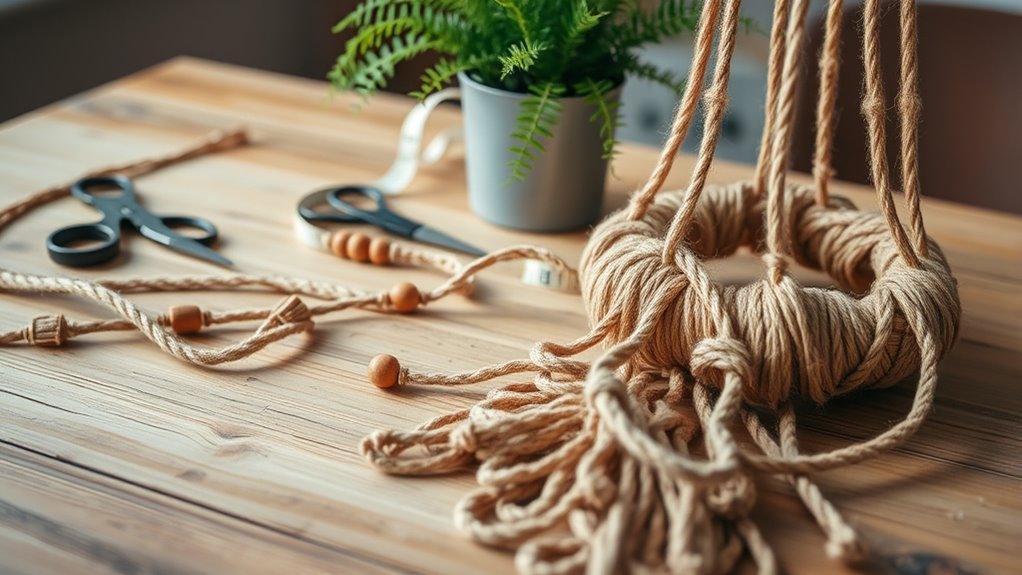
Are you ready to start creating your own macrame plant hanger? First, gather your supplies: a sturdy ring, macrame cord, scissors, and a hook or anchor point.
Choose a ring made of wood or metal to support your plant hanger evenly. The macrame cord, typically 3mm natural cotton, should be about 10 to 15 feet per strand, depending on your desired size.
Scissors are essential for precise cuts, ensuring your cords have clean edges for neat knots. Your supplies should also include a sturdy hook or anchor to hold your project steady while you work.
While decorative beads or accents are optional, focus on these core essentials to make a strong, beautiful plant hanger. Having everything ready makes the crafting process smooth and enjoyable.
Preparing the Rope and Cutting to Lengths
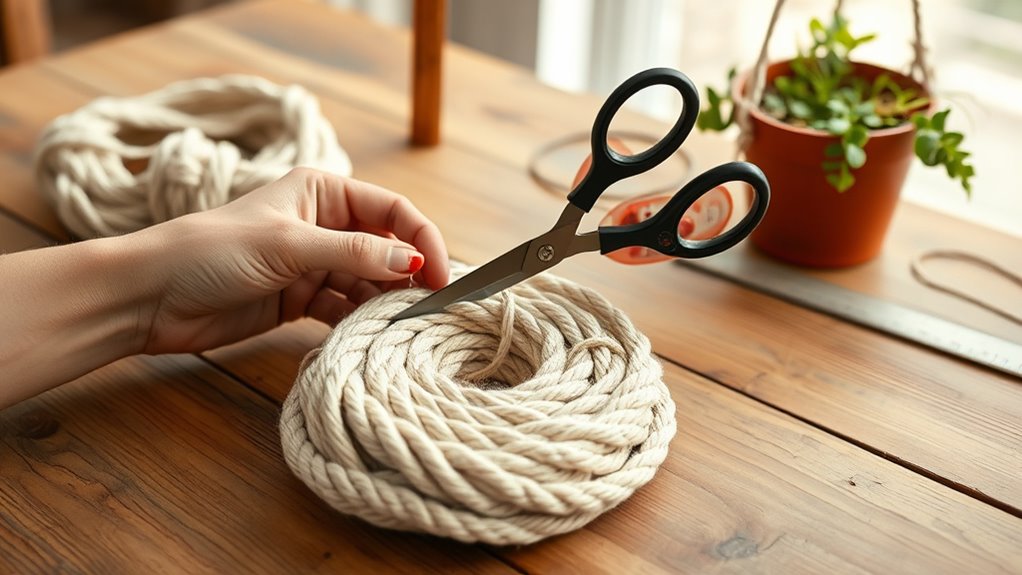
Start by measuring and cutting eight pieces of cord—four at 40 inches and four at 75 inches—to get the right lengths for your hanger. To ensure the cords are even and neat, use a cord measurement tool or a ruler for accuracy. Fold each cord in half to form a loop, which will attach to the supporting ring. Then, arrange the cords evenly around the ring, alternating short and long pieces for a balanced look. Additionally, choosing high-quality precious metals can enhance the durability and aesthetic of your finished piece. For added stability, consider proper knotting techniques to secure the cords firmly in place. Incorporating protective styling benefits can help safeguard your cords from wear and tear over time. Using durable materials ensures your plant hanger remains sturdy and long-lasting.
Selecting Rope Lengths
Before cutting your ropes, determine the desired length of your plant hanger and then cut multiple pieces that are at least three times that measurement. This extra length accounts for knots and adjustments during tying. For a standard medium-sized plant, cut eight cords, each about 8 to 10 feet long. Use the measurement to guide your cuts, ensuring enough length for secure knots and a proper hang.
| Rope Length | Number of Cords |
|---|---|
| 8-10 feet | 8 |
| 12-15 feet | Optional for larger hangers |
When preparing your cords, fold each in half to find the midpoint for attaching to your support ring or hook. Always add extra length to prevent tension issues and ensure neat knots.
Folding Ropes for Knotting
Folding your ropes before knotting is a crucial step that simplifies the process and guarantees even tension. To do this, fold each cord in half, creating a loop at the center. This makes knotting easier and helps maintain symmetry. When folding, align the ends evenly and ensure the center loop is positioned correctly on your support ring or structure. For a standard plant hanger, cut multiple lengths of cord—typically between 40 and 150 inches—longer than needed to allow for adjustments. Use four cords around 40 inches and four around 75 inches for variety in knot sizes and designs. Always cut your cords slightly longer than the final length to accommodate knotting, trimming, and finishing later in your project. Additionally, understanding the correct tire pressure for your gravel bike can improve your knot tension and overall stability of the hanger. Proper material selection for your cords can also make a difference in the durability and appearance of your finished hanger. Being aware of the best water spot removers can help keep your finished project looking pristine over time. Incorporating appliance maintenance plans into your routine can ensure your tools stay in optimal condition, making your crafting process smoother. Furthermore, choosing appropriate cord types can enhance the longevity and aesthetic of your macrame plant hanger.
Arranging Ropes Evenly
To guarantee your macrame plant hanger is balanced and visually appealing, you should arrange the cut cords evenly around the wooden ring. Start by folding each cord in half, then place the midpoint over the ring, ensuring the ends are even on both sides. Professional equipment is essential for quality recordings, and careful organization of your cords helps achieve that professional look. When arranging, alternate the cords between short and long lengths, creating proper spacing for a neat look. Before tying knots, double-check that all cords are aligned with their midpoints on the ring and that the ends are even. This even arrangement of cords is vital for consistent spacing and uniform knots throughout your project. Taking the time to carefully organize your cords will make the knotting process smoother and result in a more polished, professional-looking macrame plant hanger. Incorporating attention to detail during this step can significantly improve the overall appearance of your finished piece, especially considering the importance of visual balance in design. Additionally, ensuring each cord is securely fastened prevents slipping during knotting, which maintains the structural integrity of your hanger.
Attaching the Rope to the Support Ring

Start by folding each cord in half and looping the midpoint through the support ring to form a lark’s head knot. Make certain all cords are evenly spaced around the ring to guarantee a balanced and attractive hanger.
Tighten each knot securely and consider wrapping a short piece of cord around the gathered cords for extra stability.
Looping and Folding Method
When attaching your cords to the support ring, the looping and folding method offers a simple and secure approach. Start by folding each cord in half and looping the folded end over the ring.
Then, follow these steps:
- Create a lark’s head knot by pulling the loose ends through the fold.
- Tighten the knot to ensure it sits snugly against the ring.
- Repeat for each cord to distribute tension evenly.
- Check that every knot is secure to prevent slipping or uneven hanging. This technique is ideal for maintaining stability in a macrame plant hanger and ensures your arrangement is both functional and attractive. Additionally, using proper knot techniques can help prolong the durability and safety of your creation, especially by understanding candle safety precautions that could be relevant in similar craft projects. Remember, practicing these knots can improve your overall textile craftsmanship and result in more professional-looking finished pieces. Paying attention to interior decor principles can also enhance the aesthetic appeal of your handmade plant hangers in a country-inspired setting.
Even Rope Distribution
Attaching your cords evenly around the support ring is key to creating a balanced and attractive macrame plant hanger. To achieve even rope, fold each piece in half and loop it through the support ring, ensuring symmetrical placement. You can also use marking techniques to evenly space the cords around the ring for precise placement. Mark equal intervals on the ring to guide your placement, keeping the ropes evenly spaced. When attaching, alternate the cords around the ring to maintain balanced tension and prevent uneven pulling. Secure each rope with a knot, like a lark’s head, making sure it’s tight and evenly tensioned. Regularly check the alignment and tension as you go to keep the cords straight and symmetrical. Proper knotting and spacing will result in a sturdy, visually pleasing plant hanger with uniform, even rope distribution. Additionally, periodically adjusting the tension ensures the overall structure remains balanced and aesthetically pleasing.
Tying the Gathering Knot to Secure the Top
To secure the top of your macrame plant hanger, you’ll need to tie the gathering knot correctly. This knot keeps the rope group tight and forms a secure top for your design. Here’s how:
- Gather all ropes into a firm bundle, ensuring even distribution.
- Wrap the cord around the rope group 8-9 times to create a wrap coil that holds everything together.
- Thread the end of the cord through the bottom loop of the coil.
- Pull the cord tight to secure the knot, then trim any excess for a clean finish.
Make sure your knot is tight and even, as this will support your plant’s weight and prevent slipping. Proper execution of the gathering knot is crucial for a strong and durable hanger.
A well-formed gathering knot is essential for a sturdy macrame plant hanger.
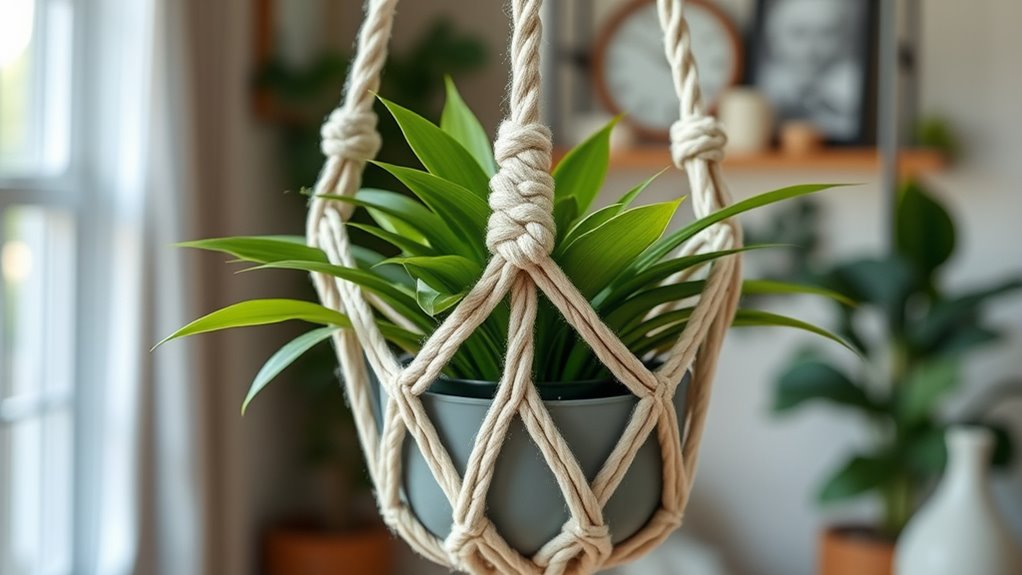
Creating Decorative Spiral and Square Knots
Creating decorative spiral and square knots adds visual interest and texture to your macrame project. Spiral knots, or half square knots, are made by tying the outermost cords in a continuous, twisting pattern, creating a lively spiral effect. Use the longer outside cords and repeat half square knots in the same direction to achieve this look.
Square knots, on the other hand, are formed by tying two half square knots in opposite directions, resulting in a flat, symmetrical pattern. Alternating the knot directions ensures your design stays even and structured.
Combining spiral and square knots enhances your fiber art, giving your macrame plant hanger a mix of twisting visual appeal and stability. These decorative knots are simple yet effective techniques for elevating your DIY macrame project.
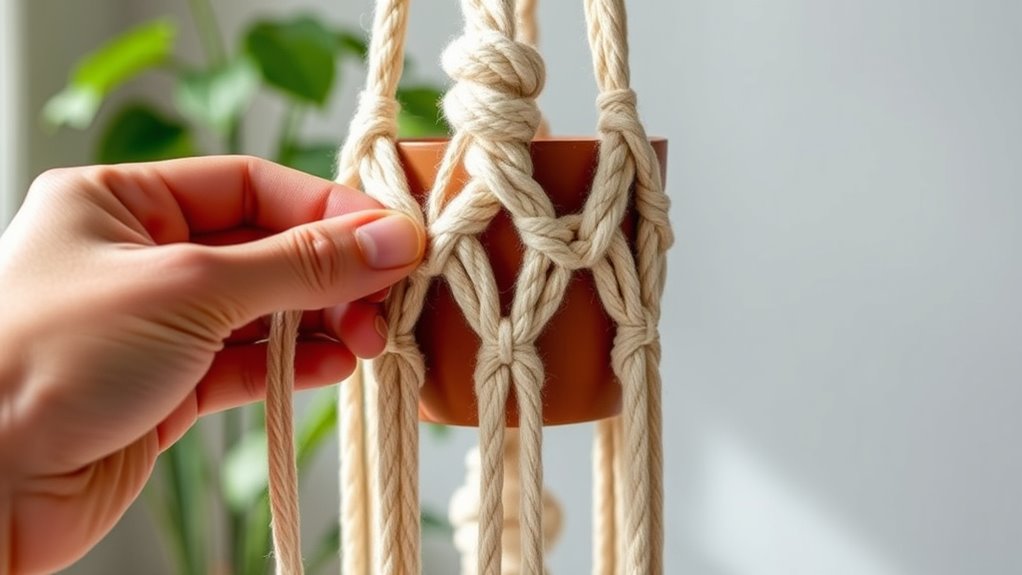
Forming the Pattern and Adjusting Spacing
Forming a consistent pattern in your macrame plant hanger starts by dividing your cords into groups of four and tying square knots.
To adjust the pattern and spacing, follow these steps:
- Measure the gaps between knots with a ruler, aiming for 3.5 to 5 inches for even spacing.
- Keep cords evenly spaced to maintain a balanced look and pattern.
- For a more intricate design, alternate knot directions or add knots at different intervals to create visual interest.
- Change the length of cords between knots to customize the overall hanger length and pattern size, making it adjustable to your pot.
Finishing the Hanger With a Final Knot and Trimming
Once you’ve finished the decorative diamond pattern, it’s time to secure your design with a final knot. Tie a strong gathering knot about an inch below the last row of knots to guarantee your hanger remains secure.
Finish your design with a secure gathering knot just below the last row for lasting stability.
Before trimming, pull all knots tight to reinforce the stability of your design. Then, trim the excess rope, leaving around 38 inches for a medium to large plant pot, or adjust according to your needs.
For a polished appearance, trim all ends evenly and tuck in any loose fibers. The final knot keeps your design secure, while trimming and even ends give your hanger a neat, finished look.
This finishing touch ensures your macrame plant hanger is both functional and visually appealing.
Hanging Your Macrame Plant Hanger and Adding the Plant
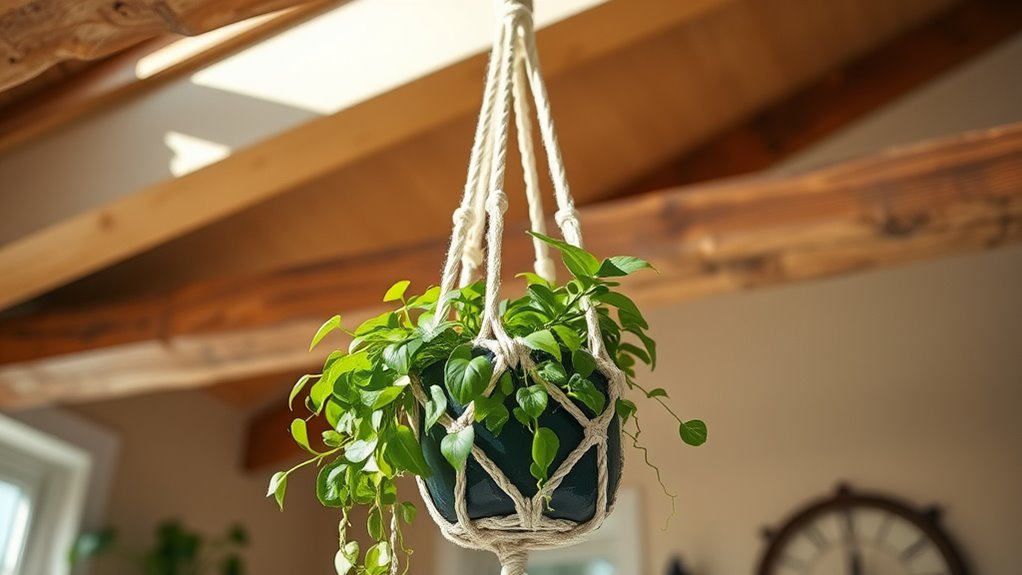
To securely hang your macrame plant hanger, choose a sturdy ceiling hook or wall-mounted bracket that can support the combined weight of your plant and hanger.
Once installed, follow these steps:
- Make sure your DIY macrame plant hanger is fully finished with tight knots, ready for hanging.
- Gently place your plant into the center of the hanger, adjusting the cords to distribute the weight evenly for stability.
- Use the gathered cords at the top to tighten or loosen the hanger, positioning your plant at your preferred height.
- Double-check all knots are secure to prevent slipping or falling, trimming any excess cord for a clean look.
Now, your plant is safely displayed, showcasing your handmade plant hanger.
Customizing and Exploring Variations for Different Spaces
When customizing your macrame plant hanger, adjusting the cord length, knot density, and pattern complexity helps it fit your space and pot size. For small or narrow areas, opt for shorter cords and minimalist knot designs to avoid clutter. Larger spaces can handle longer hangers with layered sections or intricate patterns. To support heavier pots, double cords or extra knots at stress points increase stability. Experiment with decorative tassels or bead accents to match your style. Use this table to guide your choices:
| Space Constraints | Pattern Complexity | Design Features |
|---|---|---|
| Small, narrow | Minimalist | Shorter cords, simple knots |
| Large, open | Intricate | Layered sections, tassels |
| Heavy pots | Reinforced knots | Double cords, stress points |
Frequently Asked Questions
How to Make Macrame Plant Hanger Step by Step?
To make a macrame plant hanger, start by cutting 10-15 feet cords and thread them through a wooden ring. Secure with a knot, then divide the cords into groups to tie square or spiral knots around the ring.
Space the knots evenly, adjust the length as needed, and finish with a knot at the bottom.
Trim excess cords, tighten all knots, and your hanger is ready to hold your plant securely.
How Many Cords Do I Need for a Macrame Plant Hanger?
You might worry about choosing the right number of cords, but don’t fret—it’s easier than you think. For a medium-sized pot, you’ll typically need 4 to 8 cords, each about 8 to 10 feet long.
If your pot is bigger or heavier, add more cords or use thicker ones for support. Start with 4 cords for a simple look, and adjust as needed to match your design and stability needs.
What Supplies Do I Need to Make a Macrame Plant Hanger?
To make a macrame plant hanger, you’ll need some basic supplies. Grab 3mm or 5mm cotton macrame cord, about 8 to 15 feet depending on your pot size. You’ll also need a wooden or metal ring, typically 4 to 6 inches in diameter, for support.
Scissors are essential for cutting cords, and a measuring tape helps keep everything even. Optional items include hooks, hardware, a pot, and plant nourishment.
How to Do Macrame for Beginners Step by Step?
You’re about to master macrame, and it’s easier than you think! First, pick cords three times your desired length—think of the longest scarf you’ve ever worn.
Practice simple knots like the square knot and half hitch, which are your building blocks. Attach cords to a sturdy ring or dowel, then follow tutorials step-by-step, measuring and adjusting as you go.
Before you know it, you’ll be creating stunning plant hangers like a pro!
Conclusion
Now that you’ve created your own macrame plant hanger, you’ve added a personal touch to your space. Imagine a friend seeing your handcrafted piece and feeling inspired to try their own DIY project. Like Sarah, who made one for her apartment and found it not only brightened her decor but also boosted her confidence in crafting. Your handmade hanger isn’t just beautiful—it’s a reminder that with patience and creativity, you can turn simple supplies into something truly special.