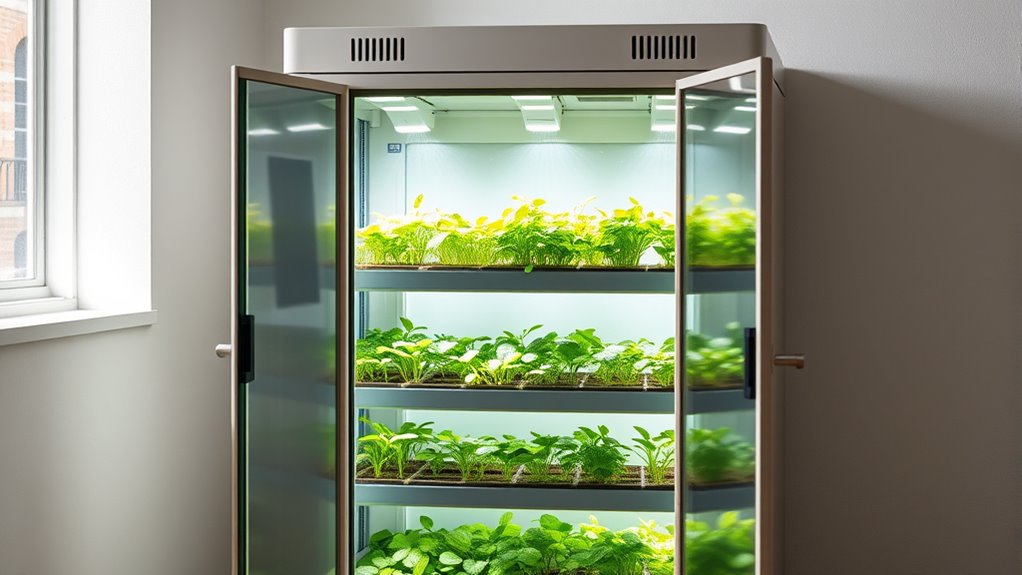

To build a simple indoor greenhouse cabinet, start by choosing a suitable glass-fronted cabinet like IKEA’s DETOLF or RUDSTA, ensuring it fits your space and supports your plants. Customize it by installing grow lights, drilling holes for cords and ventilation, and adding climate control like humidifiers and fans. Arrange your plants for best growth, then maintain proper airflow and humidity. If you keep going, you’ll discover detailed steps to create your ideal indoor garden environment.
Key Takeaways
- Select a transparent, tempered glass-front cabinet that fits your space and supports proper ventilation.
- Remove or modify shelves, installing glass or acrylic supports for even light distribution.
- Drill small holes near the top corners for cords and ventilation, sealing sharp edges afterward.
- Install full-spectrum LED grow lights securely at the top, using adjustable mounts like VELCRO® or hooks.
- Add fans and humidifiers to regulate airflow and humidity, ensuring a stable environment for plant growth.
Selecting the Right IKEA Cabinet for Your Greenhouse

Choosing the right IKEA cabinet is essential for creating an effective indoor greenhouse. Look for an IKEA cabinet with glass panels, like the IKEA DETOLF or RUDSTA, to maximize light exposure and visibility. Tempered glass panels are a smart choice because they’re durable and safe in humid environments. Additionally, ensure that the cabinet has a reliable headphone jack or wireless connectivity option to facilitate any audio needs when monitoring or managing your greenhouse setup. Consider the size and weight capacity to ensure it can handle your plants and equipment. Adjustable shelves give you flexibility to customize space for different plant sizes and humidity control devices. Make sure the cabinet has accessible doors for easy maintenance and enough ventilation options to promote airflow, which is crucial for healthy plant growth. Selecting a sturdy, well-ventilated IKEA cabinet with glass panels helps you create a thriving indoor greenhouse setup.
Preparing and Assembling the Cabinet
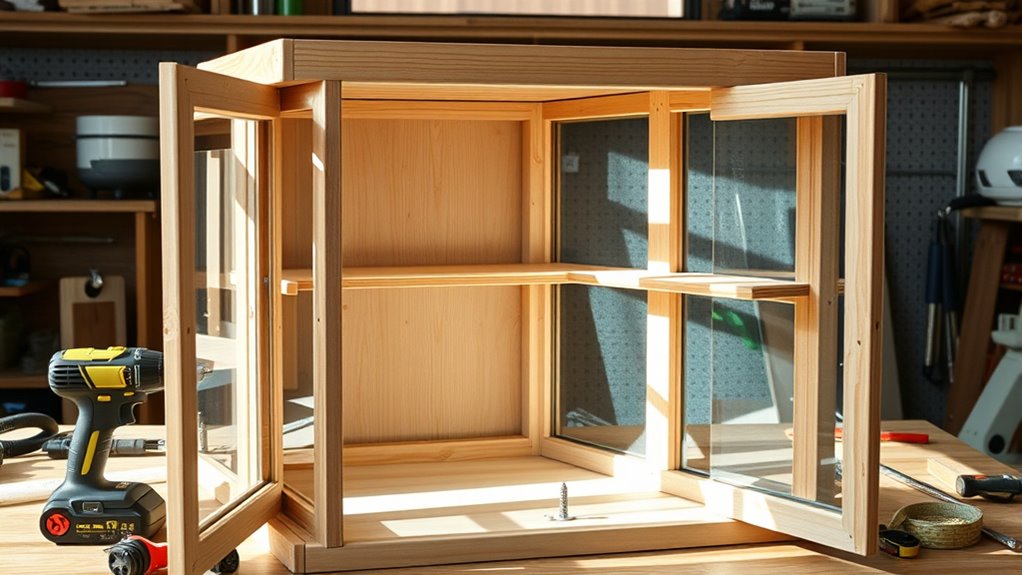
Start by choosing a sturdy, transparent cabinet like an IKEA DETOLF or RUDSTA to maximize light exposure.
Next, remove or replace existing shelves with glass or custom-cut acrylic ones to guarantee even light distribution and support your plants. Using professional-grade materials can also improve durability and clarity. Additionally, suspension upgrades can be considered if you plan to hang grow lights or other equipment inside your greenhouse. Incorporating automation in business technologies can help monitor environmental conditions such as temperature and humidity to ensure optimal plant growth.
Additionally, consider attention to detail that can influence your approach to setup, such as patience or attention to detail, which can impact the success of your indoor greenhouse.
Finally, drill a small hole in the top corner to allow cords for grow lights and other equipment to pass through securely.
Selecting Suitable Cabinet
Selecting the right cabinet is essential for building an effective indoor greenhouse. You want a sturdy, glass-fronted cabinet like an IKEA DETOLF, RUDSTA, or FABRIKÖR that fits your space and can support your lighting and humidity equipment. Choose a cabinet with adjustable or removable shelves to maximize light exposure and promote proper airflow. Customization options, such as painting or adding pegboards, allow you to enhance aesthetics and create mounting points for accessories. Guarantee the cabinet seals well with weather stripping or seals around the doors to maintain consistent humidity and prevent drafts. Additionally, drill holes in the top or sides for electrical cords, so your lighting and humidifiers can operate safely and discreetly. Ensuring proper color accuracy in your lighting setup can help promote healthy plant growth and vibrant foliage. Proper selection sets the foundation for your greenhouse’s success. To prevent heat loss and maintain optimal conditions, consider adding insulation to the cabinet for better temperature control. Incorporating climate control devices can further optimize your indoor environment for plants. When choosing a cabinet, consider the size and how it aligns with your available space and plant quantity to optimize growth conditions. Moreover, selecting a cabinet with ventilation options can improve air circulation, reducing the risk of mold and pests within your greenhouse.
Assembling and Securing Shelves
Before installing shelves, you should remove or adjust existing ones to optimize light exposure and airflow for your plants. Proper support and stability are essential for safe installation. Use brackets or shelf supports designed for your cabinet’s dimensions to secure the shelves firmly. Make sure each shelf is level and stable before placing plants or accessories. To enhance durability, reinforce or seal shelf edges with weather stripping or adhesive to prevent water damage. During installation, create holes for cords or ventilation using a drill with a step drill bit, keeping cuts clean and precise. Use a table like this to plan your support:
| Shelf Type | Support Method | Stability Tips |
|---|---|---|
| Glass | Brackets | Secure tightly |
| Wood | Shelf supports | Check level |
| Custom-cut | Brackets | Reinforce edges |
Additionally, selecting the appropriate camping gear can help protect your plants from temperature fluctuations and humidity changes during setup. Incorporating ventilation options can further improve airflow and prevent mold or mildew growth inside your greenhouse cabinet. Proper humidity control is also crucial for maintaining an ideal environment for your plants. You should also consider the operating hours of your setup area to ensure optimal conditions during your gardening sessions.
Drilling Holes for Electrical Cords and Ventilation

To guarantee your indoor greenhouse functions smoothly, carefully drill holes in the cabinet for electrical cords and ventilation. Use a step drill bit to create clean, precise holes on the side or top panel, matching the size of your electrical cords. Position the holes near the top corner for easy access and minimal gaps, especially for ceiling-mounted lights or fans. Secure the greenhouse cabinet firmly and apply steady pressure to prevent cracking or damaging the material. For ventilation, drill additional holes or slots on opposite sides, near the top and bottom, to promote airflow and regulate temperature and humidity. Always wear safety goggles and work slowly. Consider filing or sealing sharp edges to protect cords and ensure safe, efficient airflow inside your greenhouse cabinet. Incorporating self-watering plant pots into your setup can help maintain consistent moisture levels for your plants, reducing the need for frequent watering and enhancing overall plant health. Additionally, including proper ventilation options can prevent mold and excess humidity, ensuring a healthier environment for your plants. Creating effective airflow pathways is essential for preventing issues like mold growth and promoting healthy plant development. Establishing a steady airflow pattern can improve the distribution of temperature and humidity throughout the cabinet. Using an airless sprayer can also be helpful if you need to paint or treat the interior surfaces of the cabinet for better durability.
Installing Grow Lights and Lighting Accessories

Installing grow lights correctly is key to ensuring your plants receive adequate illumination for healthy growth. Use full-spectrum LED grow lights, like the VG40 or Mars Hydro VG40, which emit minimal heat and are ideal for enclosed cabinets. Mount the lights securely at the top using VELCRO® Brand Fasteners or magnetic hooks, allowing easy adjustment. Position them to evenly cover all plant areas for uniform light distribution that promotes photosynthesis. Connect the lights to a proper power source and consider adding a timer to automate daily cycles of 12-16 hours. Make sure your lighting accessories are water-resistant or suitable for humid environments to prevent damage. Proper safety measures, such as monitoring AI behavior, are essential to prevent hazards in automated systems. When installing lighting equipment, it’s important to follow manufacturer guidelines and proper wiring procedures to ensure safety and optimal performance. Additionally, selecting lights with high energy efficiency ratings can help reduce electricity consumption and operating costs. Visualize this setup with the following:
| Grow Lights | Lighting Accessories | Adjustment Options |
|---|---|---|
| Full-spectrum LED | VELCRO® Fasteners | Height & angle |
| Minimal heat | Magnetic hooks | Easy repositioning |
| Water-resistant | Timer | Automated cycles |
| 40W power | Humidity-safe | Flexible setup |
| Even coverage | Safety features | Ideal growth |
Adding Climate Control Equipment: Humidifiers and Fans
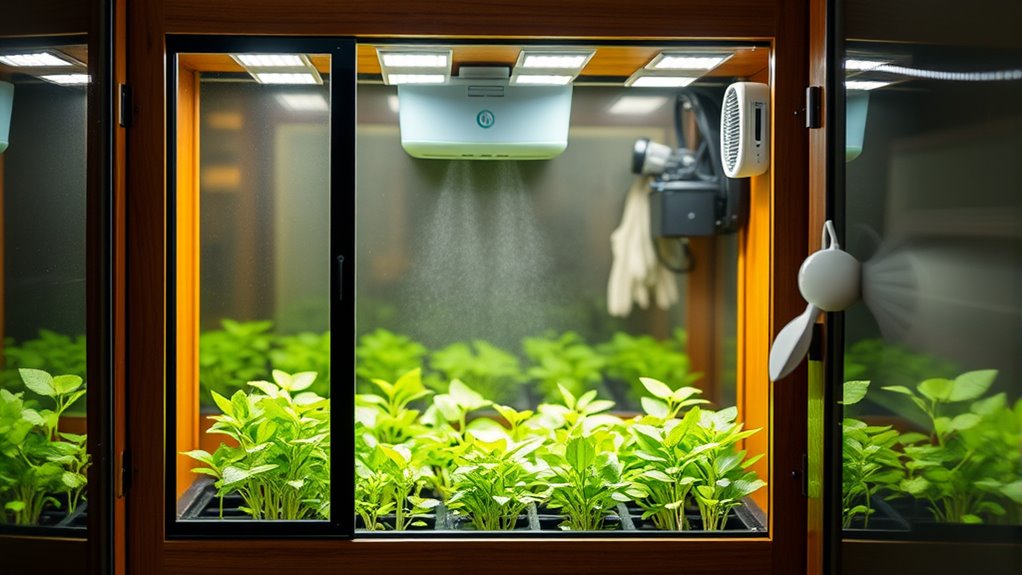
To keep your greenhouse cabinet’s environment balanced, you’ll need to focus on humidity regulation and airflow.
Choosing the right humidifier size and setting up fans correctly helps prevent issues like mold and uneven moisture.
Regularly monitoring humidity levels guarantees your plants stay happy and healthy.
Humidity Regulation Strategies
Adding climate control equipment like humidifiers and fans helps you maintain ideal humidity levels inside your greenhouse cabinet.
A humidifier boosts humidity levels to 75-90%, creating a suitable environment for tropical plants. Using a small, adjustable humidifier allows you to fine-tune humidity, preventing excess moisture, mold, and mildew.
Installing a fan promotes air circulation, which helps evenly distribute humidity and avoids stagnant, overly moist spots.
Monitoring humidity with a hygrometer gives you real-time data, so you can make timely adjustments to your humidifier and fan.
Incorporating proper humidity regulation strategies is essential for replicating tropical conditions and ensuring healthy plant growth.
Furthermore, understanding the microclimate within your greenhouse helps you optimize conditions and maintain a stable environment for your plants.
Combining these devices helps you create a stable microclimate that closely mimics tropical conditions, supporting healthy plant growth.
Proper humidity regulation is key to establishing a thriving environment for your plants inside your greenhouse cabinet.
Airflow Optimization Techniques
Ensuring proper airflow inside your greenhouse cabinet is essential for maintaining a healthy environment for your plants. Good air circulation prevents mold, mildew, and stale air buildup, promoting healthy growth.
To optimize airflow:
- Install a small fan near the top or side of the cabinet to ensure even air circulation and prevent hotspots.
- Secure fans and humidifiers with VELCRO® Fasteners or magnetic mounts for flexible placement and easy adjustments.
- Regularly open vents or cabinet doors for a few minutes daily to facilitate air exchange and ventilation, removing stale air and bringing in fresh, conditioned air.
These techniques help balance humidity control, airflow, and ventilation, creating a stable environment that supports your plants’ health and growth.
Arranging and Planting Your Greenhouse Environment

Arranging your plants thoughtfully can make a significant difference in their health and the overall look of your greenhouse cabinet. In your indoor greenhouse, consider plant arrangement carefully: place taller plants toward the back or center to maximize light and space.
Group plants with similar humidity and watering needs to simplify care and maintain consistent environmental conditions. Use decorative pots, trays, or moss to enhance aesthetics and manage excess water runoff.
Guarantee leaves don’t block each other to promote even light distribution and airflow, which supports healthy growth. Regularly rotate plants and adjust their positions to encourage uniform development and prevent etiolation.
Proper arrangement not only improves plant health but also creates an attractive, functional greenhouse environment.
Maintaining and Enhancing Your Indoor Greenhouse Setup
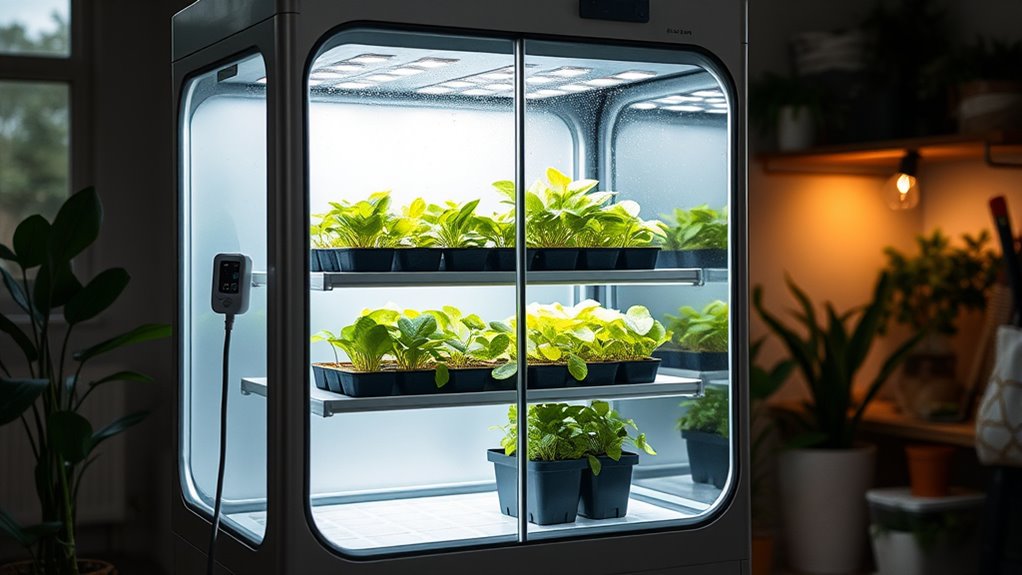
To keep your indoor greenhouse thriving, routine maintenance and thoughtful enhancements are essential. Focus on humidity control by regularly monitoring levels with a hygrometer and using a humidifier to keep moisture around 75%, ideal for tropical plants.
Guarantee proper lighting by cleaning glass panels and light fixtures to maximize sunlight and prevent mold or algae buildup that can harm plant health.
Improve ventilation by using a small fan to promote air circulation, helping prevent mold, mildew, and stagnant air. Open cabinet doors periodically for fresh airflow.
Additionally, adapt your maintenance routine by adjusting watering schedules based on plant responses and environmental conditions.
Incorporate decorative elements like textured pots or stones to personalize your DIY greenhouse, making it both functional and visually appealing.
Frequently Asked Questions
How Do You Make a Simple Indoor Greenhouse?
To make a simple indoor greenhouse, start with a transparent cabinet like an IKEA Detolf to let light in. Install grow lights at the top, add a small humidifier and fan inside for humidity and airflow, and drill ventilation holes for ventilation and cords.
Arrange your plants with proper spacing in pots with drainage. Keep an eye on temperature and humidity to guarantee healthy growth.
Is It Cheaper to Build a Greenhouse or Buy a Kit?
You’ll find it’s usually cheaper to build a greenhouse yourself than buy a kit. Building from basic materials or repurposed furniture can cost between $100 and $300, saving you money compared to pre-made kits that often start at $200 and go higher.
Plus, DIY allows you to customize, use what you already have, and tailor features to your needs, making it a budget-friendly and personalized option.
Do You Need a Fan in a Greenhouse Cabinet?
You definitely want a fan in your greenhouse cabinet. It promotes even air circulation, reducing mold, mildew, and pest issues.
A fan also helps regulate temperature and humidity, preventing heat buildup and stagnant air.
Plus, continuous airflow strengthens plant stems and boosts transpiration.
In small, enclosed cabinets, a fan is essential for maintaining healthy conditions, ensuring your plants thrive without disease or stress.
Are Indoor Greenhouses Worth It?
Imagine stepping into your greenhouse, where every plant thrives under perfect conditions — yes, indoor greenhouses are worth it. They extend your growing season, boost plant health, and let you cultivate tropical plants indoors.
For serious hobbyists, they’re cost-effective and customizable, making gardening more enjoyable and productive. Although it’s an investment, the rewards of healthier plants and increased yields make it a worthwhile addition to your indoor space.
Do I Need a Humidifier in My Greenhouse Cabinet?
You might need a humidifier if your indoor greenhouse cabinet has low humidity, especially for tropical plants needing 70-90%. Without one, plants could suffer from browning leaves and slow growth.
However, if your space naturally stays humid or you can manually increase moisture with trays or misting, a humidifier isn’t essential.
Monitor your plants’ health and humidity levels to decide if a humidifier is necessary for your setup.
Conclusion
Think of your indoor greenhouse as a tiny, thriving forest tucked inside your home. With each carefully placed plant, every light and fan working in harmony, you’re nurturing a delicate ecosystem. Just like a forest breathes life and balances itself, your greenhouse will flourish with your attention and care. Keep tending to it, and watch your indoor oasis grow lush and vibrant, transforming your space into a miniature paradise that blooms with your dedication.