To create DIY floating shelves, start by carefully planning your space and measuring dimensions accurately. Locate wall studs using a stud finder and mark support positions. Build a support framework with 2x4s, ensuring supports are level and securely attached to studs. Cut and prepare plywood shelves, then mount them onto the support system. Finish with aesthetic touches. Following these steps will help you achieve sturdy, sleek shelves—continue exploring for detailed guidance and tips.
Key Takeaways
- Measure and mark wall stud locations accurately to ensure strong support for the floating shelves.
- Build a sturdy support framework using 2x4s or 2x6s, anchored securely into wall studs.
- Attach support brackets or internal supports into studs or use appropriate anchors for weight stability.
- Cut and prepare plywood panels for shelves, ensuring precise sizing and smooth edges.
- Install shelves by sliding them onto hidden supports or brackets, ensuring level placement and even weight distribution.

(2026 Upgraded) WYBOT C2 Cordless Robotic Pool Cleaner, Dual Filtration, Wall Climbing & Waterline Cleaning, App Scheduling, Smart Navigation, Pool Vacuum for Inground/Above Ground Pools-2152 Sq.ft
Dual Filtration System Captures Fine Debris: Featuring dual-layer filtration (180μm + 10μm), the pool cleaner robot efficiently traps...
As an affiliate, we earn on qualifying purchases.
Planning and Measuring the Space
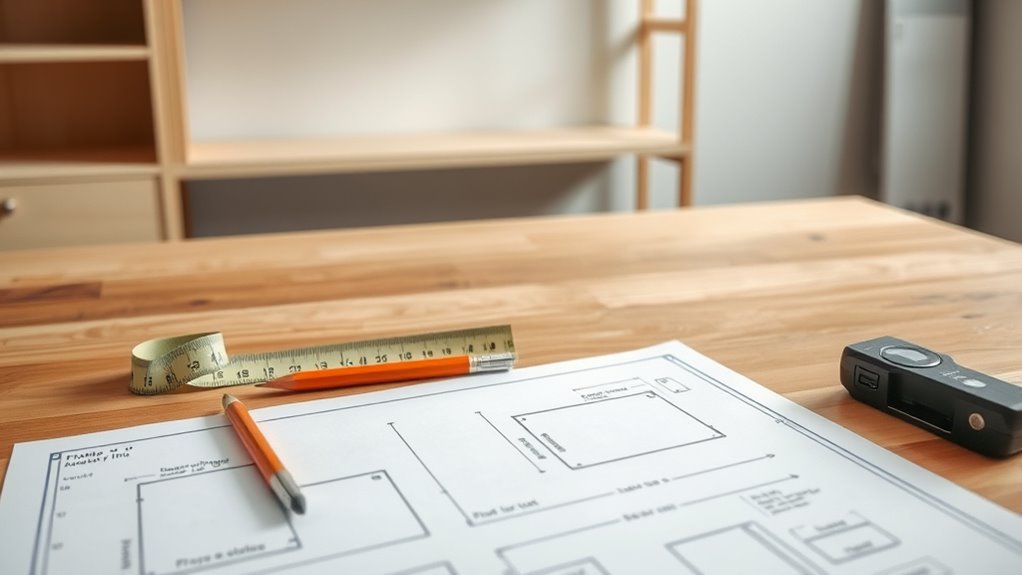
Before installing your floating shelves, it’s essential to plan and measure the space carefully. Start by taking precise measurements of the width, height, and depth of the area where you want to mount the shelves. This helps guarantee a perfect fit and a balanced look. Accurate measurements are crucial for achieving optimal placement and ensuring your shelves are both functional and aesthetically pleasing. Use a stud finder to locate wall studs behind drywall; these provide strong support for your shelves. If studs aren’t accessible, consider alternative anchors. Once you have your measurements, decide on the height and spacing for each shelf, keeping both style and functionality in mind. Mark the exact positions for the supports with a pencil, making sure to use a level for horizontal accuracy. Additionally, accounting for wall irregularities by measuring each support location individually will help assure a level, secure installation. Incorporating knowledge about automation in business can also help streamline your project planning process, ensuring efficiency and precision during the setup. Using measurement tools like laser levels and digital tape measures can further enhance the accuracy of your planning and installation process.

(2026 New) TALOSBO C1 Robotic Pool Cleaner, 180 Mins, Ultra-Strong Suction, Wall & Waterline Cleaning, Pool Vacuum for Inground Pools up to 1615 sq.ft, Dual Filtration, Smart Navigation, App Support
Powerful Suction + Dual High-Efficiency Filtration: The Talosbo C1 features a triple-motor design for exceptional suction power.. Equipped...
As an affiliate, we earn on qualifying purchases.
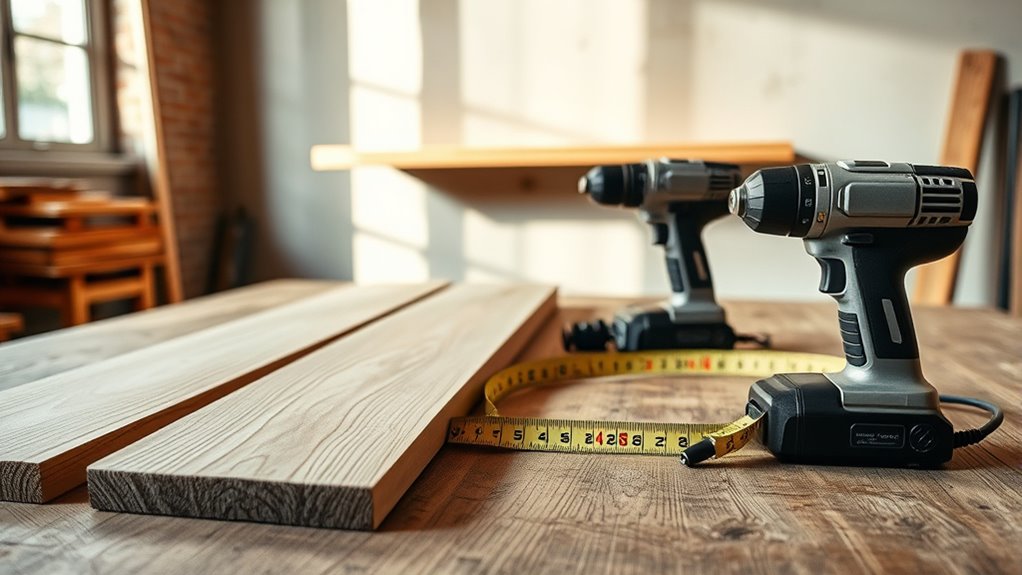
Gathering Materials and Tools

Start by collecting all the necessary materials, like plywood or reclaimed wood, cut to your desired length, along with supports. Gather the right tools, such as a drill, level, measuring tape, and saw, and make certain they’re in good condition. Using a high-quality airless paint sprayer can ensure your shelves are finished smoothly and efficiently if you choose to paint or stain them later. Don’t forget to pick suitable fasteners and finishing supplies to guarantee your shelves are sturdy and look great once installed. Additionally, considering essential oils for finishing touches or cleaning tools can help maintain a healthy environment during your project. Incorporating knowledge of sound vibrations can also enhance your understanding of material resonance and stability during assembly, which can contribute to overall structural integrity. Being aware of relationship dynamics can also help you create a space that fosters positive interactions and personal well-being.
Essential Supplies Checklist
Here’s what to gather:
- Wall mounting hardware like heavy-duty brackets or support cleats
- Sturdy lumber, such as plywood or pine, cut to your desired length
- Finishing supplies like paint, stain, or sealant for customization
- Consider using self watering plant pots or wall organization options to further enhance your decor flexibility.
- Having these supplies ready guarantees your project proceeds smoothly and your floating shelves stay secure for years.
- Additionally, choosing materials that complement your existing decor can enhance the overall aesthetic, making your space both functional and stylish.
Tool Preparation Tips
To guarantee your floating shelves are built accurately and safely, gathering the right tools and materials is essential. Start by collecting a drill, level, and stud finder, which are vital for precise placement and secure anchoring. Using a stud finder or similar equipment can help if you plan to finish the shelves with a coat of paint or stain afterward. The filtration system in your tools, such as dust collection attachments, can improve safety and cleanliness during assembly. Use the stud finder to locate wall studs, ensuring your supports are anchored into solid wood and preventing sagging over time. Check that your drill is in good condition and equipped with the appropriate bits for your screws and wall anchors. Gathering materials like plywood or wood planks, support brackets or cleats, screws, and wall anchors to ensure stability is also crucial. Prepare your workspace with measuring tape, pencil, safety goggles, and ear protection. Having all tools ready and in working order streamlines the process and guarantees a safe, successful installation. Additionally, familiarizing yourself with industry standards can help ensure your project meets safety and durability requirements.

iGarden Robotic Pool Cleaner K Series, Cordless Pool Vacuum Robot for Inground & Above Ground Pools, Smart Navigation, Touchscreen, Self-Parking, Cleans Floor, Wall & Waterline, 150 Min
Robust Cleaning Capability: Engineered with a turbine-grade impeller, an optimized flow system, and 3 brushless motors, the cordless...
As an affiliate, we earn on qualifying purchases.
Locating Wall Studs and Marking Support Positions
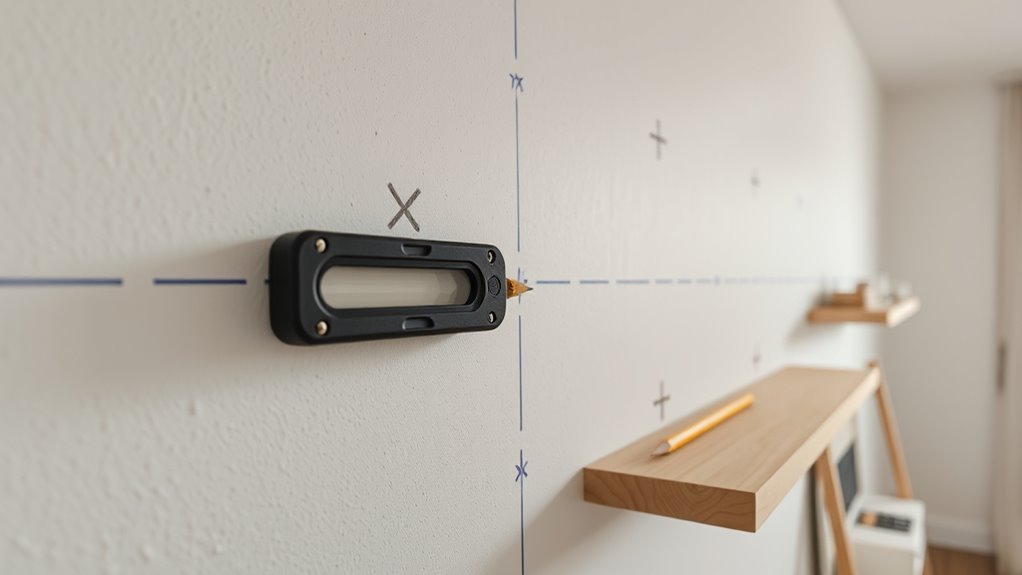
Start by using a stud finder or tap along the wall to locate the studs behind the drywall or tile, marking each point with a pencil. Incorporating ergonomic furniture and proper lighting can further enhance the comfort and efficiency of your workspace. For tiled walls, use a magnet or deep sensor to find metal brackets or studs and mark their positions carefully. Confirm the locations by gently probing or drilling small test holes before marking your support positions. Additionally, understanding wall structure can help prevent unnecessary damage during installation. Being aware of power sources and electrical wiring within the wall can also ensure safety during installation. Recognizing existing wiring patterns may further prevent accidental damage during drilling.
Use a Stud Finder
Using a stud finder is an essential step in locating the best support points for your floating shelves. It detects wall studs behind drywall using sensors or magnets, guaranteeing your shelves are securely anchored.
To use it effectively:
- Move the stud finder horizontally along the wall at a consistent height.
- Watch for signals indicating the presence of wall studs.
- Mark the edges of each stud with a pencil, then measure between marks to confirm spacing, usually 16 or 24 inches on center.
Always aim to drill into wall studs for maximum strength. If studs aren’t available, consider drywall anchors or heavy-duty toggle bolts.
Proper use of a stud finder helps ensure your floating shelves stay sturdy and safe.
Tap for Sound
Wondering how to find wall studs without a stud finder? Tap along the drywall to listen for a change in sound, indicating a stud behind the wall. Once you locate a solid spot, mark it with a pencil for your floating shelf support.
For added accuracy, measure from a corner or outlet to identify consistent stud spacing, usually 16 or 24 inches on center.
If you’re working with tile walls, use a deep sensor or special tile detector to find support points.
Before drilling pilot holes, confirm the stud location by tapping or measuring. Remember, anchoring your floating shelf into studs guarantees stability and weight support.
Use a level to keep your marks straight, and you’re ready to drill and install confidently.
Mark Support Locations
To guarantee your floating shelves are securely mounted, accurately marking the support locations is essential. Use a stud finder or tap along the drywall to locate wall studs behind the surface, then mark their positions with a pencil.
For tile or masonry walls, employ a deep sensor or a masonry drill with a carbide bit to identify solid mounting points.
Measure and record the distance between studs to determine ideal support placement, making sure supports are anchored into at least two wall studs for maximum strength.
Clearly mark the stud locations with a plumb line or level to ensure precise placement of brackets or cleats.
This careful support placement guarantees your shelves will hold securely and stay level over time.

(2026 New) AIPER Scuba V3 AI Vision Cordless Robotic Pool Cleaner, 10x Faster Pool Cleaning with AI Patrol, 24/7 Auto Cleaning, Smart Waterline Parking & Multi-Layer Filtration
10x Faster Pool Cleaning with AI Patrol System: Single front-facing AI camera detects over 20 debris types and...
As an affiliate, we earn on qualifying purchases.
Building the Support Framework With 2x4s
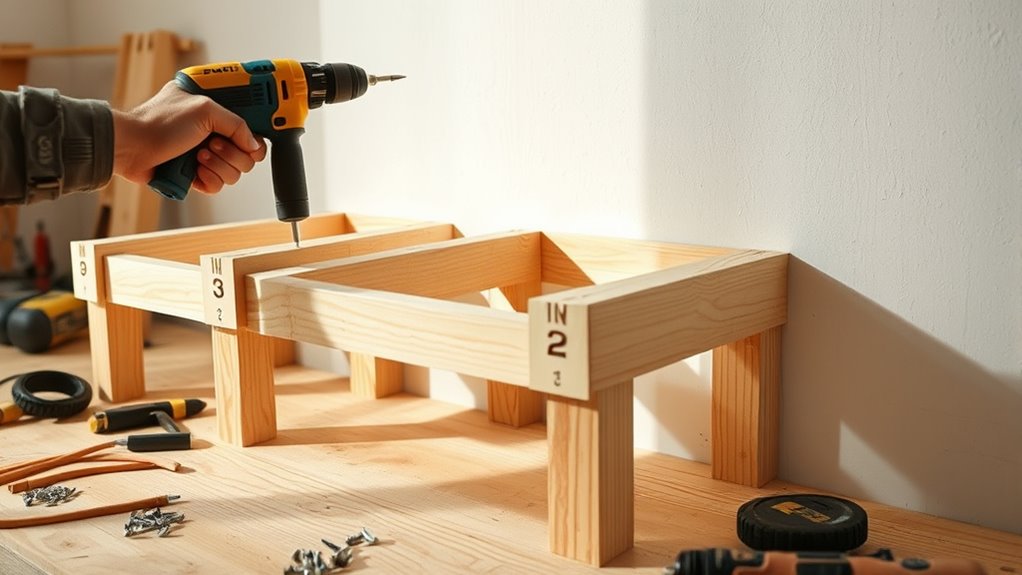
Start by measuring the width of your wall or the desired shelf length, then cut two pieces of 2×4 lumber to that length for the support framework. These 2x4s will serve as the main internal support, creating a sturdy backbone for your floating shelves.
Next, cut additional 2x4s into 14-inch pieces to form vertical supports or brackets.
Attach three sides of the internal support structure with 2.5-inch wood screws, spacing these supports about 12 inches apart for stability.
Secure the ladder-like support system to the wall using two 4-inch screws into each stud, ensuring everything is level.
This support framework provides a solid foundation, ensuring your floating shelves are both safe and durable.
Attaching Support Supports to the Wall

Attach the support framework securely to the wall by driving two 4-inch screws into each wall stud. Use a stud finder to locate the studs accurately, ensuring sturdy support. Verify that the supports are perfectly level before tightening the screws to prevent uneven shelves.
If you can’t find studs in the desired location, use wall anchors or heavy-duty toggle bolts for stability. Make sure the supports are spaced about 12 inches apart to evenly distribute weight and avoid sagging.
Check for any imperfections in the support pieces and make gentle adjustments so they sit flush and level. Properly securing the supports now will give your floating shelves a solid foundation and a clean, professional look.
Finishing the Support Structure With Paint or Stain
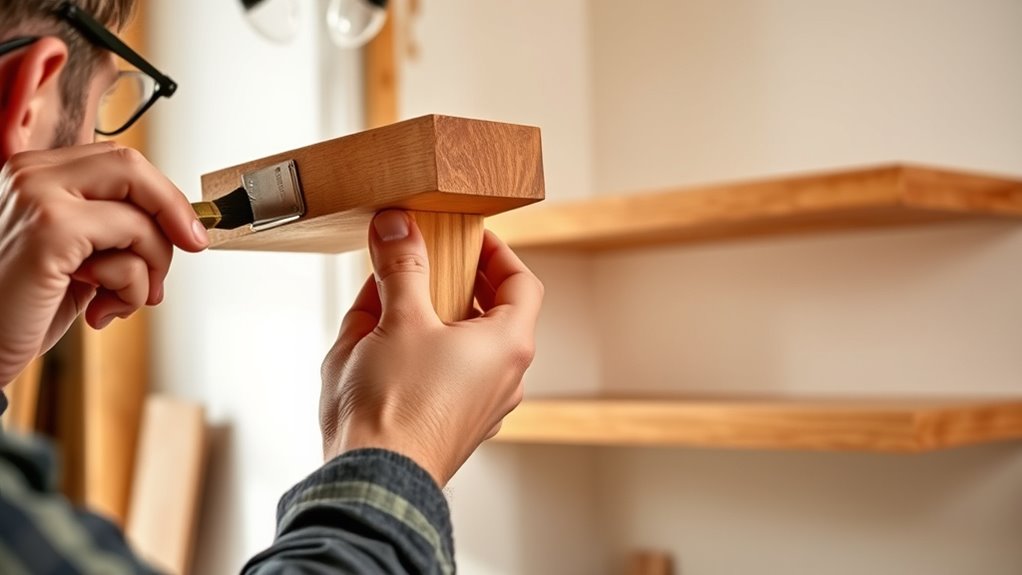
Before attaching your support beams, applying paint or stain helps hide imperfections and creates a smooth, uniform look.
Make sure to use an even coat with a brush or roller and let it dry completely according to the instructions.
Once dry, light sanding and a protective topcoat can boost durability and give your shelves a professional finish.
Surface Preparation Techniques
Applying paint or stain to the support structure before assembly is a smart step to achieve a smooth, even finish and minimize touch-up work later.
To guarantee the best results, start by lightly sanding all support pieces with fine-grit sandpaper (220 grit). This step improves adhesion and creates a polished look.
Use a brush, roller, or cloth to apply thin, even coats of paint or stain, avoiding drips and ensuring consistent coverage on all surfaces.
Allow each coat to dry completely—usually 2-4 hours for stain and longer for paint—before handling or assembling.
For added durability, consider applying a clear sealer or topcoat over the finished supports to protect against moisture and wear.
Proper surface prep results in a professional-looking, long-lasting finish.
Choosing Appropriate Finishes
Choosing the right finish for your support structure is key to achieving a polished look and ensuring durability. Whether you opt for stain or paint, applying the finish before assembly helps create an even, smooth surface and reduces mess.
Staining highlights the natural wood grain, so use a pre-stain conditioner to prevent blotchiness and ensure consistent color. When painting, apply multiple thin coats, letting each dry thoroughly, to avoid drips and achieve a professional appearance.
Consider your decor style when choosing the finish: stain enhances the wood’s natural beauty, while paint offers a clean, uniform look. Finishing supports beforehand gives you better control over color and minimizes difficulties during installation, resulting in a sleek, cohesive final result.
Application and Drying Process
Once you’ve applied your chosen finish to the support beams, it’s important to give the paint or stain enough time to dry completely. Proper drying guarantees a smooth, durable finish and prevents smudges or damage during installation.
Follow the manufacturer’s recommended drying time, usually between 2-4 hours or overnight for best results. During this period, keep the supports in a dust-free area.
- Use a fan or good ventilation to speed up the drying process
- Avoid touching or moving supports until fully dry
- Consider applying a clear topcoat for extra protection after drying
Allowing the paint or stain to dry thoroughly guarantees a professional look and long-lasting support structure for your floating shelves.
Cutting and Preparing Plywood Shelves
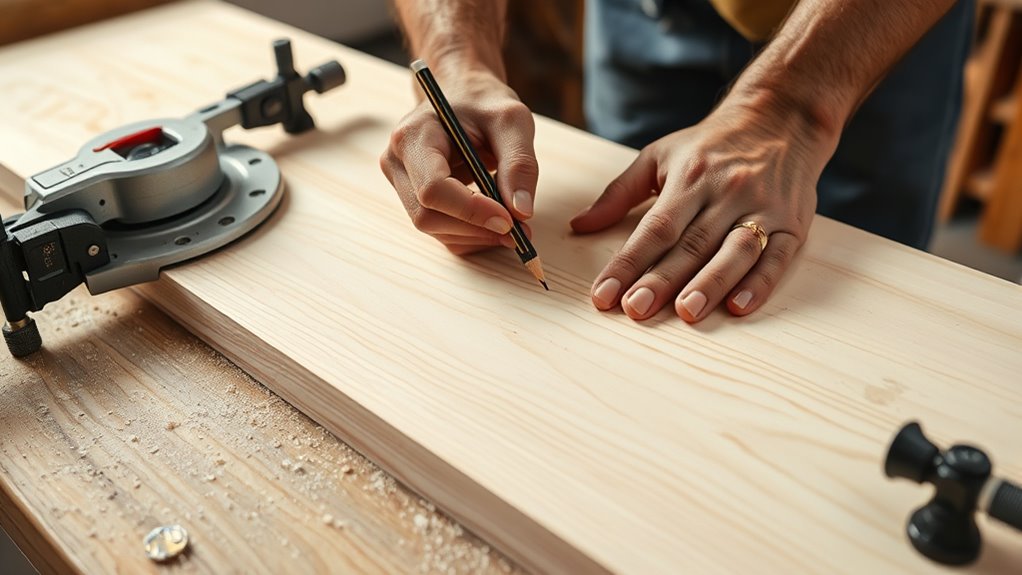
Before assembling your floating shelves, you’ll need to carefully measure and cut your plywood panels to the desired size. Use a tape measure to determine the length, adding extra for overhangs or mitered edges if needed.
Make precise cuts with a table saw or circular saw guided by a straightedge to ensure clean, straight lines. After cutting, sand the edges and surfaces lightly to remove splinters and create a smooth finish. This step is essential for a professional look and safe handling.
If your design requires narrower strips for supports or face frames, rip the plywood accordingly, maintaining consistent width and length.
Always test fit your cut panels in the intended space, making adjustments as necessary for a snug, level fit before proceeding.
Installing the Shelves Onto the Support System
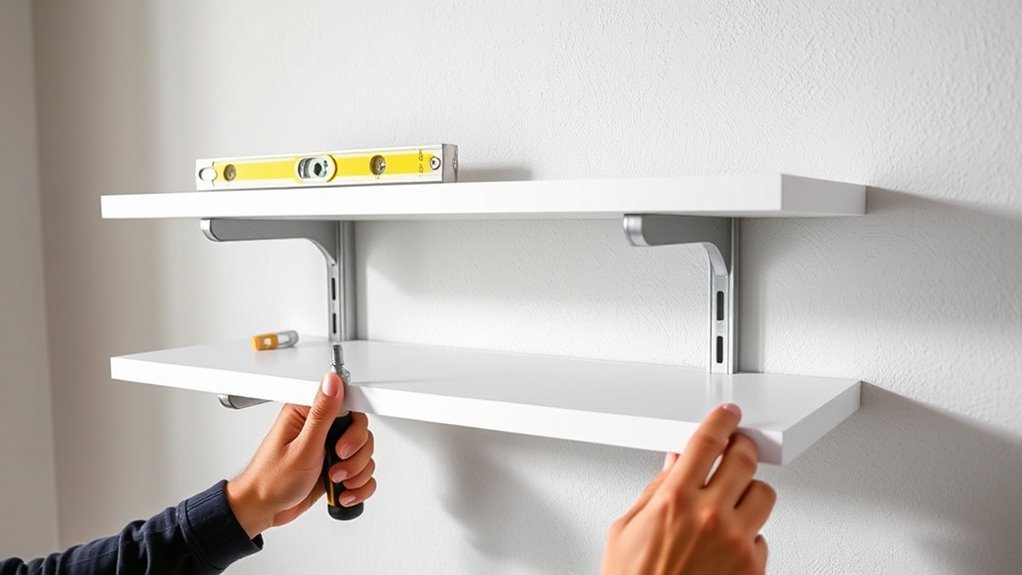
To install your shelves onto the support system, start by securing the framework to the wall. Use floating shelf brackets or support framework, driving screws into each stud at the support points. Make certain the brackets are level and flush to provide a sturdy base.
Once the support framework is in place, carefully slide the plywood shelf onto the mounted supports or cleat. Secure the shelf with additional screws or hidden fasteners from underneath or inside to prevent movement.
Carefully slide the plywood shelf onto supports and secure from underneath to ensure stability.
Double-check the level and stability of the shelf before finalizing. This step guarantees your floating shelves are secure and visually seamless.
- Verify support framework alignment and levelness
- Properly secure floating shelf brackets or cleats
- Double-check stability before finishing
Adding Final Touches and Aesthetic Details
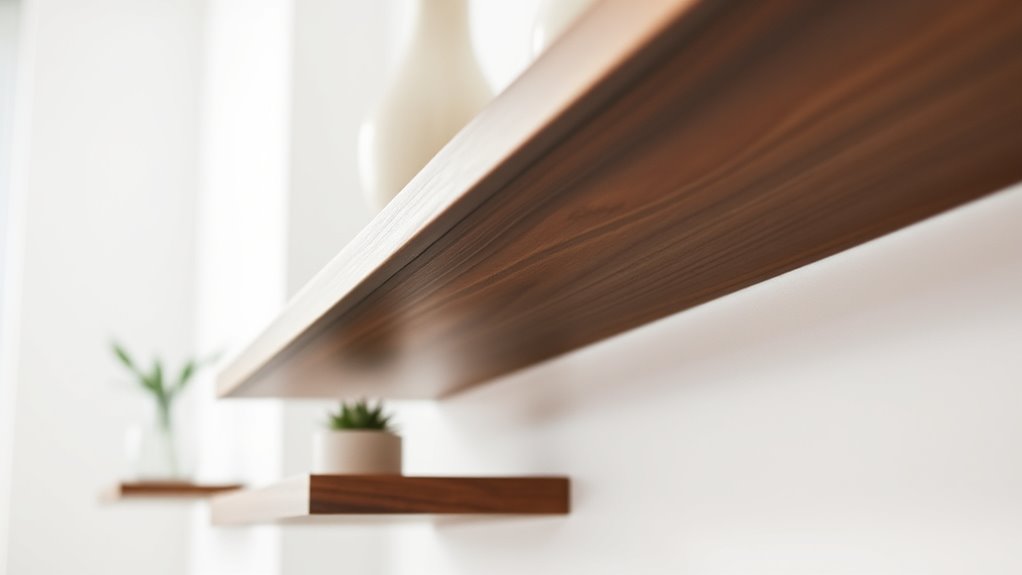
Adding final touches and aesthetic details can transform your floating shelves from basic storage to stylish focal points. Start by properly filling nail holes and sanding rough edges to create a seamless, professional look.
Finishing touches like painting, staining, or sealing not only enhance the shelves’ appearance but also improve their durability, helping them match your decor style perfectly. Consider adding decorative elements such as trim, molding, or edge banding to give your shelves a polished, custom feel.
Applying a protective top coat like polyurethane or wax shields your shelves from moisture and scratches over time. Finally, style your shelves with curated decor, props, or lighting to elevate the overall aesthetic and make your space feel complete and inviting.
Tips for Ensuring Stability and Load Capacity
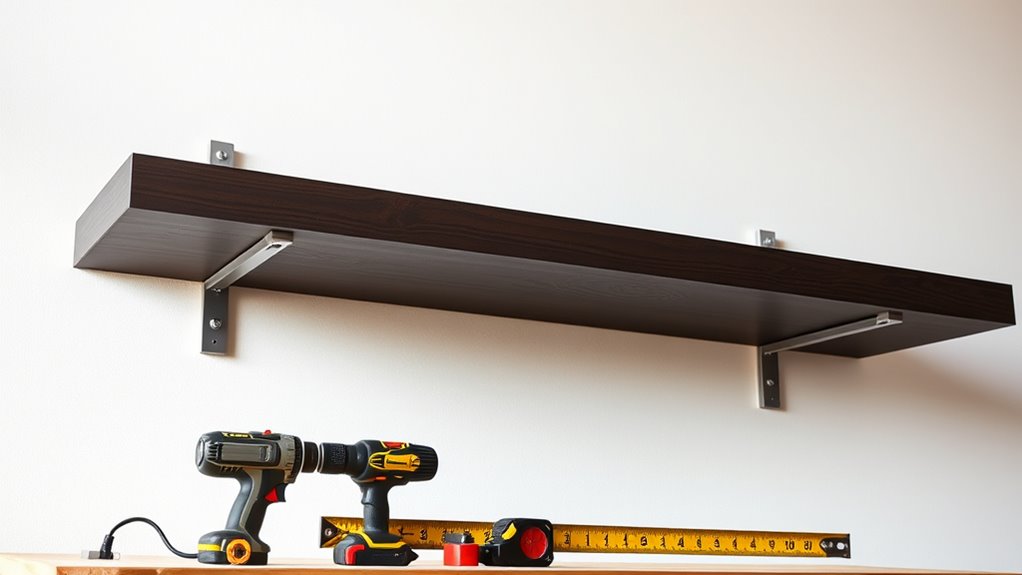
Ensuring your floating shelves stay secure and can handle the weight you plan to put on them starts with proper support installation. First, use a stud finder to locate wall studs, ensuring support brackets are anchored into solid wood for maximum load capacity. Secure each support bracket or ladder system with at least 3-inch screws into the studs to increase strength.
To distribute weight evenly and prevent sagging, space multiple supports every 12 inches for longer shelves. For heavier loads, upgrade support materials—like switching from 2x4s to 2x6s—or add extra brackets. When studs aren’t available, use rated toggle bolts or hidden support brackets.
Always verify that supports are level and firmly anchored before placing items, maintaining stability under load.
Frequently Asked Questions
What Is the Cheapest Way to Make a Floating Shelf?
Ever wondered how to make a floating shelf on a budget? You can keep costs low by using inexpensive materials like 1×4 or 1×6 lumber, or repurposed scrap wood.
Skip fancy finishes and opt for a natural or painted look.
Support brackets and cleats are affordable, easy to install, and reliable.
Why spend more when you can craft a sturdy, stylish shelf with simple, inexpensive supplies?
What Is the Rule for Floating Shelves?
The rule for floating shelves is to guarantee they’re properly supported by hidden brackets or cleats inside the wall, giving a floating appearance.
You should support the shelf based on its width and weight, typically using a support length that’s 1.5 to 2 times the depth of the shelf.
Always anchor into wall studs or use heavy-duty anchors to prevent sagging, and measure carefully for a level, stable installation.
How Much Weight Can a DIY Floating Shelf Hold?
Think of your shelf as a bridge between two mountains, supporting your treasures. A DIY floating shelf can typically hold between 50 to 100 pounds when anchored into wall studs, but heavy-duty brackets or toggle bolts can boost that.
The materials, construction, and support matter most. For heavier loads, use thicker wood, extra brackets, and solid anchoring to keep your “bridge” strong and secure.
What Holds Floating Shelves in Place?
You might wonder what holds floating shelves in place. Typically, hidden brackets or cleats are used, mounted securely into wall studs or anchors. These supports are concealed, giving the shelf a floating appearance.
You’ll want to guarantee the hardware is high quality and properly installed to keep the shelf stable. Sometimes, the shelf is glued or screwed to the supports for extra security, preventing any movement or sagging.
Conclusion
Now that you’ve built your floating shelves, you’re all set to showcase your favorite items with pride. Just remember, a stitch in time saves nine—taking the extra care during installation guarantees your shelves stay sturdy and look great for years to come. With a little patience and attention to detail, you’ve turned a simple project into a stylish addition to your home. Enjoy your handiwork and the extra charm it brings to your space!