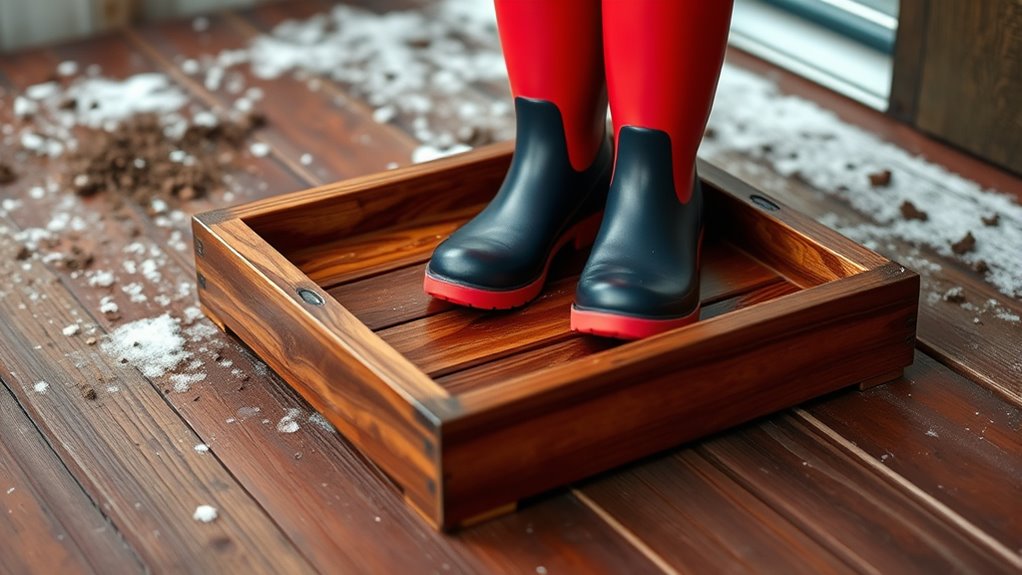

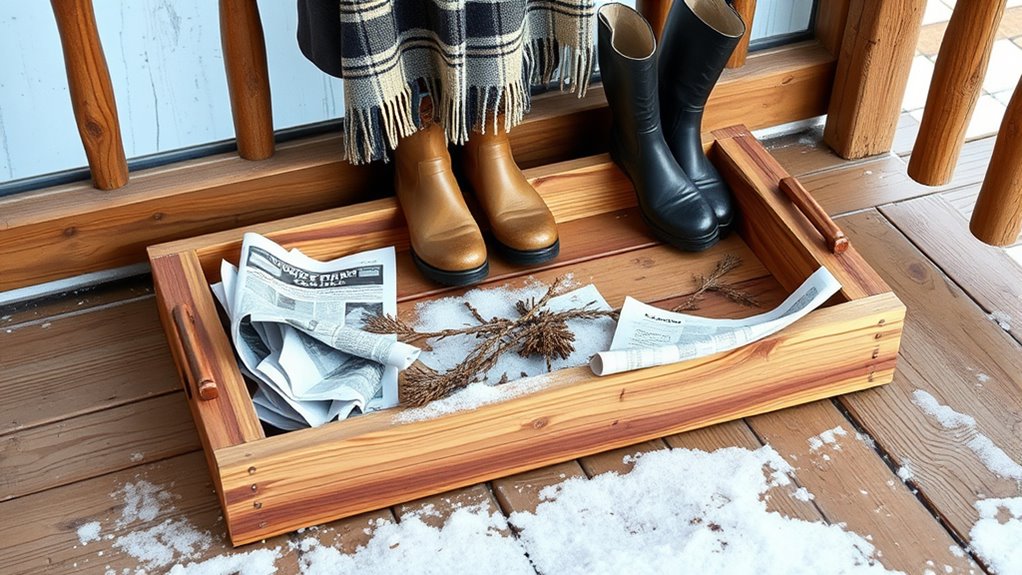
To build a simple winter boot tray, start by measuring your boots and entryway space, adding at least 2 inches for comfort. Choose durable, weather-resistant materials like scrap wood or plastic containers. Cut and assemble an outer frame with mitered corners, and attach a waterproof layer or drainage material inside. Finish by sanding, sealing, or painting to protect against moisture. If you keep going, you’ll find detailed steps to create a functional, long-lasting boot tray.
Key Takeaways
- Measure your boots and entryway to determine the appropriate size and ensure a comfortable fit.
- Choose durable, weather-resistant materials like repurposed wood, plastic, or metal for longevity.
- Construct the tray with mitered corners, secure with glue and nails, and ensure proper fit and stability.
- Add a waterproof layer and drainage options such as gravel or mesh to prevent water buildup.
- Finish with a sealant or waterproof paint, and regularly clean and inspect the tray for maintenance.
Gathering Materials and Tools Needed
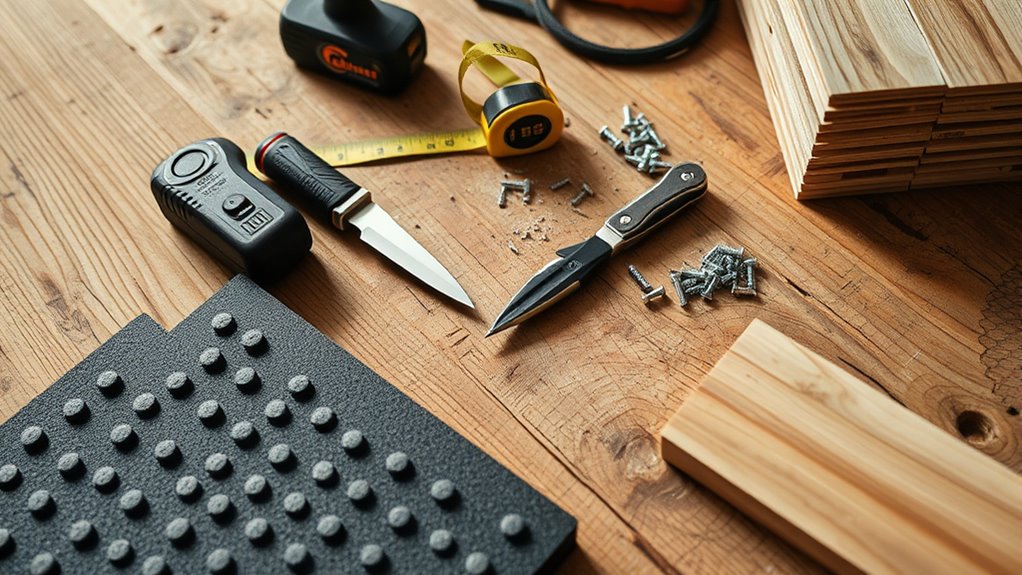
To build a simple boot tray for winter, start by gathering common materials like repurposed baking sheets, plastic containers, or scrap wood for the frame. These items make great DIY boot trays because they’re easy to find and cost-effective. Additionally, selecting materials with good water resistance ensures your tray remains durable and functional during wet conditions. Incorporating versatile designs can help your tray adapt to different footwear sizes and shapes, increasing its effectiveness. You’ll also need essential tools such as a saw, drill, measuring tape, screwdriver, and sandpaper to cut, assemble, and finish your project. Incorporating weatherproofing techniques can further extend the longevity of your boot tray by protecting it from harsh winter elements. For drainage, consider adding river rocks, plastic grating, or mesh inside the tray to let water escape from wet footwear. Using proper sealing methods can prevent moisture from seeping into the materials, enhancing durability. When choosing materials, focus on durability and water resistance to ensure your boot tray withstands seasonal moisture and mud. Many DIY boot tray projects rely on items you already have at home or can find secondhand, making your project budget-friendly and eco-conscious.
Measuring and Planning Your Boot Tray
Start by measuring your boots’ length, width, and height to find the right tray size. Adding a bit of extra space, such as at least 2 inches to the widest boot measurement, will help accommodate different footwear styles and ensure ease of placement and removal. Record your measurements carefully and sketch out your plan before selecting materials or cutting any wood. Remember that Self Watering Plant Pots can develop off-smell, discoloration, and separation, so choosing fresh, properly stored materials will help maintain the quality of your boot tray. Additionally, considering optimal angles for pinball machines can inspire you to design a tray that maintains stability and prevents balls from rolling out unexpectedly. When planning your tray, keep in mind that proper juice cleansing techniques can influence overall health and the longevity of your homemade boot tray, as well as ensuring your materials stay in good condition over time. Being aware of material storage practices can also help prevent mold or deterioration over the seasons.
Choosing the Right Size
When choosing the right size for your boot tray, measuring accurately is crucial to guarantee a proper fit. Start by measuring your largest pair of boots and add at least 2 inches for comfort. Deciding on the width based on how many pairs you plan to store, usually between 14 to 20 inches for standard sizes, ensures ample space. The height should be around 3 to 4 inches to contain melting snow and slush without overflowing. Remember to take into account your entryway space so the tray doesn’t block door movement. A well-measured DIY Boot Tray ensures all footwear fits comfortably and stays contained. Additionally, consider filtration and pump protection when selecting materials or colors for your tray, as positive associations can enhance your overall environment. Incorporating durable materials that resist moisture and wear can extend the lifespan of your tray and maintain its functionality over time. Moreover, choosing materials with weather-resistant properties can help prevent damage from winter elements and ensure your tray remains functional for multiple seasons. Properly selecting the size and materials of your boot tray can also contribute to electric heated mattress pads safety by preventing moisture buildup and potential electrical issues.
Considering Entryway Space
Measuring your entryway space is essential to guarantee your boot tray fits comfortably without blocking door movement or creating congestion. Start by measuring the length, width, and height of the area where you plan to place the tray.
Consider the size of your largest pair of boots and add at least 2 inches for ease of placement. It’s also important to evaluate the available space to ensure the boot tray won’t obstruct foot traffic or door operation.
Sketching a rough layout can help you visualize how the tray will fit alongside existing entryway furniture and accessories.
Whether you opt for a standard-sized tray or plan for a custom build, understanding your entryway space ensures your boot tray will be functional and unobtrusive during winter months.
Measuring Boot Dimensions
To guarantee your boot tray fits all your footwear comfortably, you need to measure the length and width of your tallest boots accurately. This step ensures your tray can accommodate every pair without cramming. Adding at least 2 inches to the maximum boot length and width for extra space and easy placement helps create a more comfortable fit. Use a tape measure or ruler for precise measurements, recording them carefully. Think about how many boots you want to fit at once to decide on the tray size. Also, consider your entryway or mudroom space to select a tray that doesn’t block walkways. Remember that necessary cookies enable basic functionalities like secure log-in, which can be useful when managing your measurements and planning. Taking into account self-awareness can also help you better understand your storage needs and habits, leading to a more efficient organization.
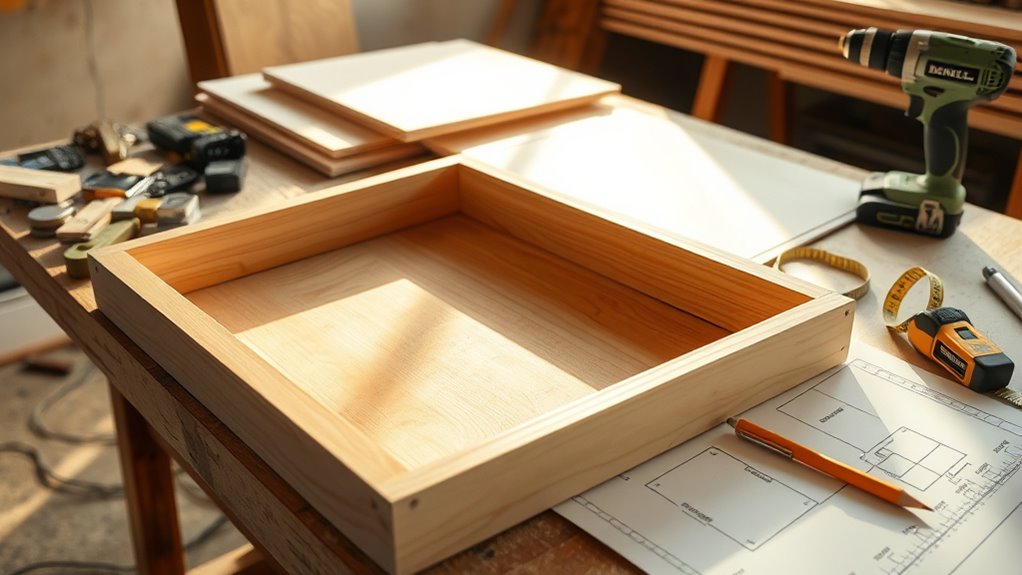
Cutting and Assembling the Inner Frame
Start by measuring the length and width of your dish-drying rack to determine the size of your inner frame, such as 20½” by 13”. Use these measurements to cut four pieces of 1×2 lumber: the short sides should be the rack width minus 1½”, and the long sides match the rack length. Sand the ends of each piece to smooth any rough edges. To assemble the inner frame, pre-drill holes at each corner to prevent splitting. Then, nail the pieces together with ⅝” finish nails, ensuring a secure fit. Before attaching the floor, confirm the inner frame fits snugly inside the outer frame to provide proper support for your boot tray. Additionally, verify the proper fit to ensure stability and durability of the finished tray. Checking the structure strength can help ensure the frame holds up over time. Incorporating material stability considerations can further improve the longevity of your project. Ensuring proper alignment during assembly will also contribute to a more durable and functional boot tray. Paying attention to design principles, such as balanced joints and even weight distribution, can enhance overall stability.
Creating the Outer Frame With Mitered Corners
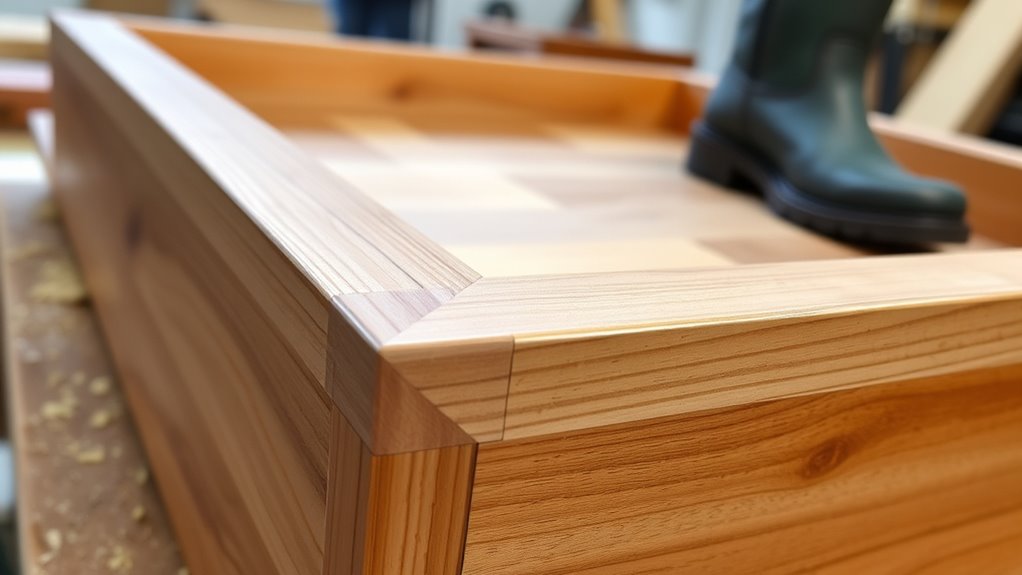
Before assembling the outer frame, measure and mark the overall dimensions, adding the width of your chosen molding to the inner frame measurements to guarantee a proper fit. Use a miter box to cut the bullnose stop moulding at 45º angles for precise corners. Dry fit the mitered pieces to check alignment and make adjustments if needed. Once satisfied, apply wood glue to the mitered joints and secure them with 1 ¼” finish nails for a tight fit. Wrap tape around the cut ends of the moulding to prevent splintering during cutting and assembly. Incorporating visual and auditory cues can help ensure accurate measurements and cuts, especially when working with detailed molding. Remember that proper technique can significantly improve the quality and durability of your finished project. Additionally, understanding Gold IRA rollovers can provide insight into alternative investment strategies for long-term financial security. Being aware of automation in business can also inspire innovative approaches to streamline your DIY projects and improve efficiency.
Attaching the Outer Frame to the Inner Structure
Once you’ve prepared the outer frame and confirmed that the mitered corners are accurate, you can begin attaching it to the inner structure. Measure and cut the molding to match the outer dimensions, guaranteeing the 45º mitered corners fit snugly.
Wrap masking tape around the cut ends of the molding to prevent splintering during cutting. Dry fit the pieces to verify proper alignment before gluing.
Apply wood glue to the mitered joints, then position the outer frame onto the inner structure, raising it about ¼” for clearance. Secure each piece with 1 ¼” finish nails, making sure the frame is flush and square using a level or straightedge.
This process ensures a sturdy, well-aligned outer molding that complements the inner structure.
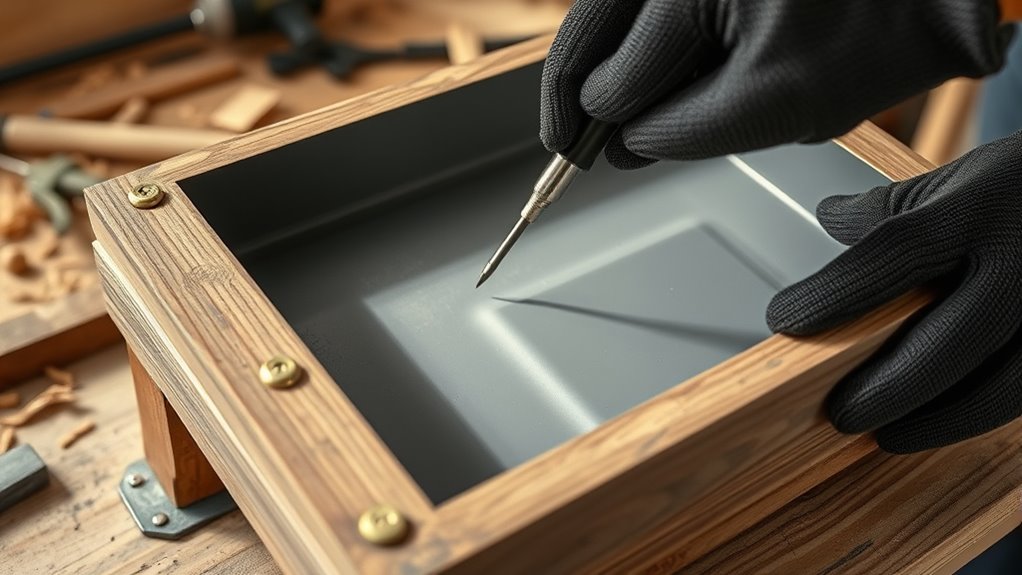
Adding a Waterproof Mat or Drainage Layer
To guarantee proper drainage and prevent water damage, you should add a waterproof layer, such as a heavy-duty plastic sheet or pond liner, beneath your drainage material. This waterproof mat acts as a barrier, stopping water from seeping into the base of your boot tray.
To verify effectiveness, consider these tips:
- Use durable materials like pond liner or heavy-duty plastic sheeting
- Place the drainage layer, such as gravel or river rocks, above the waterproof mat
- Seal the edges with waterproof tape or caulking to prevent leaks
- Regularly inspect and replace the waterproof layer as needed
- Ensure the drainage layer remains unobstructed for proper runoff
This setup keeps your tray dry and prevents mold or deterioration over time.
Finishing Touches: Sanding, Painting, and Sealing
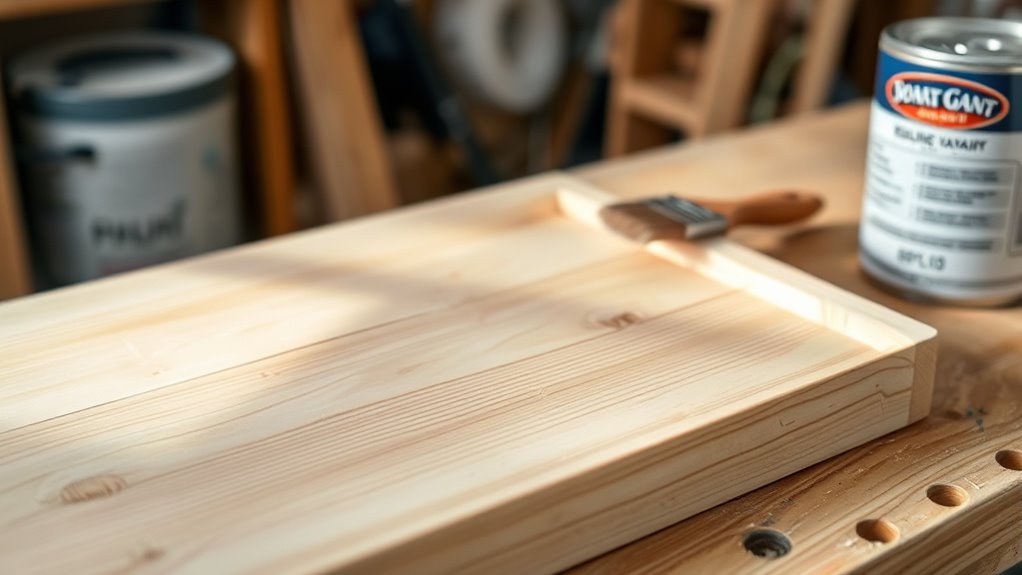
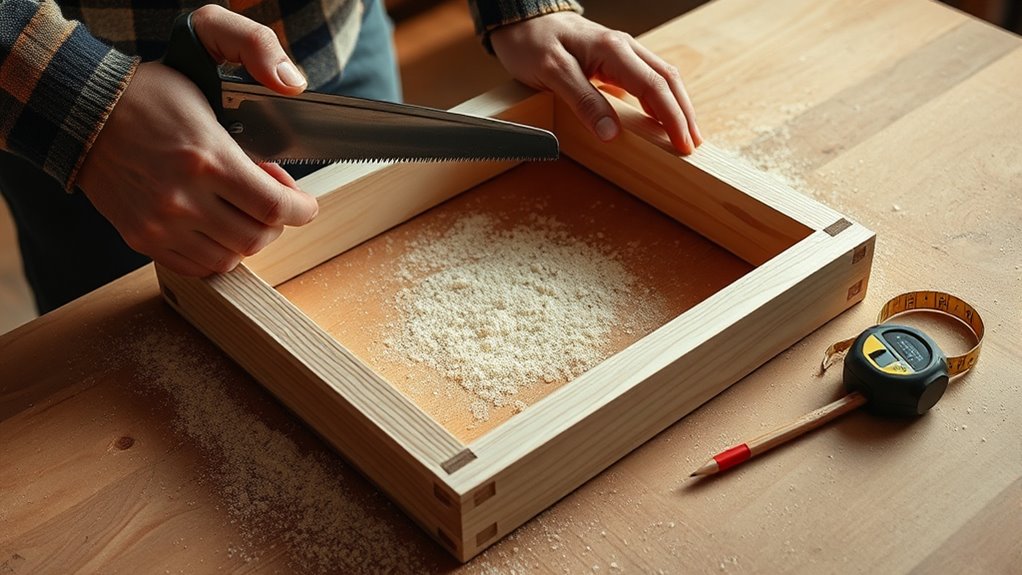
After installing the waterproof layer and drainage system, the next step is to give your boot tray a polished finish. Start by sanding the surface with 220 grit sandpaper to smooth rough edges and prepare it for painting or sealing. This step guarantees a clean, even surface that enhances adhesion.
Next, apply a primer if you plan to paint, which improves durability and helps the paint stick better. Once primed, add multiple thin coats of outdoor or waterproof paint for even coverage.
After the paint dries, seal the wood with a waterproof sealant to protect against moisture, especially in winter. Use multiple thin coats of sealant, allowing each to dry fully before applying the next, for a long-lasting, professional finish.
Tips for Using and Maintaining Your Boot Tray
Maintaining your boot tray guarantees it stays functional and extends its lifespan, especially during the busy winter months. To keep your wet shoe rack in top shape, regularly empty and clean it to prevent mold and odors from trapped moisture. Use a brush or hose to remove mud and dirt buildup after snowy or rainy days.
Place the tray in a well-ventilated area so it can dry completely between uses, reducing rust or warping. Periodically inspect it for signs of damage or wear, repairing or replacing as needed. For added durability, consider applying a weatherproof or waterproof coating.
- Empty and clean after each use
- Remove mud and dirt with a brush or hose
- Keep in a ventilated area to dry thoroughly
- Check for damage regularly
- Apply a waterproof coating
Frequently Asked Questions
What Can I Use Instead of a Boot Tray?
When you wonder what to use instead of a boot tray, consider repurposing household items. You can turn an old baking sheet or cooling rack into a DIY tray that drains and allows airflow.
Plastic storage bins with holes work well too. For a quick fix, a rubber door mat with drainage holes can be perfect.
Even shallow trays or natural elements like river rocks inside a wooden frame serve as eco-friendly options.
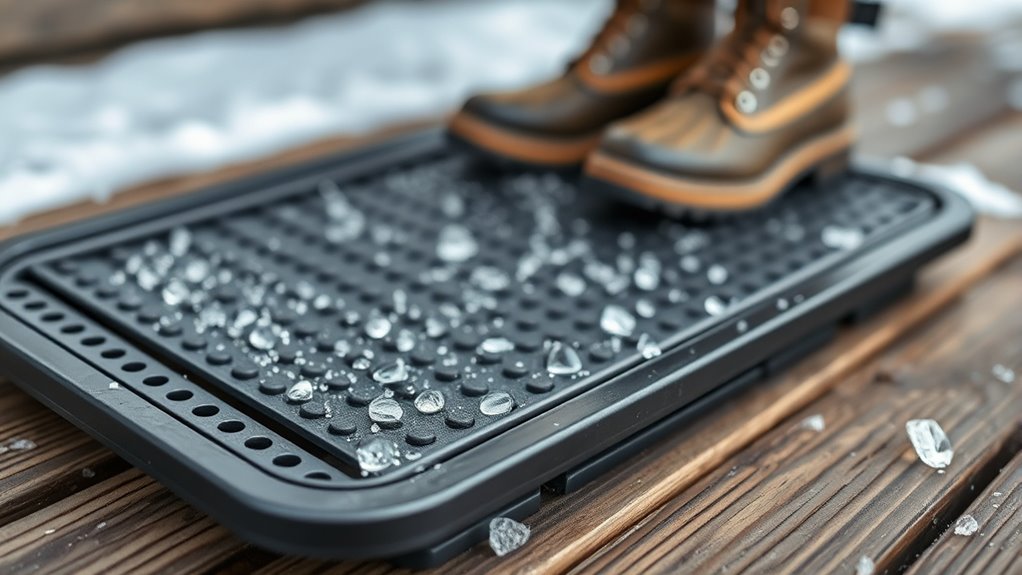
What Is a Boot Tray Used For?
Imagine coming home after a snowy day, your boots covered in mud and snow. A boot tray catches all that mess, keeping your floors clean and dry.
It’s used to collect water, mud, and dirt from your footwear, preventing damage and mess inside. Whether you have kids or pets, a boot tray simplifies cleanup, making your entryway safer and more organized during winter’s wet, muddy months.
Conclusion
Your boot tray is more than just a catchall for snow and mud—it’s a symbol of warmth and readiness. With each step, it welcomes you home, protecting your space and embracing the season’s chill. By building it yourself, you create a little sanctuary of order amid winter’s chaos. Keep it maintained, and it’ll stand as a quiet reminder that even the smallest effort can bring comfort and clarity to your busy days.