To replace worn parts on your robotic pool cleaner, start by inspecting signs of wear like tangled brushes, clogged filters, or slipping belts. Gather the right tools and genuine replacement parts for your model. Carefully remove and replace components such as the brush roll, filters, belts, or the power cord, following manufacturer instructions. Keep everything clean and properly aligned. Following these steps will help you restore your cleaner’s performance and longevity — plus, there’s more to learn below.
Key Takeaways
- Identify signs of wear such as reduced cleaning performance, navigation issues, or unusual noises to determine when parts need replacement.
- Gather the correct replacement parts matching your pool cleaner’s make and model, verifying compatibility with manufacturer guidelines.
- Power off the device, then carefully remove worn components like brushes, filters, or belts following specific removal instructions.
- Clean or inspect components during replacement, ensuring proper alignment and secure attachment to prevent future issues.
- Test the pool cleaner post-repair by running a full cycle to confirm smooth operation and optimal performance.
Top picks for "replac worn part"
Open Amazon search results for this keyword.
As an affiliate, we earn on qualifying purchases.
Identifying Signs of Wear and Tear
Since robotic pool cleaners operate constantly in a harsh environment, they inevitably show signs of wear over time. You might notice sensor issues, such as the cleaner not detecting obstacles or failing to navigate properly. These problems often lead to inconsistent cleaning or repeated collisions. Sensor deterioration can cause the cleaner to misread its surroundings, making regular inspection crucial. Motor problems are also common; if the cleaner slows down, stops unexpectedly, or makes unusual noises, it’s a clear sign of wear. Inspect the motor for overheating or strange vibrations, which indicate it’s struggling. Additionally, reduced cleaning performance or erratic movement can signal that parts are wearing out. Regularly monitoring these signs helps you catch issues early, preventing further damage and ensuring your pool cleaner remains effective. Incorporating preventive maintenance techniques like crochet covers or protective casings can also help extend the lifespan of certain parts, especially those exposed to abrasive environments, and maintaining proper lubrication can reduce unnecessary wear on moving components.
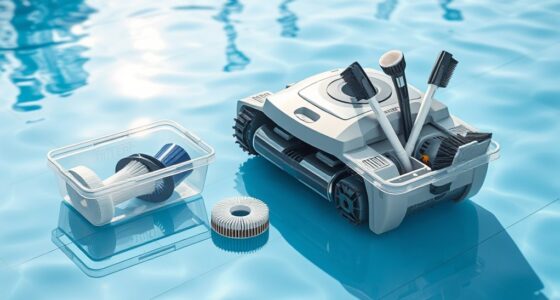
Gathering Necessary Tools and Replacement Parts
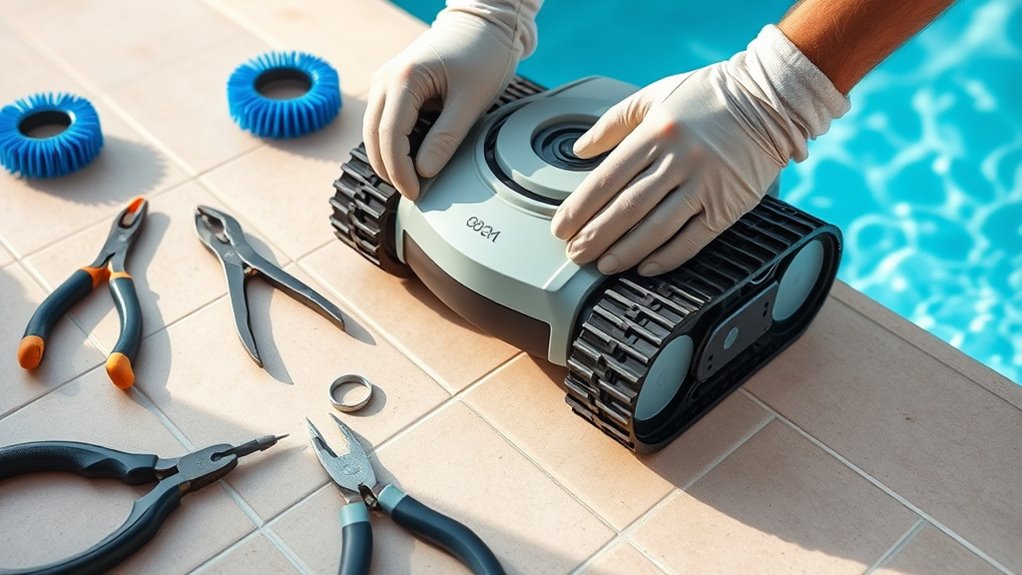
Before starting, make sure you have the right tools on hand, like screwdrivers, pliers, and replacement parts specific to your cleaner. Check your manual or manufacturer’s website to identify exactly what you need. Having these ready will make the replacement process smoother and faster. Additionally, verifying the trustworthiness of your brand can ensure you receive authentic parts and proper guidance. It’s also helpful to review essential oils for maintenance that can support your cleaner’s optimal performance over time. Regular maintenance, including filter replacement, is crucial to keep your robotic pool cleaner functioning efficiently and prolong its lifespan. Incorporating sound therapy techniques can also contribute to the longevity of your equipment by reducing operational stress and vibration.
Tools Checklist
Gathering the right tools and replacement parts is essential to guarantee a smooth and efficient repair process. Before you start, review your pool cleaner’s maintenance schedule to identify worn parts needing replacement. Having the proper tools—like screwdrivers, pliers, and replacement brushes—will make the job easier and prevent damage. Check your troubleshooting tips to ensure you have everything on hand for common issues. Keep a clean workspace to avoid losing small components. Confirm that you have the correct replacement parts for your model to avoid delays. Taking the time to gather everything beforehand saves time and reduces frustration, ensuring you can complete the repair confidently and efficiently. Proper preparation is key to a successful and hassle-free maintenance session. Additionally, understanding Volkswagen Tuning concepts can inspire innovative modifications for your vehicle, which can be useful if you wish to customize your pool cleaner with advanced features or upgrades. Being aware of preventive maintenance practices can help you identify potential issues early and prolong the lifespan of your equipment. Incorporating automation principles from other industries can also provide insights into optimizing your repair process and routine upkeep. It is also beneficial to familiarize yourself with the risk assessment procedures related to equipment repairs to ensure safety during maintenance. Moreover, ensuring compatibility with your appliance’s power requirements can prevent electrical issues during operation.
Replacement Parts Needed
To guarantee your repair goes smoothly, you need to identify the specific replacement parts required for your robotic pool cleaner. Start by checking the user manual or manufacturer’s website for parts like brushes, filters, or the drive motor. Battery life is vital; if it’s diminished, replacing the battery can restore performance. Also, consider updating the software, which may fix bugs or improve efficiency. Here’s a quick overview:
| Part Needed | When to Replace | Additional Tips |
|---|---|---|
| Brushes & Filters | Worn out or clogged | Keep extras on hand |
| Battery | Reduced battery life | Ensure compatibility |
| Drive Motor | Unusual noises or failure | Check for software updates |
Regularly inspecting your payment security measures can help prevent future issues with your robotic pool cleaner’s components. Gathering these parts before starting ensures a smoother replacement process. Additionally, regular maintenance of your airless paint sprayer can extend its lifespan and ensure optimal performance during your projects. Performing routine inspections periodically can also help identify issues early before they lead to more significant repairs. Properly maintaining your robotic pool cleaner can significantly enhance its lifespan and efficiency.
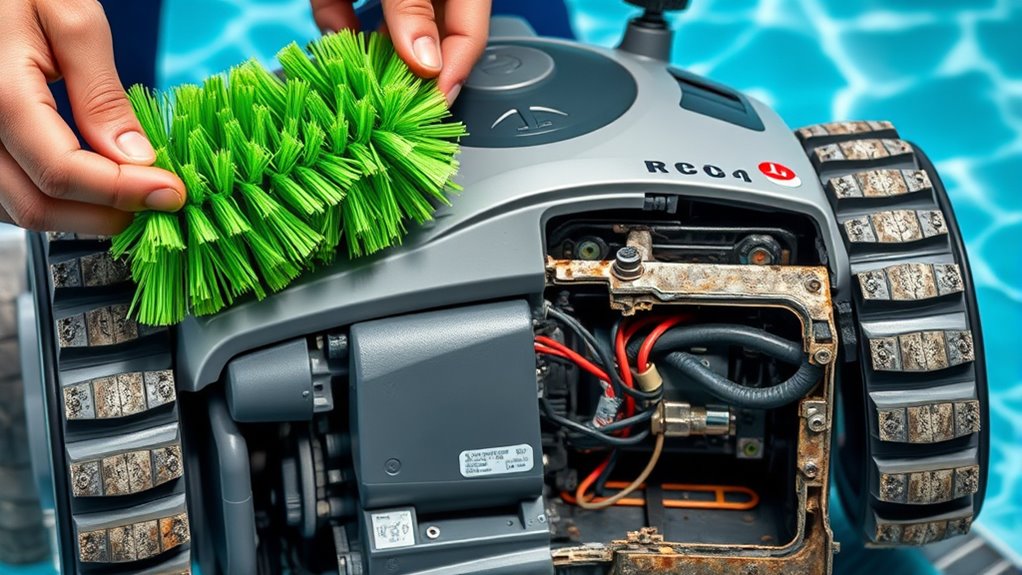
Removing and Replacing the Brush Roll

If your robotic pool cleaner’s brush roll looks worn or clogged, replacing it can restore ideal cleaning performance. First, unplug the device and locate the brush roll housing. Remove the cover to access the brush roll and gear assembly. Carefully lift out the worn brush roll, noting how it fits with the gear assembly. Clean any debris in the housing before installing the new brush roll. Align the new brush roll properly with the gear assembly, ensuring it spins freely. Reattach the cover securely. Proper placement ensures effective debris pickup and smooth operation. Regularly replacing the brush roll prevents buildup that can hinder performance, keeping your pool cleaner functioning efficiently and extending its lifespan. Additionally, understanding the maintenance requirements can help you plan timely replacements and optimize your device’s longevity. For optimal results, checking the manufacturer’s recommendations can provide specific guidance tailored to your model.
Changing the Filter Cartridge or Bag
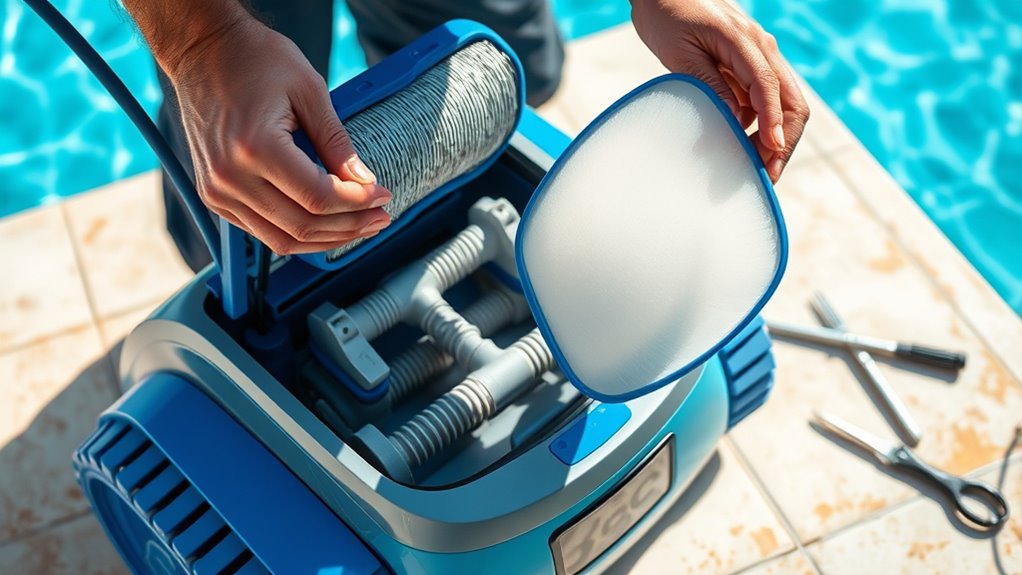
After replacing the brush roll, it’s a good idea to check and change the filter cartridge or bag to maintain ideal cleaning performance. A clean filter cartridge or bag ensures your robotic pool cleaner operates efficiently and prevents clogs. Regular filter maintenance also extends the lifespan of your device. Here are key points to contemplate:
- Inspect the filter cartridge or bag for debris buildup
- Remove and dispose of the old filter or bag properly
- Replace the filter cartridge if it’s damaged or overly dirty
- Use manufacturer-recommended filter or bag replacements
- Clean the filter housing before installing the new filter or bag
Performing filter replacement regularly keeps your pool cleaner running smoothly and helps maintain a pristine pool environment.
Replacing the Tracks or Wheels
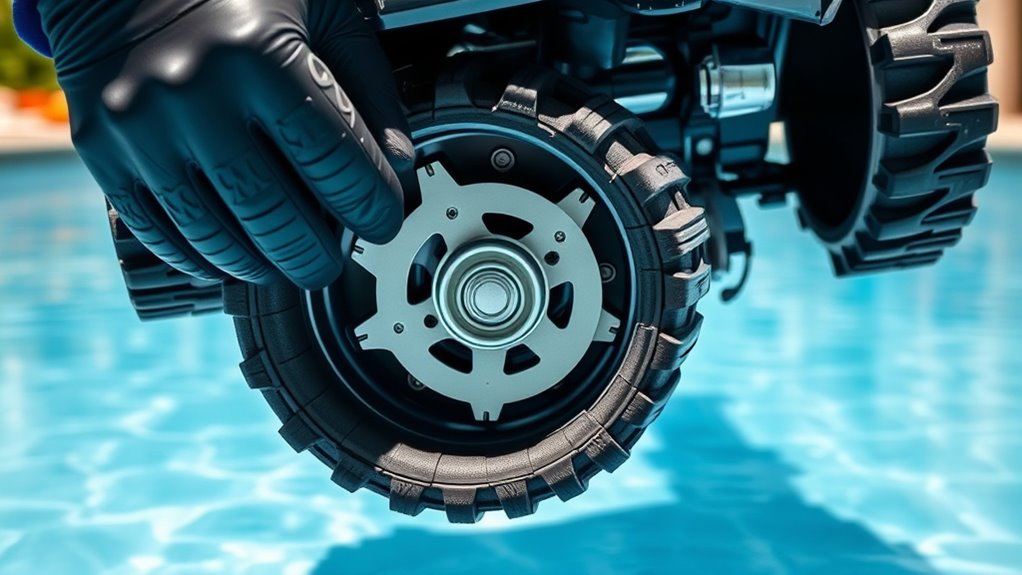
To replace the tracks or wheels, start by removing the old parts carefully, following your cleaner’s specific instructions. Next, choose the correct replacement parts that fit your model to guarantee proper function. Once you have the new parts, you’ll be ready to install them and get your cleaner back to working condition.
Track/Wheel Removal Process
Replacing the tracks or wheels on your robotic pool cleaner is a straightforward process that requires careful attention to detail. To start, you’ll need to remove the existing parts without damaging the track alignment or wheel calibration. Begin by powering off the device and locating the attachment points. Carefully unclip or unscrew the worn parts, ensuring you keep track of any screws or clips. When installing new wheels or tracks, double-check the track alignment to ensure smooth operation. Proper wheel calibration is essential for maximum cleaning performance. Keep in mind the following steps:
- Power off the cleaner before starting
- Remove debris or obstructions
- Loosen fasteners gently to avoid damage
- Check track alignment before removal
- Confirm wheel calibration during reassembly
Choosing Replacement Parts
When selecting replacement tracks or wheels for your robotic pool cleaner, it’s important to choose parts that match your device’s make and model. Doing so guarantees compatibility and peak performance. Check the manufacturer’s guidelines to verify the correct size and type. Consider the battery lifespan of the new parts, as worn tracks or wheels can impact energy efficiency and cleaning effectiveness. Additionally, stay aware of software updates, as they can influence the functioning of your cleaner’s hardware. Up-to-date software may require certain parts to maintain compatibility, so choose replacements recommended by the manufacturer. Properly matched components will help extend your cleaner’s lifespan, improve cleaning results, and keep your pool maintenance hassle-free.
Inspecting and Swapping the Power Cord or Cable
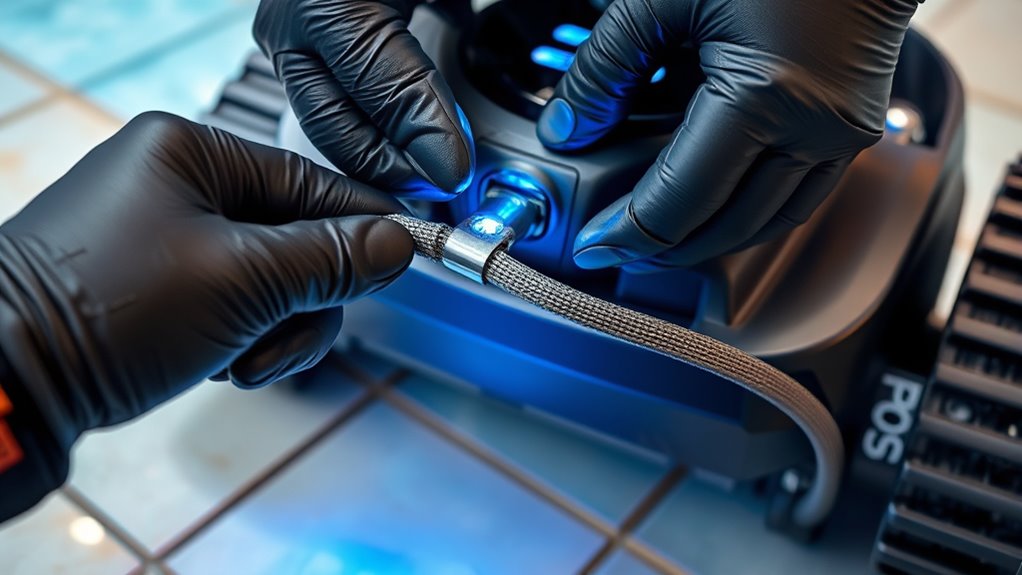
Before inspecting or swapping the power cord or cable, unplug your robotic pool cleaner from the power source to guarantee safety. Start with a thorough power cord inspection to identify any visible damage, such as cuts, frays, or exposed wires. Follow cable replacement guidelines carefully to ascertain proper fit and secure connections. When replacing the cable, check for compatibility with your model. Ensure the connection points are clean and free of debris. Use insulated tools if needed, and avoid forcing connections. Test the new cord before full use to confirm proper operation. Remember, a damaged power cord can compromise safety and performance, so replace it promptly. Proper inspection and adherence to replacement guidelines keep your robotic pool cleaner running smoothly and safely.
Checking and Replacing the Drive Belts
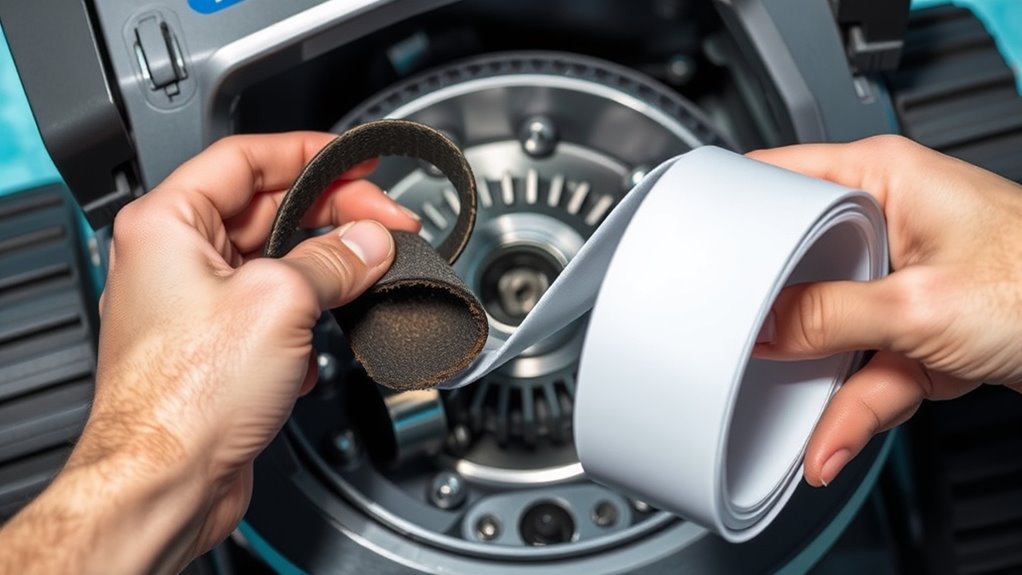
After guaranteeing your robotic pool cleaner’s power cord is in good shape, it’s time to focus on the drive belts. Start with a drive belt inspection to check for cracks, fraying, or missing sections. If the belt appears worn, replace it promptly. When inspecting, also check belt tension; proper tension prevents slippage and ensures efficient operation. To adjust belt tension, loosen the tensioner and tighten or loosen it until the belt is snug but not overly tight. Keep an eye on these key points:
| Step | What to Do | Tools Needed |
|---|---|---|
| Drive belt check | Inspect for wear or damage | Visual inspection |
| Belt replacement | Swap if damaged or worn | Replacement belt |
| Tension adjustment | Tighten or loosen as needed | Screwdriver or wrench |
Regular checks keep your cleaner running smoothly.
Cleaning and Maintaining Other Key Components

Regularly cleaning and maintaining your robotic pool cleaner’s key components is essential for peak performance and longevity. Adhering to proper maintenance schedules helps prevent breakdowns and extends your device’s lifespan. To troubleshoot common issues, inspect and clean parts like the brushes, sensors, and casings regularly. Keeping these components free of debris ensures efficient operation and reduces strain on motors.
Consider these maintenance tips:
- Clean brushes and filters weekly
- Check sensors for buildup
- Inspect power cords for damage
- Remove debris from intakes
- Lubricate moving parts as recommended
Sticking to a maintenance schedule minimizes problems and keeps your cleaner running smoothly, saving you time and costly repairs down the line.
Testing Your Robotic Cleaner After Repairs

Once you’ve completed repairs on your robotic pool cleaner, it’s important to test it thoroughly to guarantee everything functions correctly. Start by placing the cleaner in the pool and powering it on. Observe its movement and ensure it covers the entire pool surface. Pay close attention to the battery life; if it drains quickly, the repair might have affected the power system. Additionally, verify the water resistance by checking for leaks around repaired parts or seals. Make sure all sensors and brushes operate smoothly. Running the cleaner for a full cycle helps identify any issues early. If it maintains proper water resistance and performs as expected, you can be confident your repairs were successful. Regular testing ensures ideal performance and prolongs the lifespan of your robotic cleaner.
Frequently Asked Questions
How Often Should I Replace the Worn Parts on My Robotic Pool Cleaner?
You should check your robotic pool cleaner regularly to determine when it needs part replacements. Follow your maintenance schedule, which typically involves inspecting brushes, filters, and tracks every few months. Keep troubleshooting tips in mind; if your cleaner’s performance drops or it’s not functioning properly, it’s time to substitute worn parts. Staying proactive ensures your cleaner runs efficiently, saving you time and minimizing costly repairs.
Are There Compatible Replacement Parts for Different Robotic Pool Cleaner Models?
You might worry about finding the right parts, but rest assured, many companies offer compatible replacement parts for various robotic pool cleaner models. Always check model compatibility before purchasing, as parts availability varies across brands. Whether you need brushes, filters, or wheels, there are often options that fit multiple models, making maintenance easier and more affordable. Just verify compatibility to guarantee a perfect fit and smooth operation.
Can I Replace Parts Myself or Should I Hire a Professional?
You can definitely try DIY repairs if you’re comfortable with basic tasks and have the right tools. Replacing worn parts on your robotic pool cleaner is often straightforward, but if you’re unsure or the issue persists, professional servicing guarantees the job gets done correctly and safely. Consider your skill level and the complexity of the repair before deciding whether to tackle it yourself or hire a professional to avoid further damage.
What Safety Precautions Should I Take During Part Replacement?
When replacing parts, you should prioritize electrical safety and wear protective gear like gloves and goggles to prevent injury. Always unplug the cleaner before starting work to avoid electrical shocks. Work in a dry area to reduce risk, and handle tools carefully. Following these safety precautions keeps you safe and helps avoid damage to the device or yourself during the process.
How Do I Dispose of Old or Damaged Parts Safely?
When disposing of old or damaged parts, you should prioritize proper disposal methods to safeguard the environment. Check local recycling options for metal, plastic, or electronic components, and follow your area’s guidelines for hazardous waste if necessary. Don’t just toss these parts in the trash; instead, take advantage of recycling centers or specialized disposal services to ensure they’re handled responsibly and safely.
Conclusion
Now that you’ve replaced those worn parts, your robotic pool cleaner is ready to dive back into action. Think of it as giving your trusty sidekick a tune-up—suddenly, everything runs smoother and brighter. With proper maintenance, you’ll extend its lifespan and keep your pool sparkling effortlessly. Remember, a well-kept cleaner isn’t just a tool; it’s your secret weapon for a pristine pool—ready to conquer dirt and debris, one swim at a time.