You should repot your indoor plants during their active growth period, typically in spring or early summer, when they’re best able to recover quickly. Look for signs like roots escaping drainage holes, soil drying out fast, or slowed growth—these indicate it’s time. Avoid repotting during dormancy or when plants show stress. Proper timing and preparation help prevent stress, and if you keep these tips in mind, you’ll discover more ways to keep your plants healthy.
Key Takeaways
- Repot during active growth seasons like spring or early summer for minimal stress.
- Ensure soil is moist but not soggy to facilitate gentle removal and reduce root damage.
- Choose a slightly larger pot to avoid sudden overexpansion, preventing unnecessary stress.
- Handle roots carefully and prune circling roots to promote healthy growth.
- Wait until the plant shows signs of healthy new growth before fertilizing post-repot.

Utopia Home Plant Pots Indoor with Drainage Holes – Set of 5 White Plastic Flower Pots (7/6.6/6/5.3/4.8 Inch) – Modern Planters for Indoor Plants, Room & Office Décor, Great Stocking Stuffers
- Set of 5 White Plastic Pots: Indoor and outdoor use
- Multiple Sizes Included: Extra Large to Extra Small
- Drainage Holes and Saucers: For healthy plant growth
As an affiliate, we earn on qualifying purchases.
As an affiliate, we earn on qualifying purchases.
How to Tell When Indoor Plants Need Repotting
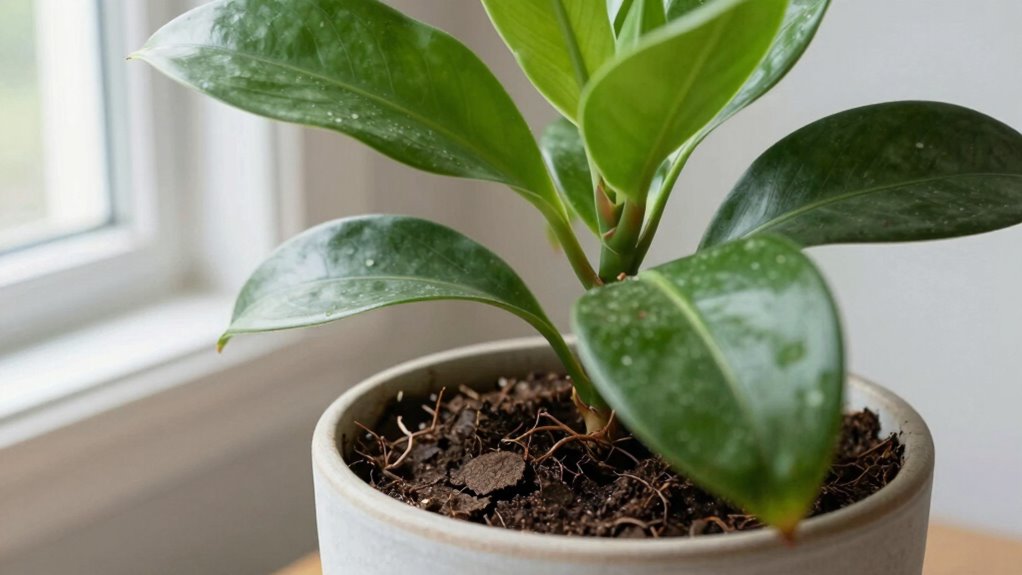
Knowing when to repot your indoor plants is essential for their health, and there are clear signs to look for. One key indicator is the soil mixture; if it dries out quickly after watering, it may mean the plant has outgrown its current pot. Also, check the watering schedule—if you need to water more frequently, it could suggest root crowding. Roots might be pushing up through the drainage holes or becoming visible on the soil’s surface. Additionally, if your plant’s growth has slowed or stopped, it might need more space for healthy development. Regularly inspecting these signs helps you catch the need to repot early, ensuring your plant remains vibrant and thriving without stress.
Signs That Your Plants Are Root Bound or Overgrown

When your indoor plant becomes root bound or overgrown, it shows clear, observable signs that it needs a larger pot. You might notice roots circling the pot’s surface or emerging from the drainage holes, indicating overcrowding. The plant may also look top-heavy or become difficult to stabilize. Leaves could become yellow or wilt despite proper watering, signaling stress from limited soil space. When repotting, consider adding soil amendments to improve drainage and nutrients. Choose decorative containers that provide enough room for growth without restricting roots. Overgrown plants often need more space to thrive, and selecting the right pot enhances their health. Recognizing these signs early helps you avoid root damage and keeps your indoor garden vibrant. Additionally, understanding the importance of landscaping can help in creating an environment that supports healthy plant growth and displays their vibrancy. Proper plant care practices are essential for maintaining healthy root systems and ensuring your plants flourish. To make informed decisions, it’s also helpful to understand how watt-hours and capacity influence plant health and maintenance needs.
When Is the Best Time to Repot Your Indoor Plants?

The timing of repotting your indoor plants can considerably impact their health and growth. The best time to repot is during the active growing season, typically spring or early summer, when your plant is naturally more resilient. Make sure you’ve adjusted your plant watering habits beforehand, so the soil is moist but not soggy, making it easier to remove the plant. When selecting soil, choose a well-draining mix suited for your plant’s specific needs to reduce stress. Avoid repotting during dormancy or when your plant shows signs of stress, such as wilting or yellowing leaves. Proper timing helps your plant recover quickly and establish in its new container with minimal shock, promoting healthy growth moving forward. Additionally, understanding the best timing of repotting can help you avoid common mistakes and ensure your plant’s long-term health. Recognizing the growth cycle of your plant can further assist in choosing the optimal moment for repotting. Being aware of the plant’s natural growth phases can provide additional insight into the ideal repotting window, reducing the risk of damaging the roots. Knowing how to monitor plant health can also help you determine the best time for repotting based on your plant’s condition.
Tools and Preparations for Repotting
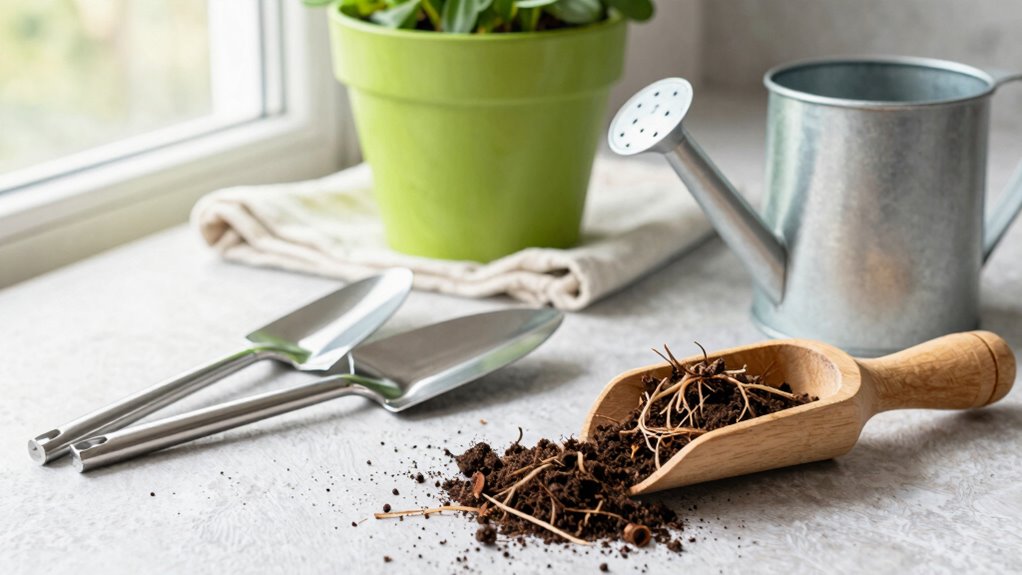
Before you start repotting, gather the essential tools like a clean trowel, pruning shears, and gloves. Make sure your workspace is prepared with newspaper or a tarp to catch soil and debris. Having everything ready will make the process smoother and less messy. Additionally, ensure your workspace has proper urban greening practices to promote sustainable plant care. Incorporating sound therapy techniques can also help create a calm environment, reducing stress during the repotting process. Being mindful of plant health and recovery can further support your indoor plants’ well-being after repotting. Practicing mindful care can also enhance your overall caregiver emotional well-being, making the task more enjoyable and less stressful. It’s also helpful to consider home safety tips to prevent accidents while handling tools and soil.
Essential Repotting Tools
Having the right tools on hand makes repotting indoor plants much smoother and less stressful. Start with a clean, sharp trowel or small shovel to handle soil and roots carefully. You’ll also need watering tools like a watering can or spray bottle to gently hydrate the plant before and after repotting. When it comes to soil selection, choose a high-quality potting mix suited for your plant type, and have it ready for quick transfer. Pruning shears or scissors can help trim damaged roots or foliage. A gloves or plant mat can protect your hands and surfaces. These tools guarantee you handle your plant gently and efficiently, reducing stress and promoting healthy growth during the repotting process.
Preparing the Workspace
To guarantee a smooth and efficient repotting process, setting up a dedicated workspace is essential. Clear the area of clutter and gather your tools, including trowels, gloves, and a watering can. Prepare the soil by selecting the right type for your plant—well-draining and nutrient-rich soil is ideal. Keep your plant watering supplies handy to assure you can hydrate the plant before and after repotting. Lay down newspaper or a tray to catch soil and excess water. This setup helps prevent messes and makes the process more manageable. Having everything organized in advance minimizes stress for your plant and saves time. With a prepared workspace, you set the stage for a successful, gentle repotting that keeps your indoor plant healthy.
A Simple Step-by-Step Guide to Repotting Indoor Plants

To start repotting your indoor plant, set up a clean workspace and gather your tools. Choose a pot that’s slightly larger and has drainage holes, making sure to handle the roots gently to avoid damage. With these steps in mind, you’ll be ready to give your plant a fresh start.
Prepare Your Workspace
Before you start repotting, it’s essential to prepare your workspace to keep the process smooth and mess-free. Clear a flat surface with plenty of space for your plant, tools, and new pot. Lay down newspaper or a tray to catch soil spills. Gather your tools: gloves, trowel, and water spray. Consider lighting adjustments—repotting in a well-lit area helps you see soil and roots clearly, reducing stress on your plant. Keep in mind that healthy plant nutrition before repotting supports better recovery. Make sure your workspace is organized to avoid unnecessary delays or accidents. Here are some key points to focus on:
- Clear and clean surface
- Gather all tools beforehand
- Adjust lighting for visibility
- Keep nutrients accessible
Choose the Right Pot
Choosing the right pot is crucial for your plant’s health and growth. Start by selecting a container with proper soil aeration, which promotes healthy root development and prevents waterlogging. Confirm the pot has drainage holes to allow excess water to escape. When it comes to pot color selection, opt for neutral shades like terracotta, white, or black, which won’t reflect too much heat or cause temperature fluctuations that stress your plant. Avoid overly bright or dark colors that can absorb excessive heat. The pot size should be slightly larger than the current root ball, giving roots space to grow without being overwhelmed. Picking the right pot sets the foundation for a stress-free repotting process and supports your plant’s ongoing vitality. Additionally, consider plant-specific needs when choosing the pot to ensure optimal growth conditions.
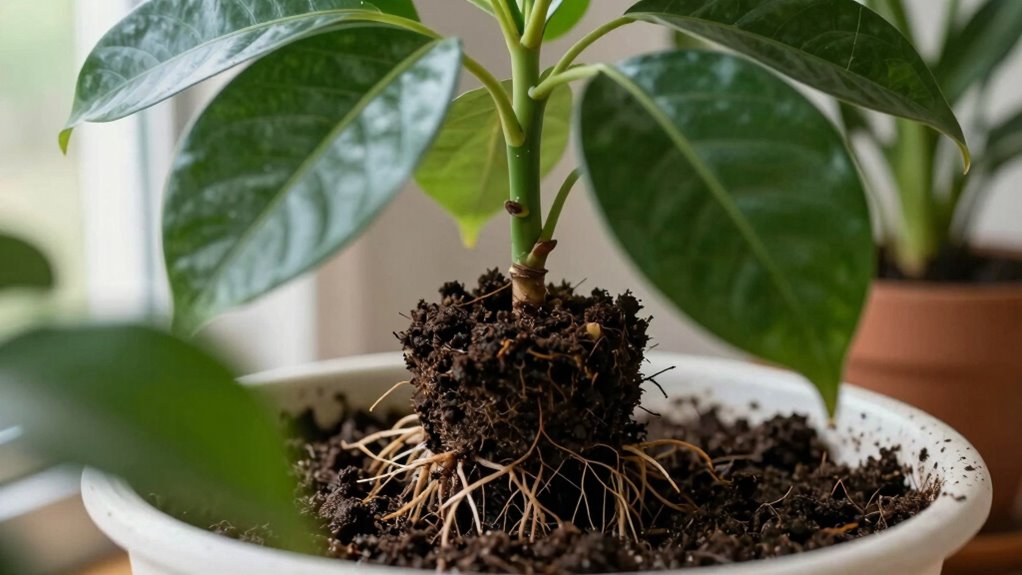
Handle Roots Gently
When you start handling your plant’s roots during repotting, it’s important to do so gently to avoid causing damage. Carefully remove any loose soil and examine the roots. If you notice root circling or becoming dense, consider gentle root pruning to encourage healthy growth and prevent root bound conditions. Be cautious not to damage healthy roots, as this can stress the plant. Proper handling promotes soil aeration, which is essential for root health and nutrient uptake. Additionally, maintaining the right plant ergonomics can help reduce stress on your plant during repotting.
- Use clean, sharp tools for root pruning to prevent infections
- Loosen dense root masses gently to encourage new growth
- Avoid damaging the delicate root tips during handling
- Ensure roots are not overly compressed in the new pot
What to Do After Repotting to Help Your Plants Thrive

After repotting, it’s essential to give your plants the right start to recover and thrive. Begin by ensuring they’re in a suitable soil mixture that drains well yet retains enough moisture. Avoid overpacking the soil, as roots need space to grow. Immediately after repotting, water your plant thoroughly to settle the soil and eliminate air pockets, but don’t overdo it—wait until the top inch feels dry before watering again. Adjust your watering schedule to account for the fresh soil, which may retain moisture longer. Keep your plant in a location with bright, indirect light to reduce stress. Monitor closely over the next few days for signs of stress or overwatering, and avoid fertilizing immediately, allowing roots to settle first. Additionally, providing proper care during this period can support healthy growth and help your plant adapt smoothly.
Common Mistakes to Avoid During Repotting
While repotting your indoor plants can boost their health, it’s easy to make mistakes that set them back. One common error is not monitoring soil moisture after repotting, which can lead to overwatering or underwatering. Adjust watering frequency based on the new pot size and soil type, as improper watering can stress the plant. Avoid disturbing roots excessively, which can hinder recovery. Also, don’t use a pot that’s too large, as this can cause water to sit and rot roots. Finally, skip repotting during extreme weather or when the plant is stressed—wait for a better time to reduce shock. To prevent pot issues, consider recycling pots and pans properly and choosing eco-friendly disposal methods. Being aware of website performance metrics can also help you optimize your repotting routine by tracking how your plants respond over time. Additionally, understanding plant care requirements can guide you in selecting the right moment and method for repotting. Recognizing regional climate differences can further inform the best timing and techniques for repotting, especially if you keep plants in varied indoor environments. Incorporating soil health practices can further improve your plants’ resilience during and after repotting.
Frequently Asked Questions
How Often Should I Repot My Indoor Plants?
You should repot your indoor plants every 1-2 years, or when they outgrow their current pot. Check the plant size and root health regularly; if roots are circling the surface or pushing out of drainage holes, it’s time to repot. Fresh soil provides essential nutrients, and a bigger pot allows for healthy growth. Avoid repotting during dormancy to reduce stress on the plant.
Can I Repot During Flowering or Dormancy?
You can repot your indoor plants during dormancy periods, as this minimizes stress and supports healthy growth. Avoid repotting during flowering, since it can disrupt blooming and cause stress. Check the flowering timing of your specific plant to determine the best window, usually in early spring or late winter. During dormancy, plants are less active, making repotting easier and less disruptive to their natural cycle.
What Soil Mix Is Best for Repotting Indoors?
You should use a well-draining soil mix for repotting indoors, as it promotes healthy root growth. Investigate the theory that a balanced soil nutrient and pH level is essential; in reality, a mix with peat, perlite, and compost often provides this balance. Aim for a pH around 6.0-7.0, ensuring your plant absorbs nutrients efficiently and remains stress-free during and after repotting.
How Do I Prevent Transplant Shock in My Plants?
To prevent transplant shock, focus on root acclimatization and smooth soil shift. Gently loosen roots before repotting, avoiding damage, and choose a soil mix that matches the plant’s needs to minimize stress. Water thoroughly after transplanting to help roots settle, and place your plant in indirect light. Gradually reintroduce it to brighter conditions, allowing roots to adapt comfortably and reducing the risk of shock.
Should I Prune Roots When Repotting?
Yes, you should prune roots when repotting if they’re circling or dead. This process, called root pruning, encourages healthy growth and prevents root-bound conditions. When you repot, do it during your plant’s regular repotting schedule, typically every 1-2 years, depending on growth. Carefully trim any damaged or overly long roots, and always use clean tools to avoid infections. This helps your plant thrive and reduces transplant shock.
Conclusion
Knowing when to repot your indoor plants keeps them healthy and vibrant. When you notice roots emerging from the drainage holes or the plant looks top-heavy, it’s a sign it’s time. With the right tools and timing, repotting becomes a manageable task—almost like a natural part of nurturing your green friends. Sometimes, the smallest adjustments can lead to the greatest growth, proving that patience and care truly make all the difference.