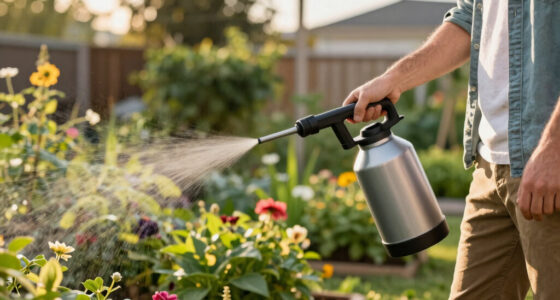

This guide provides clear steps to organize your garden tools effectively. It is designed for gardeners of all experience levels aiming to create a tidy, accessible storage area. Whether you have a small shed or a dedicated corner, proper organization simplifies gardening tasks and keeps tools in good condition. Follow these steps to transform clutter into a functional storage system.

Garden Tool Organizer for Garage and Yard Storage
- ✔ Material: Metal
- ✔ Storage Capacity: Up to 46 tools
- ✔ Number of Slots: 35

Garden Tool Organizer, Yard Tool Tower Rack for Garage Storage, Heavy Duty Steel, Black
- ✔ Material: Steel
- ✔ Capacity: 35 tools
- ✔ Dimensions: 17"(L) x 12"(W) x 29"(H)

TIDYME Garage Tool Organizer Wall Mount – 48 inches, Heavy-Duty Storage Rack with Adjustable Hooks, Anti-Rust, 300 lbs Capacity
- ✔ Length: 48 inches
- ✔ Width: 8.5 inches
- ✔ Height: 4.0 inches
Difficulty: Beginner | Time: 2-4 hours
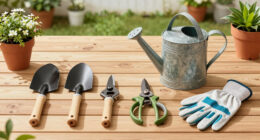
What You’ll Need
Tools & Materials:
- Shelving units or wall-mounted racks
- Hooks or pegboards
- Storage bins or containers
- Labels and marker
- Screwdriver or drill
- Measuring tape
- Utility knife
- Wall anchors (if mounting on drywall)
- Work gloves
Knowledge:
- Basic handyman skills
- Understanding of your available space
Plan your space before starting. Clear the area and gather all tools and materials. Allocate enough time for sorting, mounting, and labeling.

SAMRELAX Garden Tool Organizer, Garden Yard Tool Rack for Garage, Garage Organization and Storage, Metal Yard Tools Storage up to 46 Tools/Rake/Broom/shovel/, Suitable for Garage, Yard, Patio, Shed
- Large Storage Capacity: Holds up to 46 tools and accessories
- Space-Saving Design: Compact size fits small spaces
- Versatile Hanging Slots: 35 slots for I-handle tools
As an affiliate, we earn on qualifying purchases.
Garden Tool Organizer for Garage and Yard Storage
This metal garden tool organizer stands out for its **large capacity with 35 slots and 11 hooks**, making it ideal for those who need to store a variety of tools in a limited space. Its **space-efficient, compact design** fits easily into small garages, sheds, or patio corners, and the durable metal construction promises long-term use. Compared with the TIDYME Wall Mount, this option is more suitable for those who prefer a freestanding, all-in-one unit rather than wall mounting. However, it can be quite heavy when fully loaded, and assembly is required, which may deter some users. Its focus on garden and yard tools makes it less versatile for other storage needs.
Pros:
- Large capacity with multiple slots and hooks
- Space-saving, compact design
- Durable metal construction for longevity
- Includes side storage bag for small items
Cons:
- Can be heavy when fully loaded
- Requires assembly
- Limited to garden and yard tools
Best for: Gardeners with limited space looking for a comprehensive, freestanding storage solution.
Not ideal for: Those seeking a lightweight, portable option or a solution for non-garden tools.
Bottom line: A space-efficient, high-capacity organizer perfect for small areas but less portable when fully stocked.
“A space-efficient, high-capacity organizer perfect for small areas but less portable when fully stocked.”
Garden Tool Organizer, Yard Tool Tower Rack for Garage Storage, Heavy Duty Steel, Black
Designed for durability, this **rust-resistant steel rack** offers **35 slots** to store long-handled tools, rakes, and brooms. Its **compact dimensions** (17" x 12" x 29") make it suitable for both indoor and outdoor use, and **easy assembly** is a key advantage. Compared with the Wall Mount TIDYME Organizer, it provides a more portable, freestanding option, but it’s heavier and less flexible for wall mounting. Its sturdy steel build is perfect for outdoor environments where rust resistance is crucial, but its weight (~3 kg) might be a concern for some users. Its capacity and durability make it better suited for those with a high volume of long-handled tools.
Pros:
- Durable, rust-resistant steel construction
- Large capacity with 35 tool slots
- Easy to assemble and move
- Suitable for indoor and outdoor use
Cons:
- Heavy for some users to carry
- Limited to garden and yard tools
Best for: Outdoor enthusiasts needing a durable, rust-resistant, freestanding rack.
Not ideal for: Users with very limited space or those preferring wall-mounted solutions.
Bottom line: A robust, rust-resistant rack ideal for outdoor storage with a high capacity, but its weight may limit portability.
“A robust, rust-resistant rack ideal for outdoor storage with a high capacity, but its weight may limit portability.”
TIDYME Garage Tool Organizer Wall Mount – 48 inches, Heavy-Duty Storage Rack with Adjustable Hooks, Anti-Rust, 300 lbs Capacity
This wall-mounted organizer is designed for maximum support, supporting up to **300 lbs** with its durable **carbon steel** frame. Its **48-inch length** offers ample space for shovels, brooms, and other heavy tools, and the **adjustable hooks** allow tailored storage configurations. Unlike freestanding racks, this option is ideal for those who want to maximize wall space in a busy garage or garden shed. Its **anti-rust finish** enhances longevity, but installation may require wall studs for stability, which could be a drawback for some users. Compared with the other two options, it offers superior load capacity but less flexibility regarding placement—fixed to a wall.
Pros:
- Supports up to 300 lbs for heavy tools
- Durable, anti-rust carbon steel
- Adjustable hooks for customizable storage
- Easy to install with pre-drilled holes
Cons:
- Requires wall studs for best stability
- Limited to wall mounting, less portable
Best for: Heavy-duty garage or shed organization with maximum load capacity and wall space optimization.
Not ideal for: Renters or those with drywall-only walls who may lack proper mounting points.
Bottom line: An ultra-robust, wall-mounted option perfect for heavy tools, though installation complexity may limit some users.
“An ultra-robust, wall-mounted option perfect for heavy tools, though installation complexity may limit some users.”
As an Amazon Associate we earn from qualifying purchases.
Before You Start
Ensure the storage area is clean and dry. Remove all tools temporarily to assess space and plan your layout. Wear gloves to protect your hands during handling and installation.
Step-by-Step Instructions
Step 1: Clear and clean the storage area
Remove all items from the storage space and sweep or wipe away dust and debris. This creates a blank workspace and prevents dirt from damaging tools.
Tip: Check for any damage or pests that could affect your storage plans.
Check: The area is empty, clean, and ready for organization.
Step 2: Sort tools by type and frequency of use
Group similar tools together: pruning shears, shovels, rakes, hoes, gloves, etc. Separate frequently used tools from seasonal or seldom-used items.
Tip: Place high-priority tools at eye level or in easy-to-reach spots.
Check: Tools are grouped logically, making it easy to find each item.
Step 3: Design your storage layout
Plan where each group of tools will go. Decide which items need wall mounting, shelving, or bin storage. Sketch a rough layout if helpful.
Tip: Ensure heavy tools like shovels and rakes are stored securely to prevent falling.
Check: The plan fits your space and accounts for easy access.
Step 4: Install shelving and wall-mounted racks
Mount shelves or racks on the wall at suitable heights. Use a level to ensure they are straight. Secure them with appropriate anchors and hardware.
Tip: Avoid overloading shelves; check weight limits.
Check: Shelves and racks are sturdy, level, and capable of holding your tools.
Step 5: Hang tools on hooks or pegboards
Attach hooks or pegboards to the mounted racks or walls. Hang tools by their handles, ensuring they are secure and visible.
Tip: Use different hook sizes for different tools to prevent slipping or falling.
Check: Tools are hanging securely and are easy to grab.
Step 6: Arrange heavier tools in bins or on lower shelves
Place shovels, hoes, and other large tools in sturdy bins or on lower shelves for stability and safety.
Tip: Label bins for quick identification.
Check: Heavy tools are stored safely and do not obstruct access.
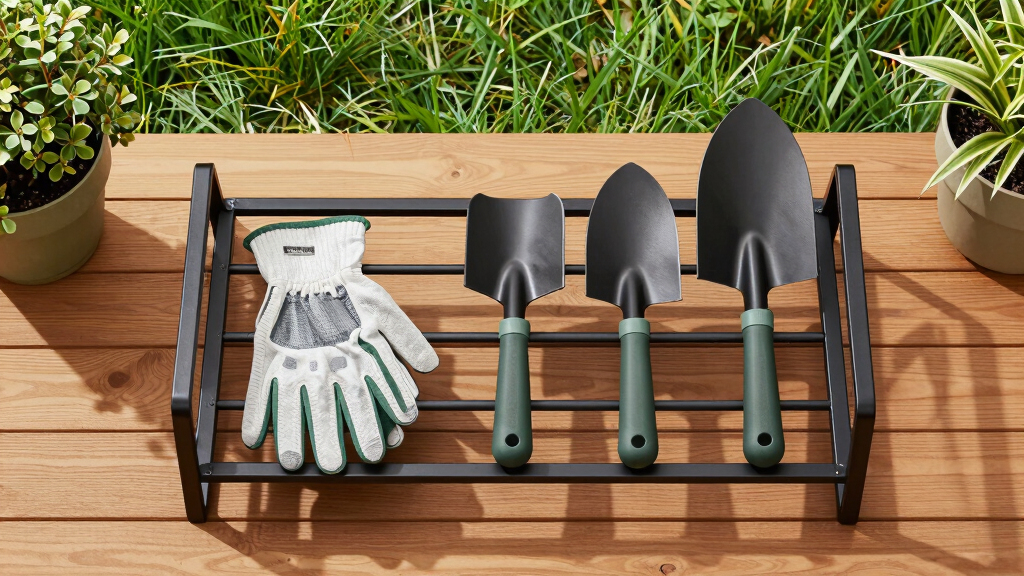
Step 7: Store smaller items in labeled containers
Use clear storage bins or small containers for gloves, seed packets, twine, and small hand tools. Label each container clearly.
Tip: Use transparent containers to see contents easily.
Check: Small items are organized, labeled, and easy to find.
Step 8: Label all storage areas
Use markers or labels to identify the contents of shelves, bins, and hooks. Place labels where they are visible.
Tip: Write clearly and use waterproof labels if the area is exposed to moisture.
Check: Labels are visible, accurate, and help locate tools quickly.
Step 9: Perform a final check and adjust as needed
Test the accessibility of all stored tools. Make adjustments if some items are hard to reach or unstable.
Tip: Ensure all tools are secure and storage is safe.
Check: All tools are accessible, safe, and well-organized.
Common Mistakes to Avoid
- Overloading shelves or hooks — Check weight limits and distribute heavier tools across multiple storage points.
- Not securing tools properly — Use appropriate hooks and mounting hardware, and test each item after hanging.
- Ignoring safety hazards — Store sharp or heavy tools in designated areas and ensure they are stable and secure.
- Poor labeling or no labeling — Label all storage areas clearly to facilitate quick retrieval and avoid clutter.
Troubleshooting
Problem: Tools falling from hooks or shelves
Solution: Use appropriate hooks designed for the tool type and check mounting hardware regularly.
Problem: Limited space after organization
Solution: Reassess your layout, consider vertical storage solutions, and declutter unused items.
Problem: Tools getting rusty or damaged
Solution: Clean and dry tools before storing, and consider using rust inhibitors or protective coatings.
What Success Looks Like
The storage area is tidy, with tools grouped logically, hanging securely or stored in labeled containers. All tools are accessible, visible, and safe to use. You can quickly find and retrieve any tool needed for gardening tasks.
Next Steps
Regularly check your storage system for stability and cleanliness. Return tools to their designated spots after use. Update labels if you add new tools or items. Consider seasonal adjustments to your organization system.
Frequently Asked Questions
How often should I reorganize my garden tool storage?
Reorganize at least once a season or after major gardening projects to maintain order and safety.
What if I don’t have wall space for racks?
Use freestanding shelving units or stackable storage bins on the floor, ensuring they are stable and accessible.
How can I prevent rust on my tools during storage?
Clean and dry tools thoroughly before storing. Use rust inhibitors, or store in a dry, well-ventilated area.
What safety precautions should I take during installation?
Wear protective gear, use proper tools for mounting, and ensure hardware is securely anchored before hanging heavy or sharp tools.