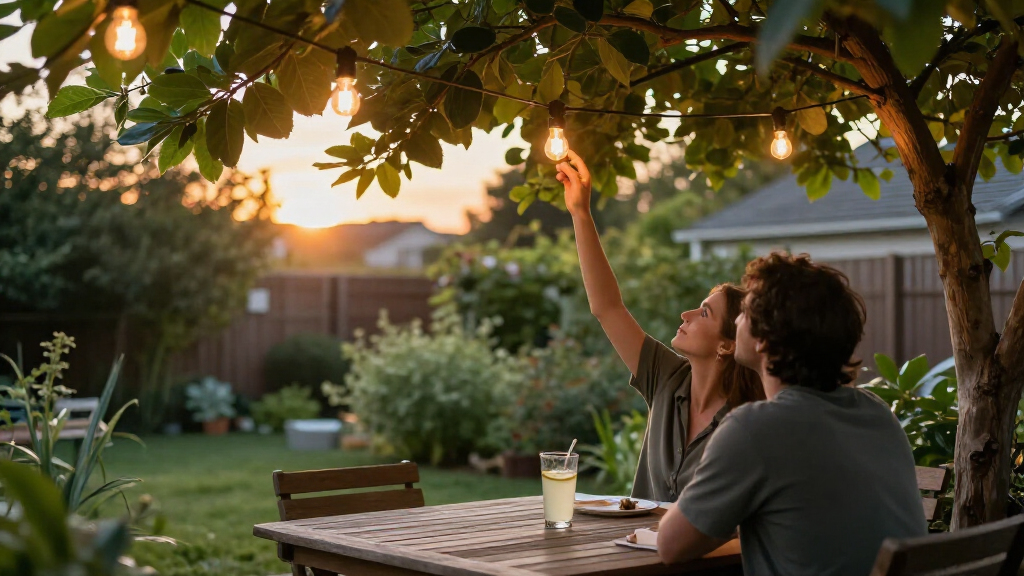

Install outdoor string lights in your garden by choosing a layout, setting secure supports, hanging weather-rated lights, and testing the finished run. This guide is for beginners with a basic hand tool kit and a suitable outdoor power source. Allow 2-4 hours, depending on the number of lights and whether you need to install posts.

55 ft Outdoor LED String Lights with 25 G40 Bulbs, Waterproof and Connectable
- ✔ Length: 55 ft
- ✔ Bulbs: 25 G40 LED bulbs plus 2 spare bulbs; count details are described as conflicting
- ✔ Bulb spacing: 2 ft

MGVIH 100 ft Outdoor LED String Lights with Remote, 37 ST38 Bulbs
- ✔ Length: 100 ft (30 m)
- ✔ Bulbs: 37 ST38 LED bulbs and 2 spare bulbs
- ✔ Bulb base: E12

Brightever 100 ft Outdoor String Lights with 52 Shatterproof Bulbs
- ✔ Length: 100 ft
- ✔ Bulbs and sockets: 52 bulbs, including 2 spares; 50 sockets
- ✔ Bulb type and base: ST38 LED; E12 base
Difficulty: Beginner | Time: 2-4 hours
What You’ll Need
Tools & Materials:
- Outdoor-rated string lights and compatible bulbs
- Tape measure and pencil or marker
- Outdoor extension cord, if needed
- Support cable, turnbuckles, and outdoor-rated cable clamps for long spans
- Screw hooks or eye bolts suited to the support material
- Drill and suitable drill bit
- Ladder rated for your weight and height
- Outdoor-rated timer or smart plug, if desired
- Safety glasses and gloves
Knowledge:
- Basic measuring and drilling
- How to use a ladder safely
- How to identify a suitable outdoor electrical outlet
Check the light maker’s instructions for permitted span, bulb type, connection limits, and outdoor rating. Use a GFCI-protected outdoor outlet. Keep plugs and connections off the ground and sheltered as directed by the maker. If the route needs new wiring, an outlet, or work near overhead power lines, hire a qualified electrician.
55 ft Outdoor LED String Lights with 25 G40 Bulbs, Waterproof and Connectable
For a garden dining nook, balcony garden or modest patio, this 55-foot G40 strand is the most balanced starting point. Its 25 bulbs are spaced two feet apart, so the layout is easy to plan across a seating area without committing to the scale of either 100-foot option. Each socket has two hanging hooks, giving us more ways to attach the strand to a fence, pergola or suitable support.Compared with the two longer picks, this set is easier to size for a smaller space, and its stated ability to connect up to 14 strings leaves room to expand. The shatterproof plastic bulbs and IP65 rating also address two common garden concerns: accidental knocks and wet weather. Each bulb is said to operate independently, which may help keep a strand useful if a bulb fails.The tradeoff is that the product is less ready for mood lighting: dimming requires a separate dimmer. The description also conflicts on bulb counts, listing 25 bulbs plus two spares while separately flagging inconsistent counts. We would verify the included quantity before planning precise spacing. Choose it for a compact garden with a possible future expansion; for broad coverage or built-in remote controls, MGVIH or Brightever is a closer match.
Pros:
- 55-foot length is easier to fit to a smaller garden area.
- Two hooks per socket offer flexible hanging options.
- IP65 rating and shatterproof plastic bulbs suit outdoor use.
- Can connect up to 14 strings for later expansion.
Cons:
- A compatible dimmer is not included.
- The provided description gives conflicting bulb-count information.
Best for: Gardeners lighting a compact patio, pergola or outdoor dining nook who want a manageable strand with expansion potential.
Not ideal for: Buyers who need a confirmed bulb count, built-in remote controls, or long coverage from a single set.
Bottom line: We recommend this as the most adaptable choice for a smaller garden, provided its included bulb count is confirmed and a separate dimmer is acceptable.
“We recommend this as the most adaptable choice for a smaller garden, provided its included bulb count is confirmed and a separate dimmer is acceptable.”
MGVIH 100 ft Outdoor LED String Lights with Remote, 37 ST38 Bulbs
When a garden needs a long run and flexible evening settings, MGVIH makes the strongest case for convenience. The 100-foot strand includes a remote with four brightness levels, three lighting modes and 3- or 5-hour timers. That gives us a way to adjust the atmosphere or set a limited operating window without adding a separate dimmer, a useful advantage over both other picks.Its 37 warm-white ST38 bulbs are spaced along the long strand, with two spares included. The 2700K color temperature points to a warm look for outdoor dining and relaxed seating. Shatter-resistant PET bulbs, built-in hanging hooks and an IP65 rating make this a plausible option for a garden exposed to ordinary outdoor conditions. Compared with Brightever, MGVIH offers more built-in control features; compared with the 55-foot G40 set, it is designed for much broader coverage.That reach calls for a suitable route and a power source, yet the supplied details do not specify how power is provided. We would check plug, cord and connection requirements before choosing a layout. The description also does not clarify replacement bulb availability. This is the best fit for buyers who value remote adjustment and timers, but gardeners prioritizing a stated plug-in specification or a denser set of sockets may prefer Brightever.
Pros:
- Remote offers four brightness settings, three modes and two timer options.
- 100-foot length covers a larger garden than the 55-foot pick.
- Includes two spare bulbs and built-in hanging hooks.
- IP65 protection and shatter-resistant PET bulbs are specified.
Cons:
- The supplied description does not specify its power source or outlet requirements.
- Replacement bulb availability is not stated.
Best for: Gardeners covering a long seating or fence area who want remote brightness changes and automatic shutoff timers.
Not ideal for: Buyers who need clearly specified power and connection details or want the most bulbs per long strand.
Bottom line: Choose MGVIH when remote controls and timers matter most, after confirming the power setup will work for the garden.
“Choose MGVIH when remote controls and timers matter most, after confirming the power setup will work for the garden.”
Brightever 100 ft Outdoor String Lights with 52 Shatterproof Bulbs
Brightever is the coverage pick for gardeners who want a long strand with many illuminated points. The 100-foot run has 50 sockets, with 52 ST38 LED bulbs supplied, including two spares. That is a substantially denser socket layout than MGVIH’s 37 bulbs over the same length, so it may suit a pergola, long fence or garden path where more frequent light points are part of the intended look.The set is described as waterproof, uses shatterproof plastic bulbs, and runs on stated 120V AC plug-in power. It is also dimmable and connectable to as many as 15 strands total, giving it room to serve larger properties. These details make its installation requirements clearer than MGVIH’s supplied description, although a long connected run still needs a suitable power and hanging plan.Brightever’s main compromise is control: the dimmer is sold separately, while MGVIH includes a remote with brightness settings and timers. Its description says waterproof but gives no IP rating, so we have less specific protection information to compare with the IP65-rated alternatives. Choose it when socket density, a stated plug-in connection and expansion matter more than included controls. For a smaller space, the 55-foot option is simpler to size.
Pros:
- 50 sockets across 100 feet provide a dense layout of light points.
- Includes 52 shatterproof ST38 LED bulbs, including two spares.
- Stated 120V AC plug-in power clarifies the connection type.
- Dimmable and connectable up to 15 strands total.
Cons:
- A dimmer is sold separately.
- Weather protection is described as waterproof without a supplied IP rating.
- Brightness and energy-saving claims are manufacturer-provided.
Best for: Gardeners lighting a long pergola, fence or path who want many sockets and the option to extend the run.
Not ideal for: Buyers who want remote controls, timers, an included dimmer, or a stated IP rating for weather protection.
Bottom line: Brightever is our long-run choice for gardeners who value a high socket count and expansion, and can supply a separate dimmer if needed.
“Brightever is our long-run choice for gardeners who value a high socket count and expansion, and can supply a separate dimmer if needed.”
As an Amazon Associate we earn from qualifying purchases.
Before You Start
Walk the garden in daylight and mark where you want the lights to begin and end. Keep the route away from gates, paths where people may snag it, hot surfaces, and areas where branches can rub the cable. Never attach lights to utility poles or power lines. Do not use trees as tight anchor points; trunks and branches move as they grow and in wind. Choose sturdy building anchors or freestanding posts instead.
Read the light maker’s instructions before connecting strands. Confirm the total connected length and the outdoor rating of every cord, plug, timer, and accessory. Do not connect indoor-only equipment outdoors or exceed the maker’s stated limits.
Step-by-Step Instructions
Step 1: Choose the layout
Sketch the area from above and mark the outlet, seating area, anchors, and the path of each light run. Choose a simple straight run, parallel rows, or a canopy shape that fits the space. Leave clearance for people walking, doors opening, and garden tools moving below the lights.
Plan the plug end near the outlet so the cord can reach without tension. If you need an extension cord, select one rated for outdoor use and sized for the distance and load according to its label and the light maker’s instructions.
Tip: Do not plan a route that relies on a cord stretched across a walkway or through a closing door.
Check: The drawing shows each anchor, the outlet, the plug end, and a clear path with no low obstructions.
Step 2: Measure the spans
Measure each run between its planned anchors. Add a small amount of slack for a gentle drape, then compare the total with the light strand length and the maker’s maximum connectable length. Record each measurement before buying or cutting anything.
For long runs, plan a separate support cable between anchors. The support cable carries the weight; the light strand should hang from it with clips or ties recommended by the light maker.
Tip: Avoid using the light cord itself as a structural support across a long span unless the maker specifically rates it for that use.
Check: You have enough light strand for the layout, and long spans have a plan to carry the load independently.
Step 3: Select and position the anchors
Use sound structural material such as a sturdy post, beam, or masonry surface with hardware made for that material. Mark anchor points at a consistent height, allowing the planned drape and clearance below. Check the other side of each drilling location for hidden wiring, pipes, or other hazards.
If the garden has no suitable attachment points, use purpose-made outdoor posts installed according to their instructions. Do not rely on a light stake pushed loosely into soil for a tensioned span.
Tip: If you cannot confirm that a surface can hold the load or cannot check for hidden services, choose a different anchor or ask a qualified tradesperson.
Check: Every run has two suitable support points, and the planned lowest point stays clear of people and objects.
Step 4: Install the mounting hardware
Put on safety glasses, then drill pilot holes using a bit suited to the anchor and surface. Install eye bolts, screw hooks, or post hardware according to the hardware maker’s directions. Tighten each fitting firmly without damaging the surface.
For a long span, attach the support cable to the structural anchors. Use the specified clamps and a turnbuckle if the cable system calls for one. Tighten only enough to remove excess slack; do not over-tension posts, branches, or building hardware.
Tip: Keep the ladder on level, firm ground. Have another adult steady it, and move the ladder instead of leaning beyond its rails.
Check: Anchors do not shift under a careful hand check, and support cables sit securely without visibly bending or pulling their supports.
Step 5: Lay out and inspect the lights
Place the unpowered light strand on the ground beneath its planned route. Check the cord, sockets, bulbs, plug, and seals for cuts, cracks, corrosion, or missing parts. Replace damaged equipment; do not tape over damage and continue.
Confirm the strand’s orientation and locate the plug end before lifting it. If bulbs are removable, follow the maker’s instructions for whether they should be installed before or after hanging.
Tip: Keep the plug disconnected from power while installing, adjusting, or replacing bulbs.
Check: The strand is undamaged, its plug end matches the planned route, and its connection limits are within the maker’s specifications.
Step 6: Hang the support cable and light strand
If your plan uses a support cable, secure it between the anchors first. Attach the light strand to that cable with the maker’s clips or outdoor-rated ties, spacing them evenly and allowing the intended gentle drape. For short spans rated to support themselves, attach the strand directly to the anchors as its instructions specify.
Work from a stable ladder position and pass the cable or strand along the route without dragging it over sharp edges. Leave enough slack at the plug end to reach the outlet without pulling on the first socket or connection.
Tip: Do not use staples, nails, or tight wire ties that can pierce or crush the insulation.
Check: The strand follows the planned route, hangs evenly, and has no sharp bends, pinched sections, or tension at the plug.
Step 7: Fit bulbs and protect connections
Install only bulbs of the type and maximum wattage listed by the light maker. Hand-tighten them as directed; avoid forcing a bulb into a socket. Position plugs, extension connections, and timers so they remain off the ground and receive the protection specified by their makers.
Use only outdoor-rated covers or connection enclosures. Do not wrap a connection in plastic or seal it with tape unless its maker instructs you to do so; trapped moisture can cause damage.
Tip: Keep all connections accessible for inspection and unplugging.
Check: Bulbs match the strand rating, and every connection is raised, protected as directed, and reachable.
Step 8: Connect and test the lights
With the switch off or timer disconnected, plug the strand into a GFCI-protected outdoor outlet. Turn on the lights and inspect every bulb and connection from the ground. Check that the run does not sag into a path and that no anchor or cable has loosened.
If a GFCI trips, unplug the lights and inspect for moisture, damage, or an overloaded connection. Do not repeatedly reset a tripping outlet. Ask an electrician to investigate persistent trips or electrical concerns.
Tip: Test after dark as well if you need to check brightness and coverage across the seating area.
Check: All bulbs light, the GFCI stays set, and the entire route remains secure and clear.
Step 9: Set a routine for use and care
Set a timer if you want the lights to switch off automatically, following the timer and light makers’ instructions. Turn the lights off or unplug them before storms, maintenance, or extended periods when they are not needed, as directed by the maker.
Inspect the strand, anchors, support cable, and connections periodically and after severe weather. Replace damaged parts with compatible outdoor-rated components. Take down or store the lights if seasonal conditions exceed their rating.
Tip: Do not climb a wet or windy ladder to adjust lights. Wait for safe conditions.
Check: You know how to switch the lights off, and you have a clear inspection and storage routine.
Common Mistakes to Avoid
- Hanging a long span from the light cord alone. — Use a separate support cable when the span, weight, or light maker’s instructions call for one.
- Using indoor cords, timers, or lights outside. — Check the outdoor rating of every powered component before connecting the system.
- Pulling the strand tight to remove all sag. — Leave a gentle drape and avoid transferring excessive force to anchors or posts.
- Leaving plugs on the ground or exposed to water. — Raise connections and protect them using the equipment maker’s specified covers.
Troubleshooting
Problem: One or more bulbs do not light.
Solution: Switch off and unplug the strand. Check that each bulb is the correct type and seated as instructed, then inspect sockets and the cord for visible damage. Replace faulty parts only with compatible components.
Problem: The GFCI outlet trips when the lights are connected.
Solution: Unplug the lights and check for damaged equipment, wet connections, or a load beyond the rated limit. Let wet components dry only as the maker directs. If the outlet trips again, stop using the setup and contact an electrician.
Problem: The strand sags too low or pulls on an anchor.
Solution: Disconnect power and take the load off the strand. Add or reposition a suitable support point or support cable, then rehang with a gentle drape. Replace any hardware or cord that has been damaged.
Problem: The lights do not reach the outlet.
Solution: Move the route or use an outdoor-rated extension cord that meets the maker’s requirements. Keep it out of walkways and do not join multiple cords unless the equipment instructions permit it.
What Success Looks Like
The finished lights follow the planned route with even spacing and a gentle drape. Anchors and any support cable stay secure, the lowest section clears people and garden activity, and the plug and connections remain raised and protected as specified. All bulbs illuminate, the GFCI does not trip, and the cable shows no cuts, pinches, or strain.
Next Steps
Use the lights on the schedule you prefer, then inspect the system periodically and after strong wind or heavy rain. Unplug the lights before cleaning, replacing bulbs, or adjusting hardware. At the end of the season, follow the maker’s storage guidance and replace damaged components before reinstalling.
Frequently Asked Questions
How high should garden string lights hang?
Set the lowest part high enough to clear people, doors, and garden activity along the route. Measure the actual clearance from the ground before hanging, and account for the strand’s sag rather than judging only by anchor height.
Do I need a support cable?
Use one for long or tensioned spans, heavy strands, or whenever the light maker calls for independent support. The support cable carries the load so the light cord and sockets are not pulled tight.
Can I attach outdoor string lights to a tree?
Avoid tight attachments around trunks or branches. Trees move and grow, which can pinch a cord or pull down an anchor. Use a sturdy building anchor or a purpose-made freestanding post instead.
Can I leave outdoor string lights up year-round?
Only if the lights and every connected accessory are rated for the weather and temperatures at your site. Follow the maker’s instructions, inspect after storms, and take the system down when conditions exceed its rating.
What should I do if the lights trip the outlet?
Unplug them and inspect for visible damage, wet connections, or an overload. Do not keep resetting a tripping GFCI. If the cause is not clear or the outlet trips again, stop using the lights and contact an electrician.