To set up your ultra-short-throw projector in a small room, position it just inches from the wall or screen to minimize distortion and maximize clarity. Properly calibrate the image by adjusting brightness, contrast, and color settings, and use test patterns to ensure edges are aligned. Manage ambient light by dimming lights or using blackout curtains, and keep the device well-ventilated to prevent overheating. If you continue, you’ll discover key tips to optimize your setup even further.
Key Takeaways
- Position the projector just inches from the wall or screen to minimize keystone distortion and maximize image sharpness.
- Calibrate brightness, contrast, and color settings using test patterns for optimal image quality.
- Manage ambient light with blackout curtains or dimming to enhance contrast and color accuracy.
- Ensure the projector is level and stable to prevent skewing, especially in small, confined spaces.
- Keep cables short and ventilation unobstructed to maintain a clutter-free environment and prevent overheating.

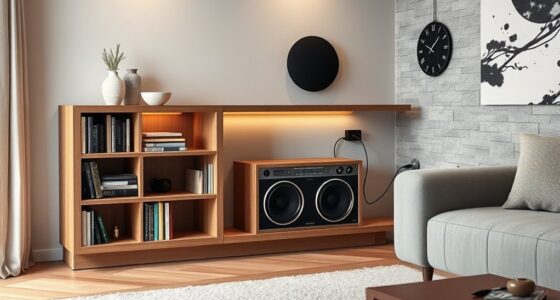
Setting up an ultra-short-throw projector is straightforward, but it requires careful placement to get the best image quality. Since you’re working in a small room, you need to position the projector precisely to maximize space and clarity. Start by choosing a location close to the wall or screen where the projector can sit just inches away from the surface. This proximity minimizes keystone distortion and keeps the image sharp. Once you’ve found the right spot, verify the projector is level and stable to prevent any skewing of the picture.
Next, focus on screen calibration. Properly calibrating your screen is vital for achieving vivid colors and sharp details. Many projectors have built-in settings to adjust brightness, contrast, and color balance. Use these to fine-tune the image, especially since small rooms tend to have limited space for image adjustments. If your projector has a test pattern feature, use it to align the image edges perfectly and verify that the picture isn’t distorted or skewed. Remember, accurate screen calibration enhances your viewing experience and makes the most of your projector’s capabilities.
Properly calibrate your projector’s settings for vivid colors and sharp images in small rooms.
Ambient lighting plays an important role in image quality, especially in small rooms where light sources are often unavoidable. To get the best picture, control the ambient lighting as much as possible. Turn off or dim any unnecessary lights, and consider blackout curtains or blinds to block outside light. If your room has multiple light sources, managing ambient light can significantly improve contrast and color accuracy. If you can’t eliminate all light sources, choose a projector with higher lumen output to compensate for ambient light. Additionally, use ambient light rejection screens if possible, as they can greatly improve contrast and color accuracy in well-lit environments. Managing ambient lighting helps prevent washout and guarantees your images remain vibrant and clear.
Finally, pay attention to cable management and ventilation. In small rooms, clutter can quickly reduce space and create distractions. Use short cables or cable organizers to keep everything tidy. Make sure the projector has enough airflow to prevent overheating, especially if it’s placed close to walls or furniture. A well-ventilated setup maintains performance and extends the lifespan of your device.
Frequently Asked Questions
Can I Use an Ultra-Short-Throw Projector Outdoors?
Yes, you can use an ultra-short-throw projector outdoors, but you need to take into account outdoor lighting and weather. Bright ambient light can wash out the image, so use it in darker evenings or shaded areas. Weather conditions matter too; protect your projector from rain, humidity, and dust by using a weatherproof enclosure or bringing it inside during bad weather. Proper placement and planning ensure a great outdoor viewing experience.
What Are the Best Wall Colors for Ultra-Short-Throw Projectors?
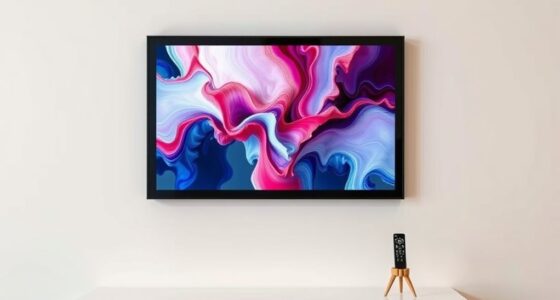
Dark, matte wall colors like deep gray or navy create stunning contrast, making your projector images pop with vibrant clarity. Bright or glossy paint finishes reflect light, reducing image sharpness, so stick to matte finishes for minimal glare. Light neutral shades such as beige or soft white also work well, providing a neutral background that enhances brightness without overpowering your display. Choose wall color options and paint finishes that maximize contrast and minimize reflections for the best results.
How Do I Minimize Ambient Light Interference?
To minimize ambient light interference, you should focus on ambient light reduction by dimming or turning off nearby lights and using blackout curtains. Proper screen positioning also helps; place the projector perpendicular to the screen and avoid windows or bright light sources behind it. Additionally, consider using a high-gain screen to improve contrast and visibility during ambient light conditions. These steps will enhance your viewing experience considerably.
Is Calibration Necessary After Initial Setup?
Absolutely, calibration is crucial after the initial setup because it guarantees your projector’s image quality is perfect. Think of the calibration process as fine-tuning a masterpiece—it’s essential for ideal clarity and color accuracy. You’ll need to do image adjustment to correct any distortions or misalignments. Skipping this step can leave your picture looking less than stellar, so take the time to calibrate thoroughly for the best viewing experience.
What Maintenance Does an Ultra-Short-Throw Projector Require?
You should regularly maintain your ultra-short-throw projector by cleaning filters to prevent dust buildup and guarantee optimal image quality. Additionally, you’ll need to adjust the keystone occasionally to keep the projection aligned and rectangular. Check your user manual for specific maintenance intervals, but generally, cleaning filters every few months and adjusting keystone as needed will keep your projector functioning smoothly and prolong its lifespan.
Conclusion
Setting up your ultra-short-throw projector is like planting a seed for endless entertainment in your small room. With the right placement and calibration, you’ll transform your space into a cinematic oasis, where every movie feels larger than life. Don’t let limited space hold you back—think of this setup as your secret weapon to maximize your room’s potential. Once you’ve got it dialed in, you’ll wonder how you ever watched without it.