To light up your walls with art through DIY projection mapping, start by choosing the right projector for your space, considering brightness, resolution, and throw distance. Plan your design, measure your wall, and sketch your ideas to guarantee everything fits perfectly. Calibrate the projector correctly for seamless visuals, and experiment with lighting and layering techniques for added depth. Practice and adjust until you achieve stunning results—keep exploring to master these creative techniques.
Key Takeaways
- Select a suitable projector based on your wall size, ambient light, and desired brightness for clear visuals.
- Measure and sketch your space to plan projection angles and surface alignment before setup.
- Use simple tools like tape or magnets to mark key points for precise projector calibration.
- Dim surrounding lights and experiment with layering effects or masks to enhance visual impact.
- Test from various angles, make adjustments, and practice to achieve seamless, professional-looking projections.

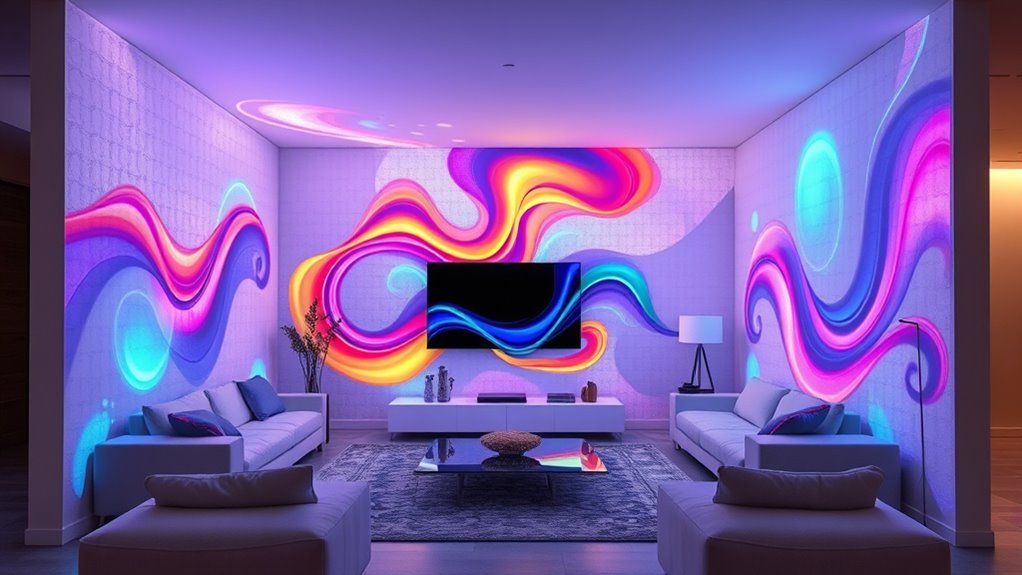
Projection mapping might seem complex, but with the right guidance, you can create stunning visual displays yourself. The key is understanding basic projection techniques and how to adapt them to your space. Whether you’re aiming to transform a plain wall into a dynamic canvas or design immersive environments, mastering projection techniques will help you achieve engaging creative installations. Start by selecting the right projector—consider brightness, resolution, and throw distance based on your wall size and ambient lighting conditions. Once you have your equipment, plan your design carefully. Sketch out your ideas and measure your space to determine how your visuals will fit and align. This planning phase ensures your creative installations look polished and professional, even if you’re just starting out.
Master projection techniques and adapt them to your space for stunning visual displays.
Next, focus on calibration. Proper alignment of your projector is critical for seamless projection mapping. Use simple tools like tape or magnets to mark key points and make adjustments until your image fits perfectly onto your target surface. This step might take some trial and error, but patience pays off when your visuals align flawlessly. For more intricate creative installations, consider using specialized software that allows you to map your visuals precisely onto complex surfaces. These tools help you manipulate images in real-time, giving you more control over how your projection interacts with the physical features of your space. This flexibility opens up endless possibilities for artistic expression, from animated murals to interactive displays.
Lighting conditions are another important factor. Dim the surrounding lights to make your projections pop and reduce ambient interference. If you’re working outdoors or in a bright room, opt for higher-lumen projectors to ensure visibility. As you progress, don’t be afraid to experiment with different projection techniques—layering multiple projectors, using masks, or incorporating 3D mapping for added depth. These techniques can elevate your creative installations from simple images to immersive experiences. Remember, the beauty of DIY projection mapping lies in your ability to customize and adapt your setup to fit your vision.
Finally, always test your setup before presenting your final work. Walk around your space, view from different angles, and make necessary adjustments. With practice, your understanding of projection techniques will deepen, allowing you to craft more complex and engaging visual displays. Keep in mind that understanding projection techniques is essential for achieving professional results and creating captivating visual art. As you gain confidence, you’ll discover that creating impressive projection mapping projects is well within your reach—transforming ordinary walls into extraordinary works of art.
Frequently Asked Questions
What Equipment Is Necessary for Beginner Projection Mapping Projects?
For beginner projection mapping projects, you’ll need a projector with sufficient brightness and resolution, a computer or laptop to run projection techniques software, and a sturdy surface to serve as your projection surface. Consider using simple shapes or textured walls. You might also need a tripod or mount for stability. Start with basic designs to learn the techniques before exploring more complex projection surfaces and effects.
How Do I Calibrate Projections for Irregularly Shaped Surfaces?
Think of your surface as a canvas with hidden contours, waiting to be revealed. To tackle surface irregularities, you’ll need precise calibration techniques like point mapping and geometric adjustments. Use a projector to test patterns, then tweak the projection alignment, adjusting warp settings and control points until the image conforms seamlessly to every bump and groove. With patience, your projection will dance perfectly across even the most uneven surfaces.
Can Projection Mapping Be Done Outdoors in Different Weather Conditions?
You can definitely do projection mapping outdoors, but you’ll need to take into account weather considerations and outdoor durability. Make sure your equipment is weatherproof or protected with covers to handle rain, wind, or extreme temperatures. Use high-lumen projectors designed for outdoor use, and choose surfaces that are stable and resilient. Planning for weather conditions ensures your projection stays vibrant and intact, creating stunning outdoor displays regardless of the elements.
What Software Options Are Best for Creating Custom Projection Maps?
When choosing software for creating custom projection maps, you want options with strong software compatibility and an intuitive user interface. Programs like MadMapper, Resolume Arena, and TouchDesigner are popular because they support multiple formats and are user-friendly, even for beginners. You benefit from easy controls and flexible features, making your projection mapping process smoother. Select software that fits your skill level and project needs for the best results.
How Do I Ensure My Projection Mapping Setup Is Safe and Secure?
Think of your setup as a fragile dance between art and safety. To keep the performance smooth, prioritize electrical safety by using proper grounding and quality extension cords. Guarantee mounting stability with secure fixtures that won’t wobble or fall, especially for outdoor or high-traffic areas. Regularly inspect cables and supports, and follow manufacturer guidelines. When you treat your equipment with care, your creative light show will shine brightly and safely.
Conclusion
So, don’t let the idea of complex equipment hold you back—you can create stunning projection mapping with just a few tools and some creativity. Even if you’re worried about technical skills, start small and experiment; practice makes perfect. Before long, you’ll be transforming your walls into dynamic works of art that impress everyone. With patience and a bit of effort, you’ll discover that DIY projection mapping is not only doable but incredibly rewarding.