
To create DIY acoustic panels that look like art, choose fabric-covered foam or mineral wool panels and select vibrant or textured fabrics that match your room’s decor. You can cut panels into unique shapes or add decorative framing to turn them into wall art pieces. Arrange them strategically around your space for both visual impact and sound improvement. Explore creative options and placement ideas further to transform your room into a stylish, acoustically optimized environment.
Key Takeaways
- Choose fabric-covered sound-absorbing materials, like foam or mineral wool, and cover them with decorative textiles or printed designs.
- Incorporate vibrant colors, patterns, or images to transform panels into eye-catching art pieces that match or enhance room decor.
- Use creative shapes, layered materials, and framing options to add visual interest and make panels resemble artwork rather than typical acoustic treatment.
- Arrange panels strategically as a gallery wall or focal points to blend soundproofing with artistic display.
- Install with simple hardware for easy swapping or repositioning, allowing ongoing customization to suit evolving interior styles.
Ever wondered how to improve your room’s sound quality without spending a fortune? If you’re tired of echoing sounds and dull acoustics, creating DIY acoustic panels that double as wall decoration might be just what you need. These panels are not only practical for sound absorption but also serve as stylish art pieces, transforming your space into a visually appealing environment. The key is to craft panels that blend seamlessly with your decor while effectively dampening unwanted noise.
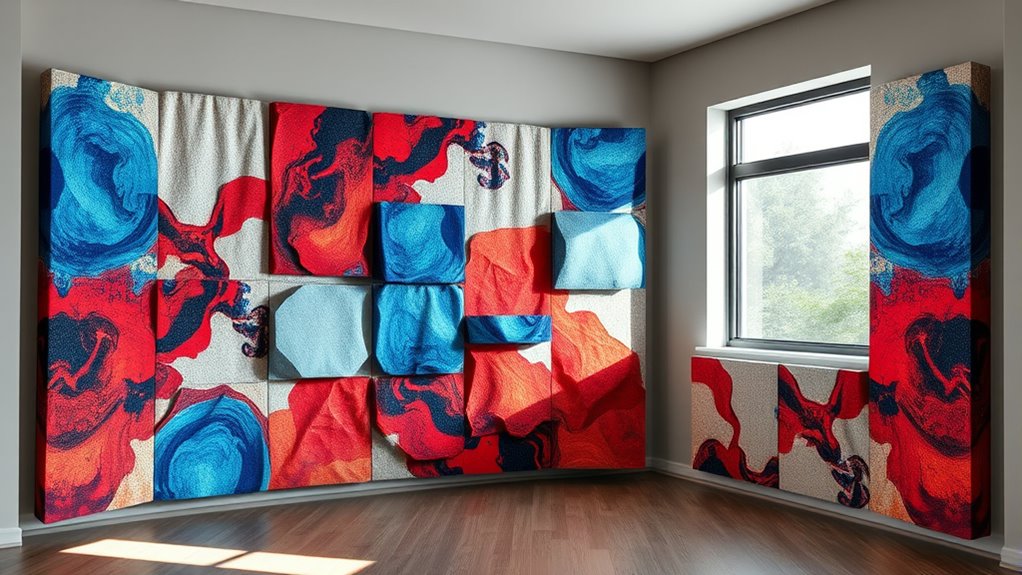
Start by choosing materials that are both functional and attractive. Fabric-covered foam or mineral wool boards are popular options for sound absorption, as they help control echo and reduce noise. To make your panels look like art, select vibrant fabrics, textured textiles, or even printed designs that match your room’s aesthetic. Covering the panels with appealing fabrics turns them into eye-catching wall decoration, so they don’t look out of place or purely functional. You can even get creative by framing them with decorative borders or mounting them in unique shapes and patterns.
Choose vibrant fabrics and textured textiles to transform acoustic panels into stylish wall art.
Placement is vital for maximizing both sound absorption and visual impact. Hang your panels strategically on the walls where sound reflections are strongest—typically behind speakers, around seating areas, or near reflective surfaces like glass windows or hardwood floors. When you position panels thoughtfully, you’ll notice a significant reduction in echo and better sound clarity. Additionally, arranging multiple panels as a gallery wall adds an artistic element, turning acoustic treatment into a focal point rather than an eyesore.
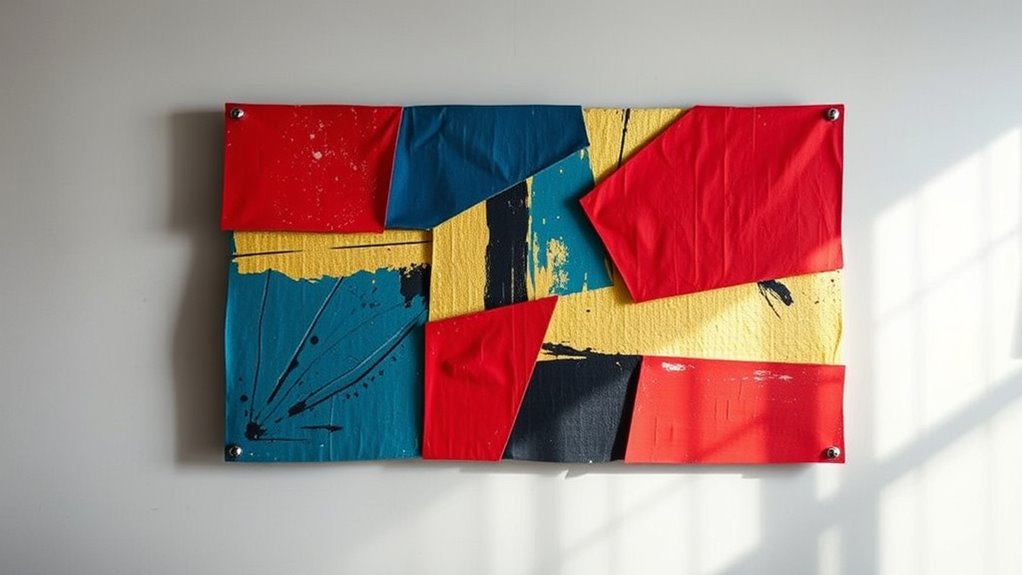
If you want your DIY acoustic panels to truly stand out as art, consider customizing their shapes and sizes. Geometric patterns, abstract designs, or even photographic prints can make your wall panels a conversation starter. Using different colors and textures creates a dynamic visual effect that complements your room’s style. Remember, the goal is to achieve a balance between sound absorption and wall decoration—so don’t shy away from experimenting with layering or combining various materials and patterns.
Keep in mind that these panels are easy to install and replace. You can mount them with simple hooks, adhesive strips, or even create a modular system that allows you to rearrange your art panels whenever you want a fresh look. When done thoughtfully, your DIY acoustic panels will not only enhance your room’s acoustics but also serve as a creative expression that elevates your interior design. Incorporating soundproofing techniques into your decor can significantly improve both comfort and aesthetics. With a bit of effort, you turn functional soundproofing into an artful statement piece that improves both the sound quality and the aesthetic appeal of your space.
Top picks for "acoustic panel look"
Open Amazon search results for this keyword.
As an affiliate, we earn on qualifying purchases.
Frequently Asked Questions
How Effective Are Art-Looking Acoustic Panels Compared to Traditional Ones?
Art-looking acoustic panels are just as effective as traditional ones in providing acoustic absorption, but they also offer a high aesthetic appeal that traditional panels often lack. You’ll find that blending style with function enhances your space while reducing noise. By choosing creatively designed panels, you get ideal sound absorption without sacrificing visual appeal, making them a smart, stylish choice for improving your environment’s acoustics.
Can These Decorative Panels Be Customized for Specific Room Sizes?
You can definitely customize these decorative acoustic panels for your room size. When designing, you choose from various design options and specify custom sizing to guarantee a perfect fit. This flexibility means you get panels that not only match your aesthetic preferences but also optimize sound absorption. By tailoring the dimensions, you create a seamless look while enhancing acoustic performance, making your space both beautiful and functional.
What Materials Are Safest for DIY Acoustic Art Panels?
You should choose safe materials like fire-resistant fabrics and eco-friendly adhesives for your DIY acoustic art panels. Fire-resistant fabrics ensure safety in case of heat or sparks, while eco-friendly adhesives minimize harmful fumes and environmental impact. Always verify that the adhesives are non-toxic and suitable for indoor use, and select fabrics that meet fire safety standards. This way, you create both beautiful and safe acoustic panels for your space.
How Do I Clean and Maintain These Artistic Acoustic Panels?
You should clean your artistic acoustic panels every 3-6 months to maintain their appearance and sound absorption. Use a soft, damp cloth to gently wipe the surface, avoiding harsh chemicals that could damage the material. Considering material durability, choose panels made from sturdy, washable fabrics or foam. Regular cleaning prevents dust buildup, which can reduce acoustic performance, ensuring your panels stay both beautiful and functional for years.
Are There Any Professional Installation Tips for Optimal Soundproofing?
To guarantee ideal soundproofing, focus on proper installation techniques, like sealing gaps and using the right adhesive. Avoid common installation pitfalls such as uneven mounting or leaving gaps around panels, which can compromise soundproofing. Make sure panels are flush against the wall, and use acoustic caulk for airtight seals. Properly positioning your panels helps maximize sound absorption and reduces echoes, giving you a professional, effective soundproofing result.
Conclusion
Now that you know how to create DIY acoustic panels that double as art, there’s no reason to let the opportunity slip through your fingers. With a little creativity and effort, you can turn plain walls into eye-catching masterpieces while improving your sound quality. Remember, the proof of the pudding is in the eating—so go ahead, plunge in, and make your space both stylish and functional. Don’t just sit on your hands—get started today!