TL;DR
A closet can serve as a small vocal booth or recording nook, but success depends more on acoustic treatment and mic placement than on soundproofing alone. Moving the rig into another room is often the simplest, most effective noise control — especially for AI or high-power setups.
Ever wondered if your tiny closet could double as a decent vocal booth or quiet AI workstation? The secret isn’t just about stuffing it with foam. It’s about where and how you treat it, and the smart choices you make about placement. Done right, your closet can be a surprisingly effective recording space — or a near-silent home for your high-powered rig.
This guide pulls back the curtain on the best practices for dampening sound, placing gear, and turning a closet into a controlled environment. Whether you’re aiming for crisp vocals or a whisper-quiet AI setup, understanding the balance between acoustic dampening, placement, and ventilation is your best move.
Acoustic dampening
& the rig in the closet.
The most powerful noise fix isn’t a material — it’s a floor plan. A rig you can’t hear because it’s in another room beats any amount of foam. Tap the approaches in Part 1 to see what actually works.
(another room)
(levers 1–4)
(door / barrier)
(acoustic foam)
Contain the noise, not the heat
Key Takeaways
- Moving your rig into another room is often the simplest, most effective noise control — especially for AI or high-power setups.
- Treat reflection points first—behind the mic and ceiling—for immediate improvements in vocal clarity.
- Coverage of absorptive material should be at least 50% of reflective surfaces; don’t rely on just foam tiles or corners.
- Ventilation is critical—sealed closets trap heat, which can throttle your machine’s performance and cause noise from fans.
- Don’t expect to make a closet completely soundproof. Focus on reducing reflections and leaks for a natural, controlled sound.

Focusound 52 Pack Acoustic Foam Panels 1" x 12" x 12" Sound Proof Foam Panles Soundproofing Noise Cancelling Wedge Panels for Home Office Recoding Studio with 300PCS Double-Side Adhesive
Soundproofing - Acoustic foam panels triangular grooves structure for better noise absorption, helps to reduce and absorb unwanted...
As an affiliate, we earn on qualifying purchases.
As an affiliate, we earn on qualifying purchases.
Why a Closet Can Be a Game-Changer for Your Recording or AI Rig
A closet’s small, enclosed nature naturally cuts down on reflections and echo. Think of it as a tiny, dedicated acoustic chamber. When properly treated, it turns into a cozy, sound-controlled nook—perfect for vocals or sensitive AI work.
Imagine recording vocals in a closet filled with blankets and foam. The sound is warm, intimate, and free of distracting reverb. Likewise, an AI rig tucked away in a closet can run loud fans and GPUs without disturbing your work or sleep.
Recent DIY creators report that small spaces like closets can cut reverb by up to 70%, making a noticeable difference in clarity and quality.
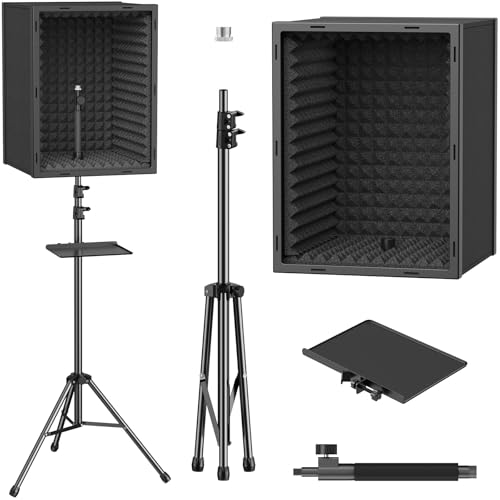
TONOR Personal Vocal Booth, Microphone Isolation Shield for Studio, Framed Acoustic Foam Box, Sound Absorbing, for Professional Recording, Podcast, Singing, Adjustable Height, Max 190 cm/53.1inch
Sound Absorption & Isolation: This vocal booth features a box design combining five high-density foam and sound absorbing...
As an affiliate, we earn on qualifying purchases.
As an affiliate, we earn on qualifying purchases.
Acoustic Treatment vs. Soundproofing — What Really Matters in a Closet
Acoustic dampening and soundproofing aren’t the same, but many confuse them. Acoustic treatment reduces echo, flutter, and room reverb. Acoustic treatment reduces echo, flutter, and room reverb. Soundproofing blocks sound from leaking outside or in.
In a closet, your main goal is to tame reflections and avoid sound bouncing off hard surfaces. Acoustic foam, blankets, and panels absorb internal echoes, which helps your recordings sound clearer and more professional. However, this internal control is a tradeoff — the space still allows some sound to escape. To improve isolation, sealing gaps, adding weatherstripping around the door, and using heavy blankets can help minimize leaks. But these measures are often a compromise: they can slightly reduce sound escape but won’t turn your closet into a soundproof chamber.
Understanding these tradeoffs is crucial. Over-treating the space with dense foam or sealing every crack can make it overly dead, which might make vocals or instruments sound unnatural or muffled. Conversely, under-treating leaves enough reflections to muddy your recordings. The key is to find a balance—adding enough absorption to reduce echo while maintaining a natural, lively sound that captures the nuances of your voice or instrument.

Aokeo Microphone Isolation Shield, Foldable Mic Shield with Triple Sound Insulation, Reflection Filter with 3/8" and 5/8" Mic Threaded Mount for Recording Studio, Podcasts, Singing, and Broadcasting
The Microphone Isolation Shield features a sound-proof foam front and a ventilated metal back panel to eliminate noise...
As an affiliate, we earn on qualifying purchases.
As an affiliate, we earn on qualifying purchases.
Where to Place the Microphone for Clear, Reflective-Free Recordings
Good mic placement is the secret sauce in a closet booth. Start by positioning the mic about 6-12 inches from your mouth, slightly off-axis to reduce plosives and sibilance. This distance helps capture a natural sound while minimizing the room’s influence. The closer you are, the more your voice dominates, and the less room sound is picked up, which is essential in a reflective environment.
Identify the main reflection points — the wall behind you and the ceiling — and treat those areas first. You might also consider placing acoustic panels strategically around your space. Use a reflection filter or portable gobos if available. These tools help block sound waves bouncing directly into the mic, which otherwise create a boxy, echoey sound. Proper placement also involves being mindful of your own position relative to reflective surfaces. Experiment with mic angles and distances to find the sweet spot where your voice sounds full but free of room artifacts.
Think of your microphone as an active participant in the room’s acoustic environment. Position it thoughtfully to minimize the influence of unwanted reflections. For example, placing a foam panel directly behind the mic at head level can significantly reduce reverb and early reflections, resulting in a cleaner, more professional recording. The goal is to isolate your voice as much as possible from the room while capturing its natural qualities.
Focusound 52 Pack Acoustic Foam Panels 1" x 12" x 12" Sound Proof Foam Panles Soundproofing Noise Cancelling Wedge Panels for Home Office Recoding Studio with 300PCS Double-Side Adhesive
Soundproofing - Acoustic foam panels triangular grooves structure for better noise absorption, helps to reduce and absorb unwanted...
As an affiliate, we earn on qualifying purchases.
As an affiliate, we earn on qualifying purchases.
What Materials Make the Biggest Difference in a Closet Setup
Materials matter more than brand names. Focus on dense, soft, and textured surfaces that absorb sound, such as acoustic foam and blankets. Focus on dense, soft, and textured surfaces that absorb sound. Blankets, moving pads, acoustic foam, and rugs are all effective because they convert sound energy into heat, reducing reflections.
In a small closet, coverage is critical. Aim to cover at least 50% of the walls, especially the reflection points like the wall behind the mic and the ceiling. Dense foam panels, ideally 2-4 inches thick, are effective at absorbing mid and high frequencies, which are most problematic in small spaces. For bass response, use corner traps or foam wedges in the low-frequency zones, as these areas tend to amplify bass buildup, causing muddiness.
Layered blankets, quilts, or moving pads can be surprisingly effective when placed at reflection points or draped over the door. They absorb sound across a broad frequency range, but their effectiveness depends on density and coverage. The more surface area you cover, especially on hard reflective surfaces, the better your results. Don’t forget to treat the door and gaps with weatherstripping or a heavy curtain to prevent sound leaks, which can undermine your efforts.
What You Shouldn’t Expect from a Closet Setup
Don’t assume a closet can make your space soundproof. It’s primarily about reducing reflections and echo, not blocking all sound from escaping. It’s primarily about reducing reflections and echo, not blocking all sound from escaping. You’ll still hear outside noise, and your neighbors might still hear you. Achieving complete soundproofing requires substantial construction and sealing, which is usually impractical in a closet.
Also, don’t overdo it on treatment — a wall of foam can make the space overly dead and claustrophobic. It can also trap heat, especially if you’re using dense materials or sealing the space tightly. The goal is to create a balanced acoustic environment that minimizes echo without sacrificing comfort or airflow. Think of it as tuning the room’s acoustics rather than building a fortress.
Ultimately, a closet setup is about creating a controlled environment for sound quality, not full isolation. Managing expectations helps prevent frustration and ensures you focus on practical improvements that matter most for your recordings or work.
Common Mistakes That Ruin Your Closet’s Sound Quality
Pro tip: don’t treat only the corners. Bass buildup often occurs in parallel walls and corners, creating muddiness and a boomy sound. Neglecting these areas leaves low frequencies unchecked, which can muddy your recordings and make mixing more challenging. Proper corner treatment with bass traps or foam wedges helps control these problematic frequencies, resulting in clearer sound and more accurate mixing.
Ignore the door and gaps at your peril. Gaps and leaks allow sound to escape and external noise to intrude, defeating your efforts. Sealing these with weatherstripping, acoustic sealant, or heavy curtains is essential. Failure to do so can result in a noisy, inconsistent environment that hampers your work.
Placing the mic without considering reflection points leads to muffled, boxy vocals. Overloading the space with hard, reflective surfaces turns it into an echo chamber, which complicates mixing and reduces vocal clarity. Proper placement of absorptive materials and thoughtful mic positioning are crucial to prevent this.
Lastly, don’t forget ventilation. A sealed closet traps heat, which can damage your equipment or cause thermal issues. Installing a small fan or vent ensures airflow, keeps your rig cool, and prevents noise from cooling fans from becoming part of your recordings.
Frequently Asked Questions
Is a closet really good enough for recording vocals?
Yes, a closet can be an excellent vocal booth if treated properly. Focus on reducing reflections with blankets and panels, and position the mic carefully. It won’t be perfect for every style, but for many applications, it works surprisingly well.What is the difference between acoustic treatment and soundproofing?
Acoustic treatment reduces internal reflections and echoes, making the sound clearer. Soundproofing blocks sound from entering or leaving the space. For a closet, treatment is easier and more practical than full soundproofing, which requires sealing and construction.Where should I place the microphone in a closet booth?
Position the mic 6-12 inches from your mouth, slightly off-axis to avoid plosives. Treat the wall behind and above you as reflection points. Use a reflection filter if possible. The goal is to isolate your voice from room reflections.Should I treat the walls, ceiling, corners, or door first?
Start with the reflection points behind the mic and the ceiling. Then, focus on corners to control bass buildup. Seal gaps around the door with weatherstripping. Cover the door with a blanket or soundproof curtain for leaks.Do I need foam, or are blankets enough?
Both work, but coverage and density matter more. Thick blankets, moving pads, and quilts can be effective if they cover key reflection points. Foam panels are more precise but pricier. Use what’s available and focus on covering critical areas.Conclusion
Turning a closet into a recording or AI station is all about smart placement, effective dampening, and keeping things cool. It’s a balancing act—reduce reflections, block leaks, and ensure airflow. Done right, your closet becomes a surprisingly versatile space for high-quality work or crisp vocals.
Remember, it’s not just about the foam or the gear—it's about where and how you set it up. With a few tweaks, your closet can sound better than a professional booth—and stay cool doing it. So, get creative, keep it simple, and let your space work for you.