Vermiculture is a simple way to turn your kitchen scraps into nutrient-rich compost using worms like red wigglers. To get started, choose a well-ventilated container with bedding such as shredded newspaper or cardboard, and keep it moist. Feed the worms small amounts of food, avoiding meat or dairy, and monitor moisture levels. As the worms work, you’ll produce compost and liquid fertilizer called compost tea, helping your garden thrive—keep going to learn more about this eco-friendly process.
Key Takeaways
- Vermiculture uses worms to break down organic waste into nutrient-rich compost and compost tea for plants.
- Set up a ventilated container with bedding material like shredded newspaper, keeping it moist but not soaked.
- Feed worms small kitchen scraps, avoiding meat, dairy, and oily foods to prevent pests and odors.
- Harvest finished compost when it turns dark and crumbly; collect and dilute compost tea before use.
- Benefits include reducing waste, enriching soil, and providing natural fertilizers to promote healthy plant growth.
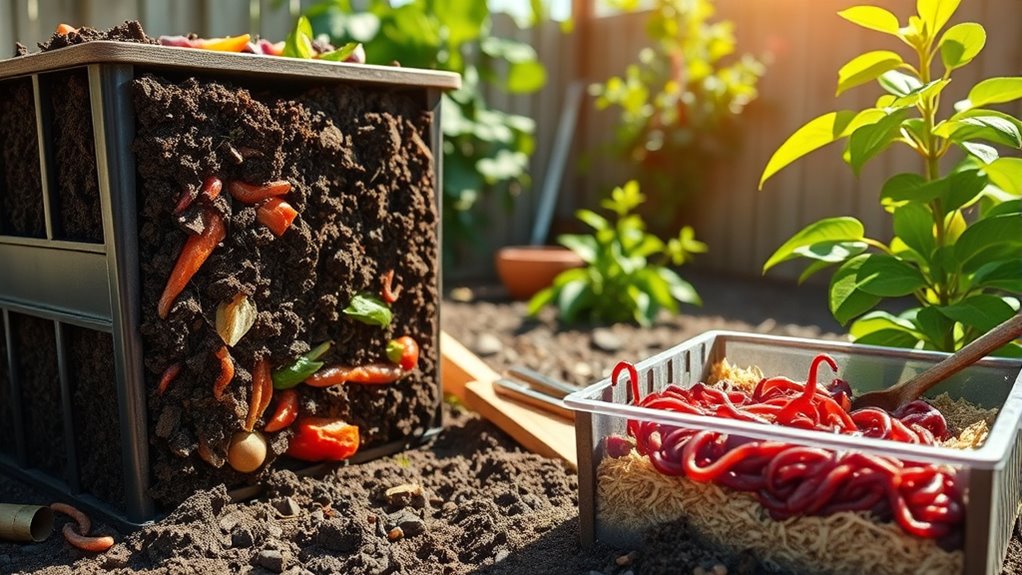
Have you ever wondered how to turn kitchen scraps and yard waste into something useful? If so, setting up a worm bin is an excellent way to start. A worm bin is a simple, efficient method of composting that uses worms—specifically red wigglers—to break down organic material. When you add kitchen scraps like vegetable peels, coffee grounds, and eggshells to your worm bin, the worms consume this waste and produce nutrient-rich compost. This process not only reduces landfill waste but also creates a valuable soil amendment. As the worms work, they produce a liquid known as compost tea, which is a powerful, natural fertilizer. You can collect this tea from the bottom of your bin and dilute it with water before applying it to your plants or garden beds. Compost tea is packed with beneficial microbes, making it an excellent boost for healthy plant growth.
Getting started with a worm bin requires some basic setup. Find a sturdy, ventilated container—such as a plastic storage bin or a dedicated worm composting bin—and drill small holes for airflow. Place bedding material like shredded newspaper, coconut coir, or cardboard inside to create a comfortable environment for the worms. Keep the bedding moist but not soaked, and add a handful of worms to begin the process. Be sure to feed your worms small amounts of kitchen scraps regularly, avoiding meat, dairy, and oily foods, which can attract pests or cause odors. Cover the scraps with bedding to keep things tidy and maintain an odor-free bin.
Set up a worm bin with a ventilated container, bedding, and regular kitchen scraps.
Maintaining your worm bin involves a few simple tasks. Keep an eye on moisture levels, ensuring the bedding stays damp but not soggy. Turn the contents occasionally to aerate the compost and encourage decomposition. Over time, you’ll notice the material turning into dark, crumbly compost—your worm castings. Once you see this, you can harvest the finished compost and continue feeding your worms. As your bin matures, you’ll notice the production of compost tea increasing. To extract this liquid, set a container under the drainage spout or the bottom of the bin, then dilute the collected tea with water—usually one part tea to ten parts water—before using it to nourish your plants.
Starting a worm bin is a straightforward way to practice vermiculture and produce natural fertilizer. It not only helps reduce waste but also provides you with nutrient-rich compost and compost tea that can *considerably* improve your garden’s health. With regular attention, your worm bin will become an ongoing source of organic matter, helping you grow vibrant, healthy plants while making a positive impact on the environment.
Frequently Asked Questions
How Long Does It Take for Worms to Produce Compost?
Worm reproduction speeds up compost production, but it usually takes about three to six months for worms to produce mature compost. The compost maturation time depends on factors like temperature, moisture, and feedstock. As worms consume organic waste, they continually reproduce, creating more compost. Keep their environment ideal, and you’ll see finished, nutrient-rich compost in a few months, making your vermiculture efforts worthwhile.
Can I Compost Meat or Dairy in Vermiculture?
You can compost meat and dairy waste in vermiculture, but it’s not recommended for beginners. These materials can attract pests and create odors, making your worm bin less healthy. If you choose to try meat composting, do so sparingly and bury the scraps deeply to prevent issues. For a smoother process, focus on veggie scraps and avoid dairy and meat until you’re more experienced with vermiculture.
What Are the Signs of a Worm Bin That’S Not Healthy?
If your worm bin isn’t healthy, you’ll notice signs like strong worm bin odors, which indicate excess moisture or improper balance. You might also see a worm population decline, meaning fewer worms or dead ones. These issues often result from overfeeding, incorrect bedding, or too much waste. Keep a close eye on these signs to address problems early, helping your worms thrive and your compost stay active.
How Do I Harvest Worm Compost Without Harming the Worms?
Oh, the joy of harvesting worm compost without harming your tiny, wriggly friends—truly a noble quest! You gently push aside the top layer, revealing the rich, dark treasure beneath. Use a scoop or your hands carefully, embracing worm preservation and delicate harvesting techniques. Patience is key; coax those worms out, don’t yank. Soon, you’ll have nutrient-rich compost, happily harvested without disturbing your vermiculture companions.
What Should I Do if My Worm Bin Smells Bad?
If your worm bin smells bad, you should focus on odor control and bedding maintenance. First, add more bedding like shredded newspaper or coconut coir to absorb excess moisture and odors. Turn the bedding gently to aerate it, which helps reduce unpleasant smells. Avoid overfeeding worms, as rotting food causes odors. Maintaining proper moisture levels and ensuring good airflow will keep your bin smelling fresh and healthy for your worms.
Conclusion
Now that you know the basics of vermiculture, you’re well on your way to turning kitchen scraps into rich compost. Remember, patience is key—think of it as planting a seed and watching it grow. With consistent effort, you’ll see your worms thrive and your compost bin flourish. Keep at it, and you’ll soon be reaping the rewards of your hard work. After all, Rome wasn’t built in a day, and a thriving compost system takes time too.