
To create a DIY home planetarium, gather a bright light source like an LED flashlight, darken your room, and design star patterns by poking tiny holes in cardstock or cardboard. Position your pattern in front of the light and project onto your ceiling or wall. Adjust the distance and angles to refine the star shapes and add motion for realism. Want to turn your space into a convincing starry sky? Keep exploring the details!
Key Takeaways
- Create star patterns on cardstock using pins or needles to project constellations onto your ceiling or wall.
- Use a bright light source, such as an LED flashlight or small projector, positioned behind the star template.
- Adjust the distance and angle of the light to control the size and sharpness of the projected stars.
- Incorporate moving parts like spinning disks to simulate star motion and add realism to your planetarium.
- Enhance the experience with colored filters or gels to mimic star colors and celestial bodies for a more immersive display.
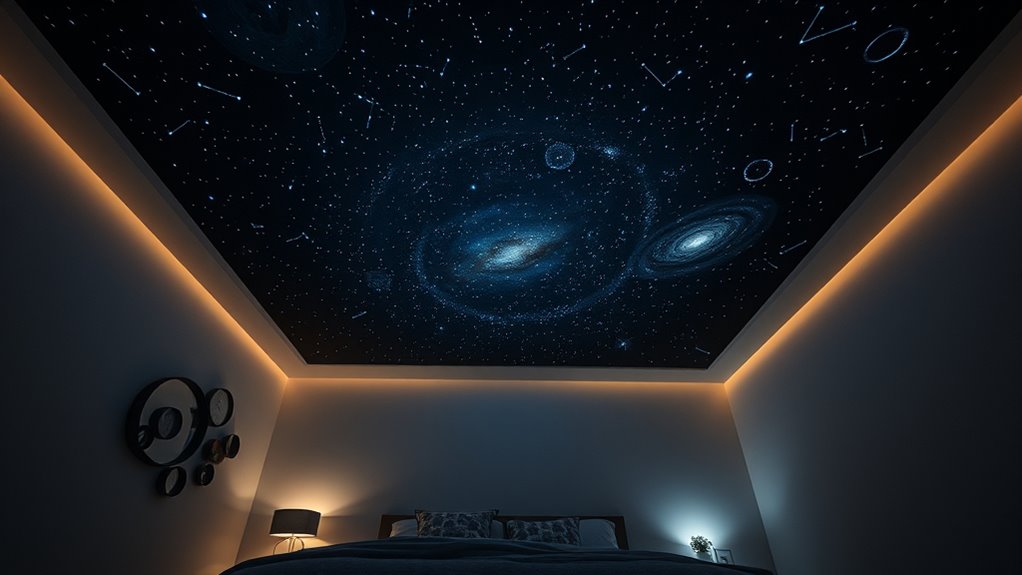
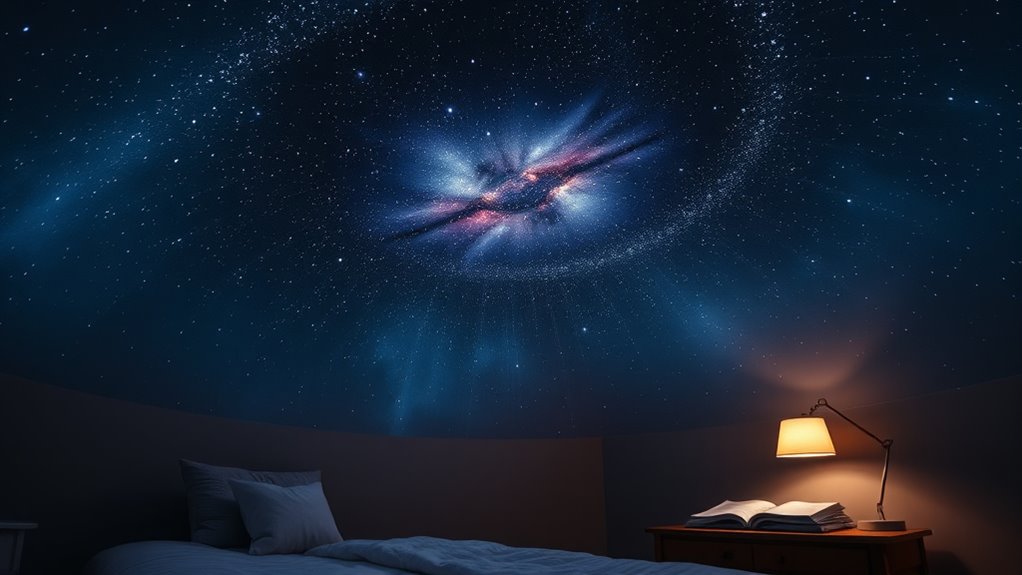
Have you ever wondered how to bring the night sky into your own living room? Creating a DIY home planetarium is a fantastic way to do just that. With a few simple materials and some basic steps, you can transform any room into a miniature universe, complete with star constellations and celestial projection. The key is understanding how to mimic the natural beauty of the night sky and project it onto your ceiling and walls, making it look as if you’re gazing up at a real star-filled sky.
Start by choosing a compact, bright light source—such as an LED flashlight or a small projector—that can be easily manipulated. You’ll also need a dark room to get the best effect, so consider closing curtains or turning off other lights. To create the star constellation patterns, you can use a pin or needle to poke tiny holes into a sturdy piece of cardstock or cardboard, designing your favorite constellations or random star patterns. When you shine your light through these holes, the light will pass through, casting pinpoint stars onto your ceiling, replicating the celestial projection. Adjust the distance between the light source and the holes to control the size and sharpness of the stars, giving your projection a more authentic appearance.
To add more realism, consider incorporating a rotating disk or spinning device behind your star patterns. This will simulate the movement of stars across the sky, giving your celestial projection a dynamic feel. You can also enhance the experience by using colored filters or gels over your light source, mimicking different star colors or even distant planets. If you want to go a step further, there are affordable DIY planetarium kits available that include star maps and projection disks, making it easier to create accurate star constellations and celestial scenes. Understanding divorce process in various states can help you appreciate how complex systems are structured and simplified for public understanding.
Position your projector or light behind your star pattern template, aiming it at a blank wall or ceiling. Play around with the distance and angles until you get a clear, crisp projection of your star constellations. Dim the room lights, and suddenly, you’ll have a mesmerizing night sky right in your own home. Not only is this a fun project, but it also serves as a relaxing way to wind down, especially for kids who love astronomy. With a little ingenuity and patience, your DIY home planetarium can become a mesmerizing centerpiece—bringing the wonders of the universe into your everyday life.

Abaodam Small Wood Star Light DIY Kit Self-Assembly Wooden Star Projector Night Light Bedroom Ceiling Decoration Science Experiment Young Learners
Encourages scientific exploration: promotes curiosity and interest in scientific subjects,night light star projector,star projector for ceiling
As an affiliate, we earn on qualifying purchases.
As an affiliate, we earn on qualifying purchases.
Frequently Asked Questions
Can I Customize the Star Patterns for Different Locations?
Yes, you can customize star patterns for different locations. Star pattern customization allows you to create a location-based projection that accurately reflects the night sky from your specific area. By adjusting the settings or using dedicated software, you can modify the star arrangements to match your geographic coordinates. This guarantees your home planetarium provides an authentic experience, making the projection more realistic and personalized for your viewing location.
What Safety Precautions Should I Take During Assembly?
During assembly, you should prioritize electrical safety by guaranteeing all wiring is correctly insulated and disconnected from power when handling. Handle materials carefully to avoid cuts or damage, especially with sharp tools or delicate components. Keep your workspace organized and dry, and wear safety glasses if needed. Double-check connections before powering up your device, and follow all manufacturer instructions to prevent accidents and ensure a safe, successful build.
How Durable Are the Materials Used for the Projector?
Did you know that high-quality projection materials can last up to 10 years? Your projector’s durability depends on the material’s longevity and wear resistance. Typically, acrylic and certain plastics are quite sturdy, resisting scratches and fading over time. While they may show minor signs of wear, these materials are designed to withstand frequent use, ensuring your night sky projection remains vibrant and functional for years to come.
Is It Possible to Add Sound Effects to the Planetarium?
You can definitely add sound effects to your planetarium. By using sound synchronization, you guarantee the ambient noise aligns with the star projections, creating an immersive experience. You might connect a speaker to your device or integrate a sound module for background music or space sounds. This way, you enhance the overall ambiance, making your sky projection more engaging and realistic, perfect for educational or relaxing nights under the stars.
Can This Project Be Adapted for Outdoor Use?
You can adapt this project for outdoor use, but you need to take into account weather conditions and outdoor lighting. Protect your equipment from rain, wind, and extreme temperatures by using weatherproof materials or a sturdy cover. Also, make certain outdoor lighting doesn’t interfere with your projections; choose a dark, sheltered spot. With proper planning, you can enjoy stargazing and your DIY planetarium even outside, enhancing your celestial experience.
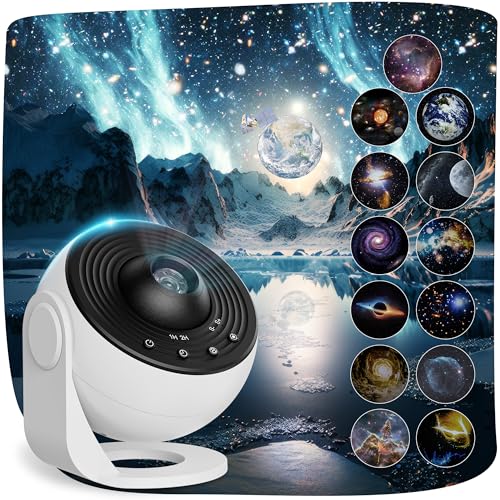
Planetarium Projector Pro for Bedroom, 13 in 1 Star Projector Galaxy Light, Ceiling Night Light Milky Way Mood Lighting with Timer, LED Space Galaxy Lamp Bedroom Room Decor for Adults Kids – White
【Planetarium Projector Pro 2025】- Doubling previous brightness with 30% wider projection, this galaxy projector for bedroom now immerses…
As an affiliate, we earn on qualifying purchases.
As an affiliate, we earn on qualifying purchases.
Conclusion
With your DIY home planetarium, you’ll turn your room into the most mesmerizing starlit galaxy imaginable—so immersive, you’ll feel like you’re floating among the stars every night. No longer just gazing at the sky through a tiny window, you’ll command your own universe, guiding planets and constellations with a flick of your hand. Get ready to impress everyone with your cosmic masterpiece, transforming your space into the most breathtaking, universe-sized adventure they’ve ever seen—without ever leaving home!
Planetarium Projector Pro for Bedroom, 13 in 1 Star Projector Galaxy Light, Ceiling Night Light Milky Way Mood Lighting with Timer, LED Space Galaxy Lamp Bedroom Room Decor for Adults Kids – White
【Planetarium Projector Pro 2025】- Doubling previous brightness with 30% wider projection, this galaxy projector for bedroom now immerses…
As an affiliate, we earn on qualifying purchases.
As an affiliate, we earn on qualifying purchases.